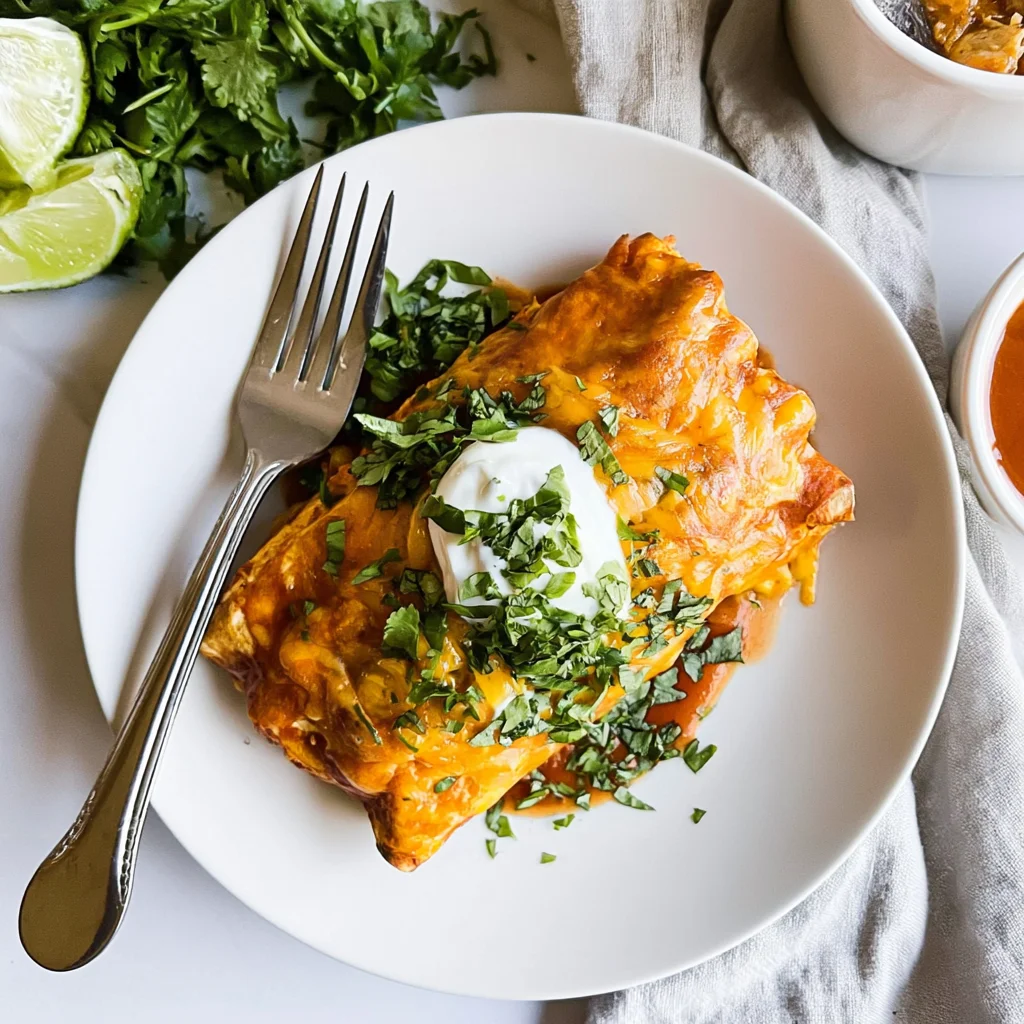
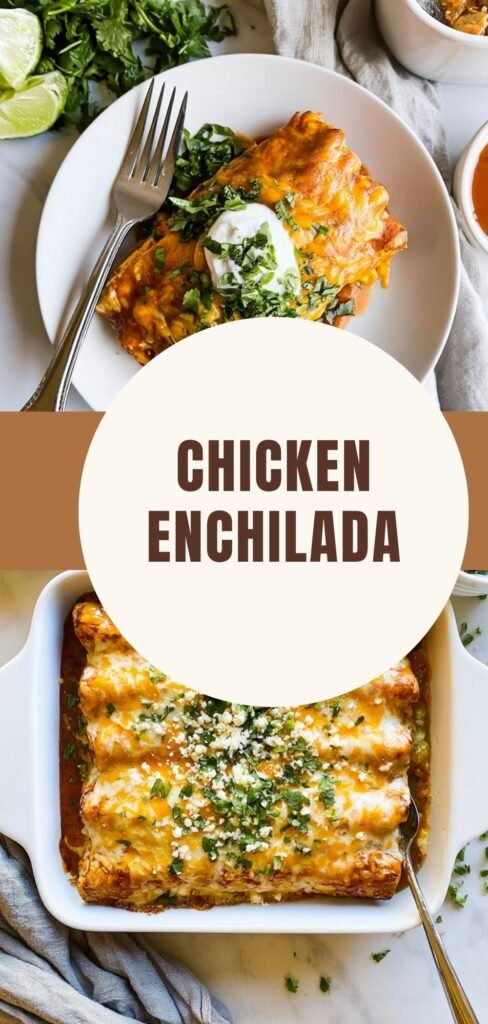
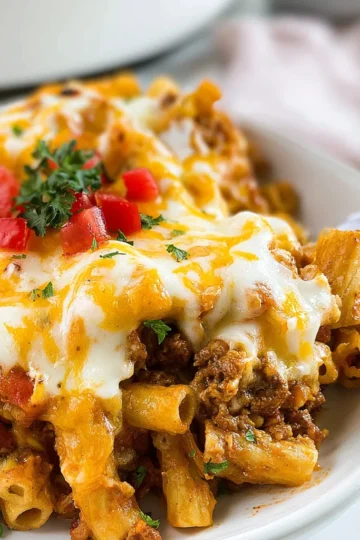
Imagine stepping into a cozy kitchen filled with the mouthwatering aroma of Chicken Enchiladas baking in the oven, where the rich scent of cumin and chili powder dances through the air. As you pull open the oven door, the sight of golden, bubbly cheese atop neatly rolled tortillas invites you to dive right in, promising layers of tender chicken, hearty black beans, and sweet corn wrapped in a warm embrace of flavor.
There’s something incredibly satisfying about preparing this dish; it’s not just a meal but a celebration of comfort and togetherness. With simple ingredients and straightforward steps, you'll soon be serving up enchiladas that are not only delicious but also create a moment to share with family or friends. Get ready to savor a recipe that's as rewarding to make as it is to enjoy!
Why You'll Love This Recipe
- You’ll adore this Chicken Enchilada recipe for its delicious and comforting flavors that everyone will savor.
- The vibrant colors and melted cheese create a visually appealing dish that’s perfect for any occasion.
- Plus, it’s an easy-to-follow recipe that brings together wholesome ingredients, making it a versatile choice for busy weeknights.
- Whether served as a family dinner or at a gathering, these enchiladas are sure to impress!
Now, let's dive into the detailed preparation process for making these delectable Chicken Enchiladas.
As I pulled the Chicken Enchiladas from the oven, the cheesy aroma filled the kitchen. My kids rushed in, their eyes lighting up as they exclaimed, “These look amazing!” It was a simple moment that made all the effort worthwhile.
Essential Ingredients
To create delicious Chicken Enchiladas, having the right ingredients on hand is crucial for achieving authentic flavors.
Cooked chicken (shredded): Use rotisserie chicken for a quick option or boil and shred your own for a fresh taste.
Cheddar cheese (shredded): Opt for sharp cheddar for a richer flavor, and make sure to reserve some for topping.
Black beans (canned, rinsed and drained): Canned black beans are convenient; just rinse well to remove excess sodium before using.
Corn (canned or frozen): Sweet corn adds a nice crunch; thaw frozen corn before adding to the filling if using that option.
Cumin: This spice adds warmth; freshly ground cumin can enhance the flavor profile even more.
Chili powder: A blend of spices that brings depth; adjust the amount based on your heat preference.
Salt: Essential for seasoning; remember to balance it with other flavors in the dish.
Olive oil (for cooking): Use extra virgin olive oil for sautéing to infuse a lovely flavor into your sauce.
Onion (finely chopped): A small onion adds sweetness and depth; sauté until translucent for the best results.
Garlic (minced): Freshly minced garlic elevates the sauce's aroma; avoid pre-minced options if possible for a fresher taste.
Tomato paste: This thickens the sauce while adding richness; a little goes a long way in enhancing flavor.
Chicken broth: Use low-sodium broth to control salt levels in your enchilada sauce without compromising taste.
Sugar: A teaspoon balances acidity in the sauce, ensuring a harmonious flavor profile throughout the dish.
Water: Adjusts the sauce consistency; add gradually until you reach your desired thickness.
Corn tortillas (warmed): Warming tortillas makes them pliable and easier to roll without breaking during assembly.
Cilantro (chopped, for garnish): Fresh cilantro adds brightness and color when sprinkled on top before serving; use it liberally!
The full ingredients list, including measurements, is provided in the recipe card directly below.
Let's Make It Together
Step 1: Prepare the Enchilada Sauce:In a large skillet, heat 2 tablespoons of olive oil over medium heat. As the oil warms up, you’ll notice a lovely aroma filling your kitchen. Add the finely chopped onion and sauté for about 3-4 minutes until it turns translucent and softens. Then, add the minced garlic, and cook for an additional minute until fragrant—your senses will be awakened by the savory scent! Stir in the tomato paste, chicken broth, cumin, chili powder, salt, sugar, and water. Allow this mixture to come to a gentle simmer and cook for about 10 minutes, stirring occasionally until it thickens slightly. This sauce forms the flavorful base of your Chicken Enchilada!
Step 2: Prepare the Chicken Filling:While your sauce is simmering, grab a mixing bowl and combine 2 cups of shredded cooked chicken with 1 cup of rinsed and drained black beans, 1 cup of corn (canned or frozen), 1 teaspoon each of cumin and chili powder, and 1 teaspoon of salt. Fold in 1 cup of cheddar cheese for that creamy texture. Mix everything well until fully combined; you should see a colorful medley of ingredients that promises deliciousness in every bite.
Step 3: Assemble the Enchiladas:Preheat your oven to 375°F (190°C). Spread a thin layer of the enchilada sauce on the bottom of a baking dish—this prevents sticking and adds flavor. Take a warmed tortilla and place about ¼ cup of your chicken filling in the center. Roll it up tightly like a little package! Place each rolled tortilla seam-side down in the dish. Repeat this process with all tortillas and filling; they should fit snugly together in the dish.
Step 4: Add Sauce & Cheese:Once all your enchiladas are neatly arranged, pour any remaining enchilada sauce over them generously—make sure every tortilla is covered to keep them moist during baking. Then sprinkle the remaining 1 cup of cheddar cheese on top; it'll melt into gooey perfection as it bakes!
Step 5: Bake the Enchiladas:Cover your baking dish with aluminum foil to prevent over-browning. Bake in your preheated oven for 20 minutes. The smell wafting through your home will be irresistible! After that time, remove the foil and bake for an additional 10 minutes or until you see the cheese bubbling and turning golden brown—a beautiful sight that signals deliciousness is near.
Step 6: Serve It Up!:Once out of the oven, let your Chicken Enchiladas cool for a few minutes. This helps set everything beautifully together but don't wait too long! Garnish with fresh chopped cilantro on top before serving to add a burst of color and freshness.
Now that you have mastered this recipe step-by-step, let's dive into how we can elevate our Chicken Enchilada experience even further!
You Must Know
- For a flavor boost, try using rotisserie chicken for the filling; it saves time and adds depth to your Chicken Enchilada.
- I learned this trick when I needed a quick dinner solution.
- When warming tortillas, consider wrapping them in a damp paper towel and microwaving for about 30 seconds to keep them pliable.
- This tip helped prevent tearing during assembly.
- Don’t skip the fresh cilantro garnish; it adds a vibrant touch and enhances the overall flavor profile of your Chicken Enchilada.
- I've found that fresh herbs can elevate any dish.
With these tips in mind, you're well on your way to creating delicious Chicken Enchiladas that will impress family and friends alike!
Add Your Touch
Feel free to customize your Chicken Enchilada by swapping in different proteins, such as ground turkey or sautéed vegetables for a vegetarian option. For an extra kick, add diced jalapeños or a sprinkle of smoked paprika to the chicken filling. Experiment with various cheeses like Monterey Jack or pepper jack for a unique twist. If you prefer a creamier sauce, consider stirring in sour cream before assembling. The beauty of enchiladas lies in their versatility, so let your creativity shine and make this dish your own!
Now that you've customized your enchiladas, let's explore some delicious serving suggestions.
Storing & Serving
To maintain the flavor and freshness of your Chicken Enchiladas, store leftovers in an airtight container in the refrigerator for up to 3 days. When serving, garnish with fresh cilantro to enhance the presentation and flavor. Pairing with a side of sour cream or guacamole can also elevate your dish, making it a delightful meal for any occasion.
Now that your Chicken Enchiladas are ready to be enjoyed, let’s explore some delicious side dish options!
Chef's Helpful Tips
- 1. To avoid tearing your tortillas while assembling, warm them in the microwave or on a skillet for a few seconds. This makes them pliable and easier to roll without breaking.
- For an extra layer of flavor, consider marinating your shredded chicken in the spices used in the filling before combining with other ingredients. This enhances the overall taste profile of your Chicken Enchilada.
- If you prefer a spicier kick, add diced jalapeños or a sprinkle of cayenne pepper to the chicken filling or enchilada sauce. Adjust according to your heat tolerance for the perfect balance!
Now that you're equipped with these tips, let’s dive into the step-by-step preparation of your delicious Chicken Enchilada!
As I served my Chicken Enchiladas to friends, their delighted smiles and appreciative nods reminded me that sharing good food creates lasting memories, filling the heart with warmth and joy.
How to Know It’s Done Perfectly
Your Chicken Enchiladas are perfectly done when the cheese is bubbly and golden, and the tortillas are slightly crisp around the edges. The aroma of spices should fill your kitchen, promising a delightful flavor. Remember, slight variations in texture and color are normal, so trust your instincts!
Now that you know how to achieve that perfect finish, let’s explore some serving suggestions for your delicious Chicken Enchiladas.
FAQ
What is the best way to prepare Chicken Enchilada for meal prep?
Preparing Chicken Enchilada for meal prep is simple: assemble the enchiladas as directed, but instead of baking them immediately, cover them tightly with aluminum foil and refrigerate. When you're ready to eat, just bake them straight from the fridge, adding an extra 5-10 minutes to the baking time to ensure they're heated through.
Can I customize the Chicken Enchilada filling?
Absolutely! While the official recipe features shredded chicken, black beans, corn, and spices, feel free to add your favorite ingredients like sautéed peppers or onions for additional flavor and texture.
How can I make Chicken Enchilada spicier?
To add some heat to your Chicken Enchilada, consider increasing the amount of chili powder in the filling and sauce or adding diced jalapeños into the chicken mixture before assembling. You can also serve with hot sauce for an extra kick!
What should I serve with Chicken Enchilada?
Chicken Enchiladas pair wonderfully with sides such as Mexican rice, refried beans, or a fresh green salad. These additions complement the flavors and make for a satisfying meal.
How do I store leftover Chicken Enchilada?
Leftover Chicken Enchilada should be stored in an airtight container in the refrigerator for up to 3 days. To reheat, simply pop it in a preheated oven at 350°F (175°C) until warmed through.
With these tips and tricks in mind, you’re all set to create delicious Chicken Enchiladas that will impress your family and friends!
Chicken Enchiladas
Ingredients
Method
- In a large skillet, heat 2 tablespoons of olive oil over medium heat. Add the chopped onion and sauté for about 3-4 minutes until translucent.
- Add the minced garlic and cook for an additional 1 minute until fragrant.
- Stir in the tomato paste, chicken broth, cumin, chili powder, salt, sugar, and water. Bring the mixture to a simmer and let it cook for about 10 minutes, stirring occasionally, until slightly thickened.
- In a mixing bowl, combine the shredded chicken, black beans, corn, cumin, chili powder, salt, and 1 cup of cheddar cheese. Mix well to combine.
- Preheat your oven to 375°F (190°C). Spread a thin layer of the enchilada sauce on the bottom of a baking dish.
- Take a warmed tortilla, place about ¼ cup of the chicken filling in the center, and roll it up tightly. Place it seam-side down in the baking dish.
- Repeat with the remaining tortillas and filling, arranging them snugly in the dish.
- Once all the enchiladas are in the dish, pour the remaining enchilada sauce over the top, ensuring all tortillas are covered.
- Sprinkle the remaining 1 cup of cheddar cheese on top.
- Cover the baking dish with aluminum foil and bake in the preheated oven for 20 minutes.
- Remove the foil and bake for an additional 10 minutes, or until the cheese is bubbly and golden.
- Remove from the oven and let cool for a few minutes. Garnish with fresh cilantro before serving.

Leave a Reply