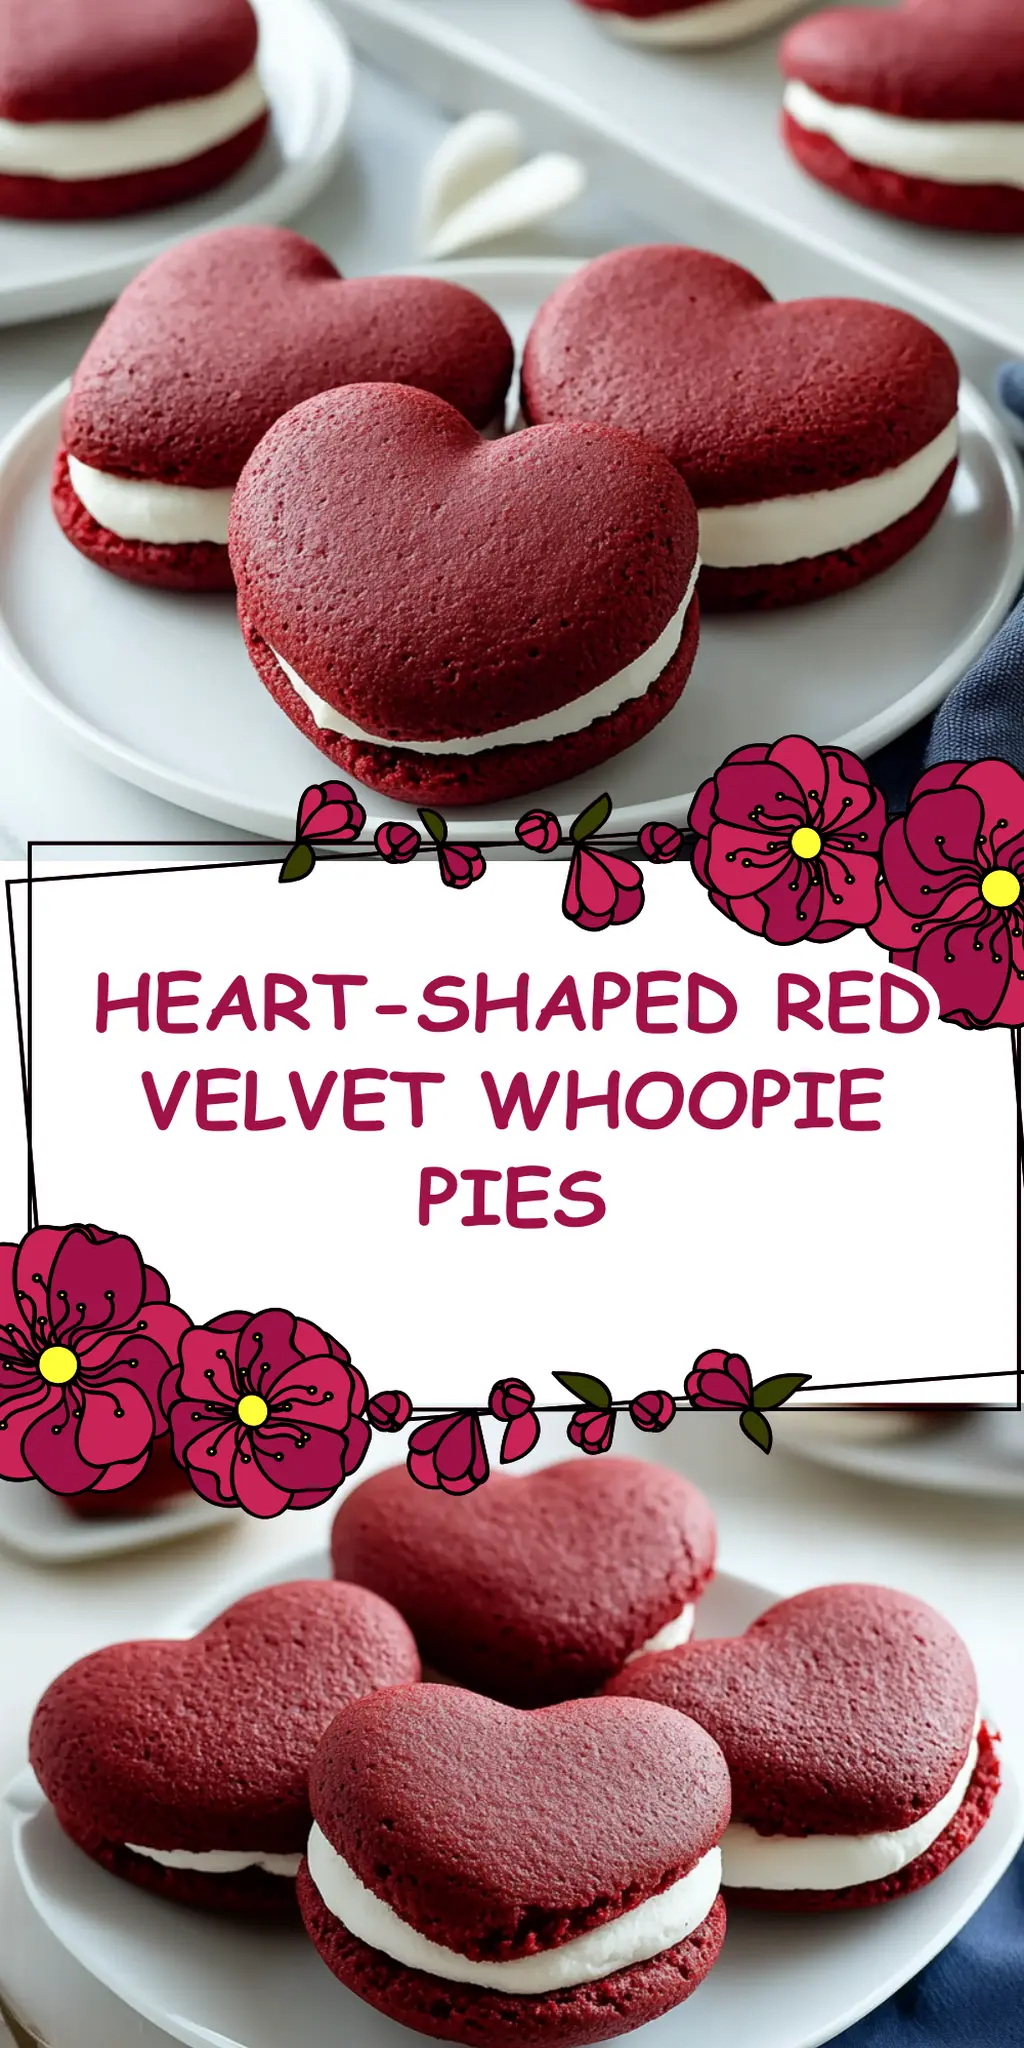
When I first decided to bring a little sweetness into a friend’s life, I never imagined it would lead me to create these Heart-Shaped Red Velvet Whoopie Pies. As the vibrant red batter came together, the kitchen was filled with the rich, warm aroma of cocoa and vanilla, transporting me to moments of childhood joy. Picture this: a cozy afternoon, soft music in the background, and the enticing sounds of baking filling the air—it’s a recipe for happiness!
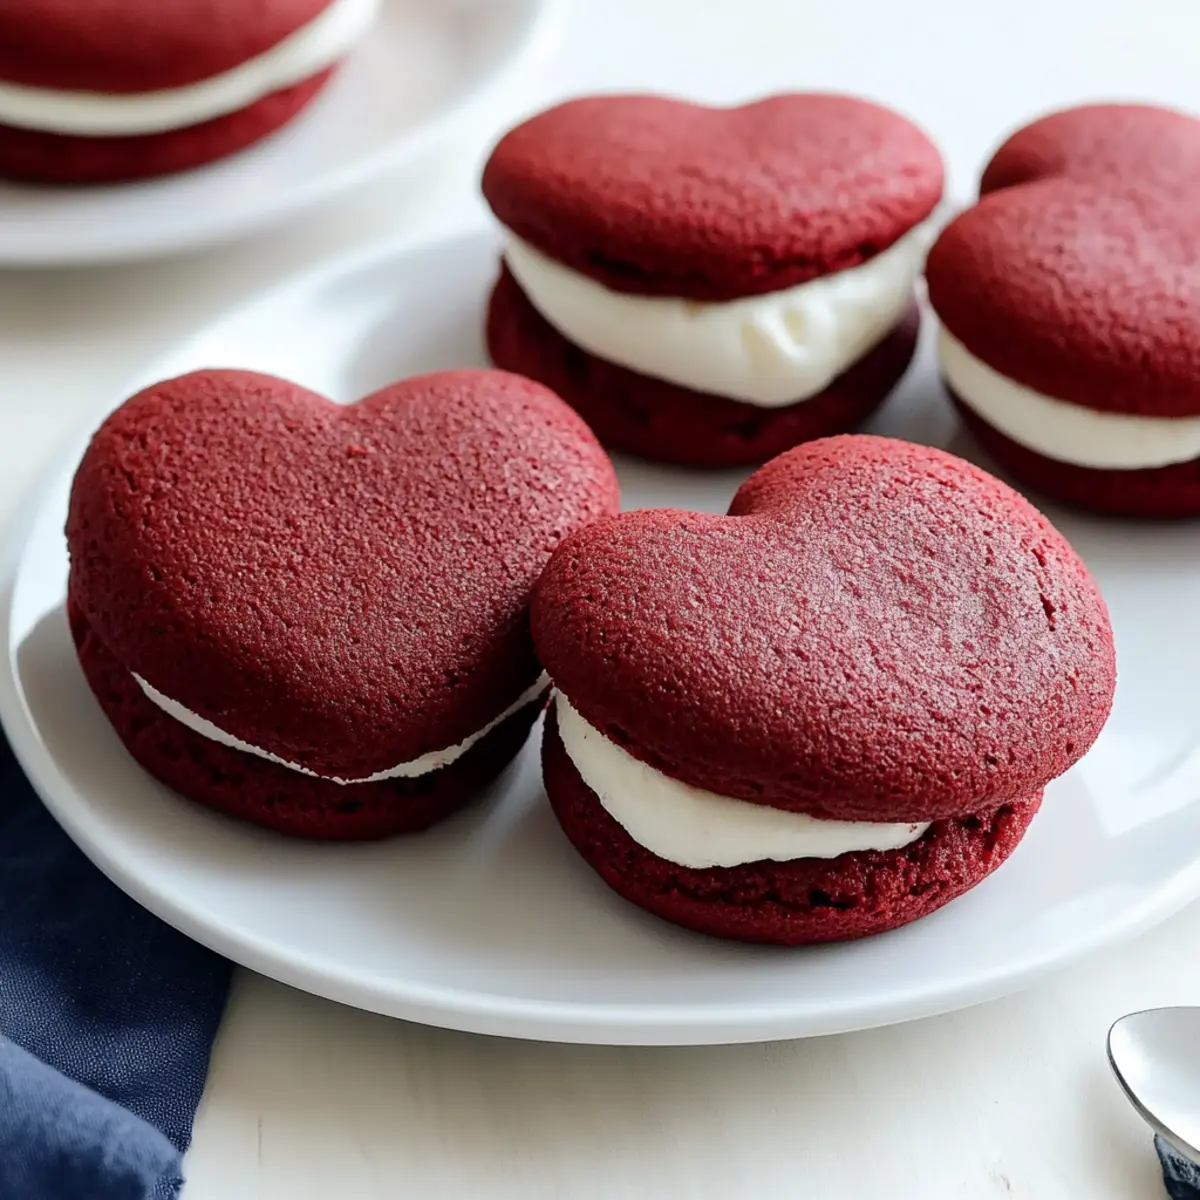
These whoopie pies are more than just a treat; they’re a heartfelt dessert that brings smiles to every table. Perfect for a cozy date night or a family gathering, their striking color makes them the star of any occasion. Plus, they’re surprisingly simple to make! With a fluffy cream cheese filling nestled between two soft, red velvet cookies, these pies offer a delightful blend of flavor and nostalgia.
So roll up your sleeves and let’s dive into a recipe that promises to fill your kitchen with love and your hearts with sweetness!
Why You'll Love This Heart-Shaped Red Velvet Whoopie Pies
- These Heart-Shaped Red Velvet Whoopie Pies are incredibly easy to make, allowing bakers of all skill levels to create a stunning dessert.
- The combination of rich cocoa and creamy frosting delivers an irresistible flavor that will have everyone coming back for seconds.
- Their beautiful heart shape and vibrant color not only make them visually appealing but also perfect for any celebration or romantic occasion.
- Plus, they are a true crowd-pleaser, ensuring that your guests will be delighted and impressed with this delightful treat.
Heart-Shaped Red Velvet Whoopie Pies Ingredients
• Here’s everything you need to create these delightful treats!
For the Cookie Batter
• Buttermilk – Adds moisture and a slight tanginess to the whoopie pies.
• Unsalted Butter – Softened for easy mixing and a rich flavor.
• Brown Sugar – Provides deep sweetness and moisture to the batter.
• White Sugar – Balances the richness, ensuring a delightful sweetness.
• Egg – Acts as a binder, giving your cookies structure.
• Vanilla Extract – Enhances the flavor with a warm, comforting aroma.
• Baking Soda – A leavening agent that helps the cookies rise.
• Baking Powder – Works alongside baking soda to create fluffy texture.
• Salt – Enhances overall flavor by balancing the sweetness.
• Cocoa Powder – Provides the classic chocolate flavor that pairs beautifully with red velvet.
• All-Purpose Flour – The base for our cookie batter, providing structure.
• Red Food Coloring – Gel preferred for vibrant color without excess liquid.
For the Cream Cheese Frosting
• Cream Cheese – Softened for a smooth and creamy filling with a slight tang.
• Unsalted Butter – Ensures the frosting is rich and creamy.
• Powdered Sugar – Sweetens the frosting while also giving it a fluffy texture.
• Vanilla Extract – Just a hint to tie together the rich flavors of the frosting.
Dive into this Heart-Shaped Red Velvet Whoopie Pies recipe and bring a little love into your kitchen!
How to Make Heart-Shaped Red Velvet Whoopie Pies
-
Create a stencil: Start by crafting a heart-shaped stencil on parchment paper, flipping it over so the pencil marks are facing down. This will guide your batter shapes perfectly!
-
Mix dry ingredients: In a large bowl, combine the flour, baking powder, baking soda, salt, and cocoa powder. Whisk until blended, ensuring no clumps remain for a smooth batter.
-
Cream the butter and sugars: In another bowl, beat the softened unsalted butter with both sugars until the mixture is light and fluffy—this should take about 3 minutes.
-
Add egg and vanilla: Incorporate the egg and vanilla extract into the butter and sugar mixture. Mix until you achieve a silky, homogeneous texture that smells heavenly.
-
Combine wet and dry ingredients: Gradually fold in the dry ingredients along with the buttermilk, alternating between the two. Gently mix until the batter is smooth and vibrant red—be careful not to overmix!
-
Color the batter: Add red food coloring, a little at a time, until you reach your desired deep red hue. This should mirror the classic red velvet look!
-
Pipe the cookies: Using a piping bag, carefully pipe the batter onto your parchment paper, following the heart outlines you created. This will give each whoopie pie a lovely shape.
-
Bake: Preheat your oven to 350°F (180°C) and bake the cookies for 10 minutes. They should rise and look just set—lovely and puffy!
-
Cool completely: Once out of the oven, allow the cookies to cool on a wire rack. Make sure they’re completely cool before frosting—this ensures a perfect sandwich!
-
Make the frosting: For the cream cheese frosting, beat the softened cream cheese and butter until smooth. Gradually add the powdered sugar and vanilla extract, whipping until it’s fluffy and creamy.
-
Assemble the whoopie pies: Pipe the frosting onto the flat side of one cookie, then place another on top, pressing gently to create a sweet sandwich.
Optional: Dust with additional cocoa powder for a chic finishing touch.
Exact quantities are listed in the recipe card below.
What to Serve with Heart-Shaped Red Velvet Whoopie Pies?
Imagine indulging in a delightful treat paired perfectly with complimentary flavors that elevate your dessert experience.
-
Fresh Berries: The tartness of strawberries or raspberries cuts through the sweetness, providing a refreshing contrast to the rich whoopie pies.
-
Vanilla Ice Cream: A scoop of creamy vanilla ice cream adds a luscious, cool element that perfectly complements the soft, chocolatey texture of the cookies.
-
Coffee: A cup of freshly brewed coffee brings out the bold flavors of cocoa while adding a wonderful depth—a sweet match made in heaven!
-
Chocolate Ganache: A drizzle of silky chocolate ganache on top of the whoopie pies enhances the chocolate flavor, creating a decadent affair.
-
Creamy Hot Chocolate: Cozy up with a cup of rich, creamy hot chocolate. The warmth and sweetness create an inviting atmosphere perfect for enjoying these heart-shaped delights.
-
Red Wine: A glass of smooth red wine pairs nicely, bringing out the vanilla and chocolate flavors while adding a sophisticated touch to your dessert experience.
Enjoy these pairings for a complete, heartwarming dessert spread that beckons everyone to gather and savor sweetness together!
Make Ahead Options
These Heart-Shaped Red Velvet Whoopie Pies are perfect for meal prepping, making your baking experience smoother and stress-free! You can prepare the cookie batter and refrigerate it up to 24 hours in advance; just be sure to cover it tightly to maintain its moisture. Additionally, you can make the cream cheese frosting and store it in an airtight container in the fridge for up to 3 days. When you're ready to bake, simply pipe the batter onto parchment and bake as instructed. For the assembly, allow the cookies to cool completely before frosting to ensure a perfect sandwich without any melting. With these make-ahead tips, you'll enjoy fresh whoopie pies with minimal fuss, ideal for those busy weeknights or sweet surprises!
Heart-Shaped Red Velvet Whoopie Pies Variations
Feel free to add your personal touch to these delightful whoopie pies; the possibilities are endless!
-
Gluten-Free: Swap all-purpose flour with a gluten-free blend to make these treats suitable for gluten-sensitive friends and family.
-
Dairy-Free: Use almond milk and coconut oil instead of buttermilk and butter for a dairy-free option that’s still delightfully rich.
-
Nutty Addition: Fold in ½ cup of finely chopped walnuts or pecans into the batter for a delightful crunch and extra flavor.
-
Spicy Twist: Add a pinch of cayenne pepper to the frosting for a surprising kick that beautifully contrasts the sweetness.
-
Chocolate Cream Cheese Frosting: Mix in melted dark chocolate when preparing your frosting for an indulgent chocolatey layer!
-
Zesty Lemon: Brighten the flavor by incorporating some freshly grated lemon zest into the frosting; it adds a lively contrast to the sweetness.
-
Fruit-Filled: Add a few tablespoons of raspberry or cherry preserves to the frosting for a fruity surprise with each bite.
-
Mini Pies: Create smaller versions by piping tiny hearts instead; they're perfect for bite-sized treats at parties!
Each of these variations gives the beloved classic a new life, ensuring that every batch of Red Velvet Whoopie Pies truly reflects your personal flair and tastes. Enjoy crafting delightful memories in your kitchen!
How to Store and Freeze Heart-Shaped Red Velvet Whoopie Pies
Room Temperature: Store whoopie pies in an airtight container for up to 3 days; be sure to place parchment paper between layers to prevent sticking.
Fridge: If you want to extend freshness, keep them in the refrigerator for up to 1 week; just remember to let them come to room temperature before serving for the best flavor and texture.
Freezer: For longer storage, freeze whoopie pies for up to 3 months. Wrap each pie individually in plastic wrap, then place in a freezer-safe bag to prevent freezer burn.
Reheating: To enjoy them warm, thaw them overnight in the fridge, then gently heat in the microwave for a few seconds; enjoy the gooey goodness of the cream cheese filling again!
Chef's Helpful Tips
- When making Heart-Shaped Red Velvet Whoopie Pies, ensure that your butter is at room temperature for easier creaming with the sugars, which creates a light and fluffy texture.
- Avoid overmixing your batter after adding the dry ingredients, as this can lead to dense cookies instead of soft and spongy ones.
- Be cautious with the amount of red food coloring you add; start with a small amount and gradually increase until you achieve the desired color without making the batter too liquid.
- For even baking, use an oven thermometer to confirm that your oven is at the correct temperature of 350°F for perfect whoopie pies every time.
Heart-Shaped Red Velvet Whoopie Pies Recipe FAQs
What should I look for when selecting buttermilk?
Absolutely! When choosing buttermilk for Heart-Shaped Red Velvet Whoopie Pies, look for a container with a date well into the future. The buttermilk should be thick and have a slight tangy aroma. You can also make a quick substitute by mixing regular milk with a tablespoon of vinegar or lemon juice, letting it sit for about 5 minutes until it curdles.
How should I store my Heart-Shaped Red Velvet Whoopie Pies?
Very! To keep your treats fresh, store them in an airtight container at room temperature for up to 3 days. If you'd like to extend their shelf life, place another layer of parchment paper between each whoopie pie to prevent sticking! For even greater freshness, you can keep them in the refrigerator for up to a week, just remember to bring them to room temperature before enjoying them.
Can I freeze my Heart-Shaped Red Velvet Whoopie Pies?
Absolutely! For longer-term storage, you can freeze your whoopie pies for up to 3 months. To do this, wrap each pie individually in plastic wrap, then place them in a freezer-safe bag to prevent freezer burn. When you're ready to indulge, simply let them thaw in the fridge overnight. For a warm treat, pop them in the microwave for a few seconds after thawing—this brings back that delightful creaminess of the frosting!
What should I do if my whoopie pies turn out too flat?
Don’t worry—this happens! If your Heart-Shaped Red Velvet Whoopie Pies come out flatter than expected, it can be due to a few reasons like too much butter or sugar, or even a warm kitchen affecting the batter. Ensure your butter is softened, not melted, before beating. If they're still too flat, try chilling the batter for 15-20 minutes before piping it onto the parchment, which can help them hold their shape better.
Are Heart-Shaped Red Velvet Whoopie Pies suitable for people with allergies?
Absolutely! However, please note they contain common allergens like gluten, dairy, and eggs. If you're preparing these for someone with allergies, consider using gluten-free flour and egg substitutes such as applesauce or flaxseed meal mixed with water. Always double-check your ingredient labels to ensure safety.
Heart-Shaped Red Velvet Whoopie Pies
Ingredients
Equipment
Method
- Create a stencil: Craft a heart-shaped stencil on parchment paper.
- Mix dry ingredients: Combine flour, baking powder, baking soda, salt, and cocoa powder.
- Cream the butter and sugars: Beat softened unsalted butter with both sugars until light and fluffy.
- Add egg and vanilla: Incorporate egg and vanilla extraction into the mixture.
- Combine wet and dry ingredients: Gradually fold in dry ingredients along with buttermilk.
- Color the batter: Add red food coloring until desired hue is reached.
- Pipe the cookies: Use a piping bag to pipe the batter onto the parchment paper following heart outlines.
- Bake: Preheat oven to 350°F and bake cookies for 10 minutes.
- Cool completely: Allow cookies to cool on a wire rack.
- Make the frosting: Beat softened cream cheese and butter, then add powdered sugar and vanilla.
- Assemble the whoopie pies: Pipe frosting between two cookies to create a sandwich.


Leave a Reply