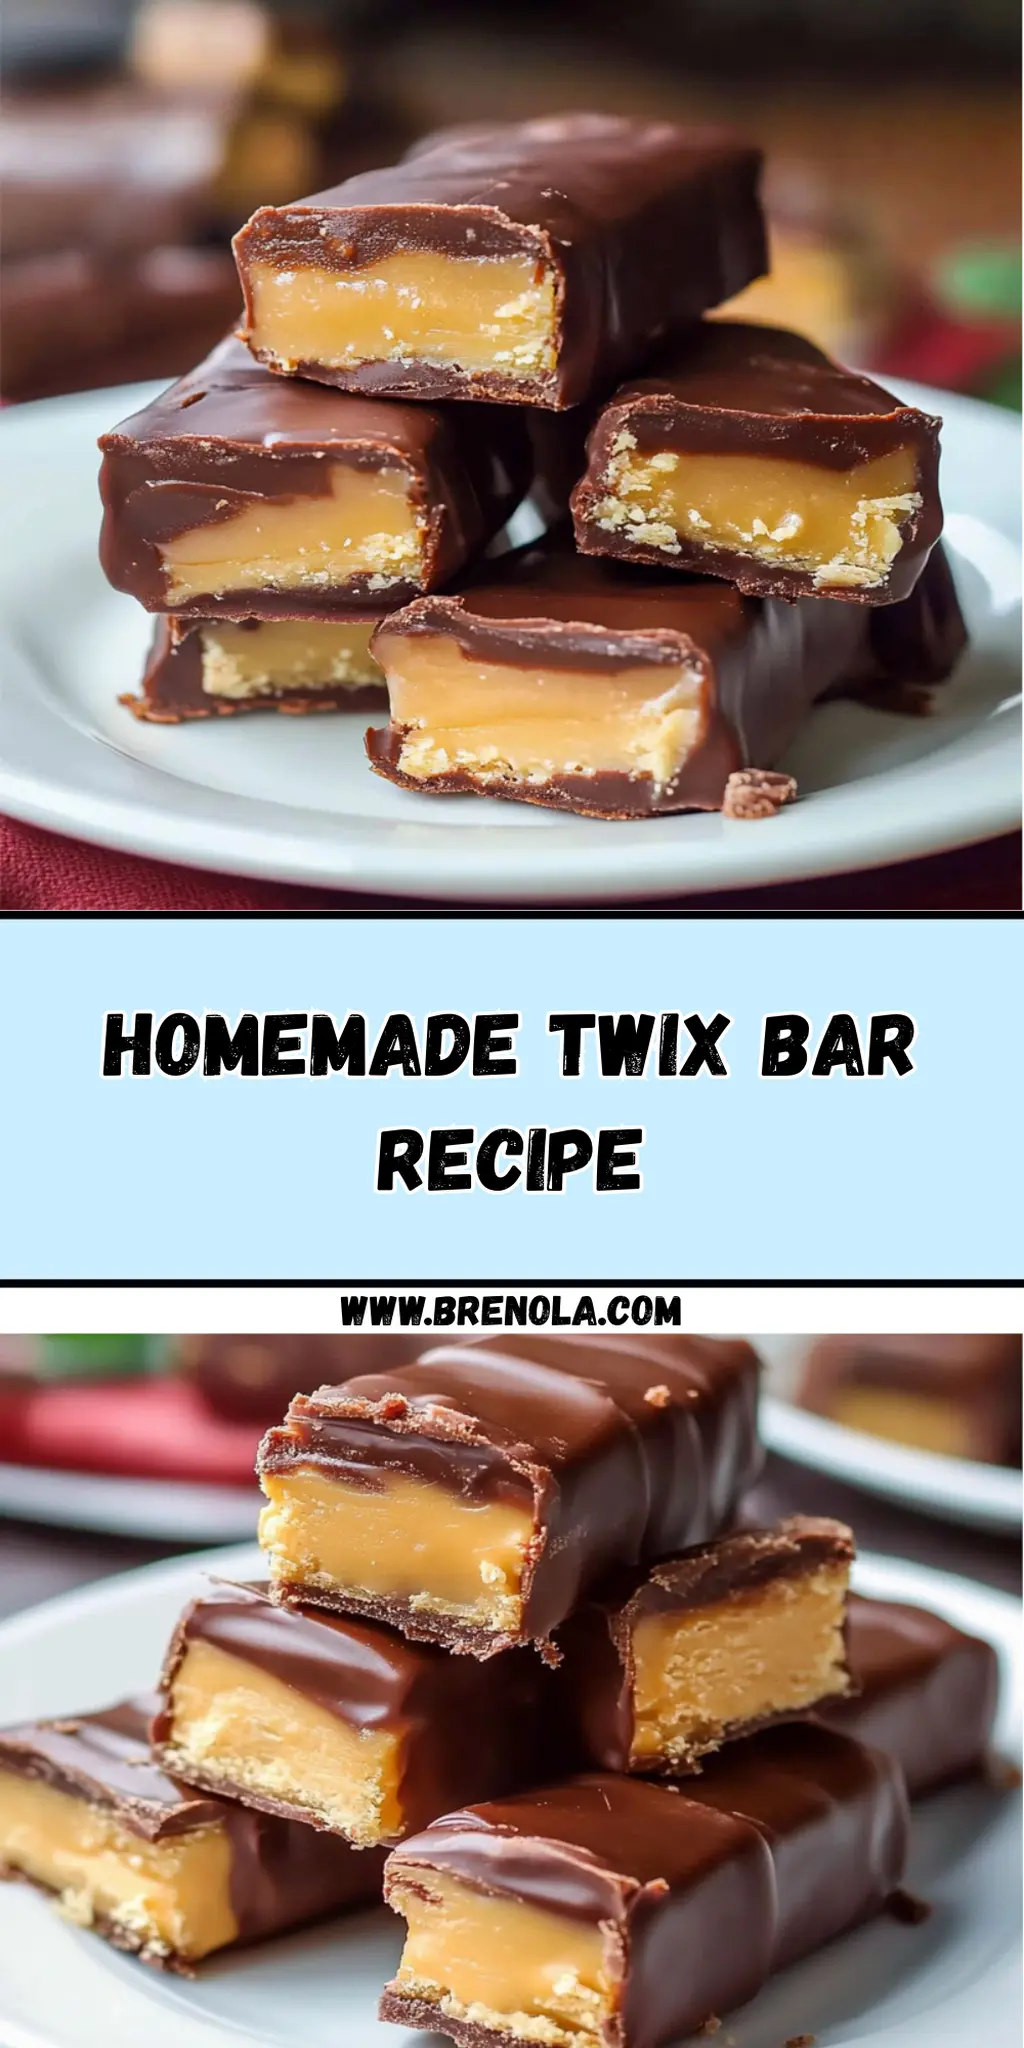
As I sifted through a mountain of old recipes while organizing my kitchen, I stumbled upon a forgotten treasure: the homemade Twix bar recipe. The sweet memory of biting into that crunchy, chewy, and chocolatey delight hit me like a wave of nostalgia. I realized that instead of reaching for store-bought bars filled with questionable ingredients, I could easily recreate that bliss at home.
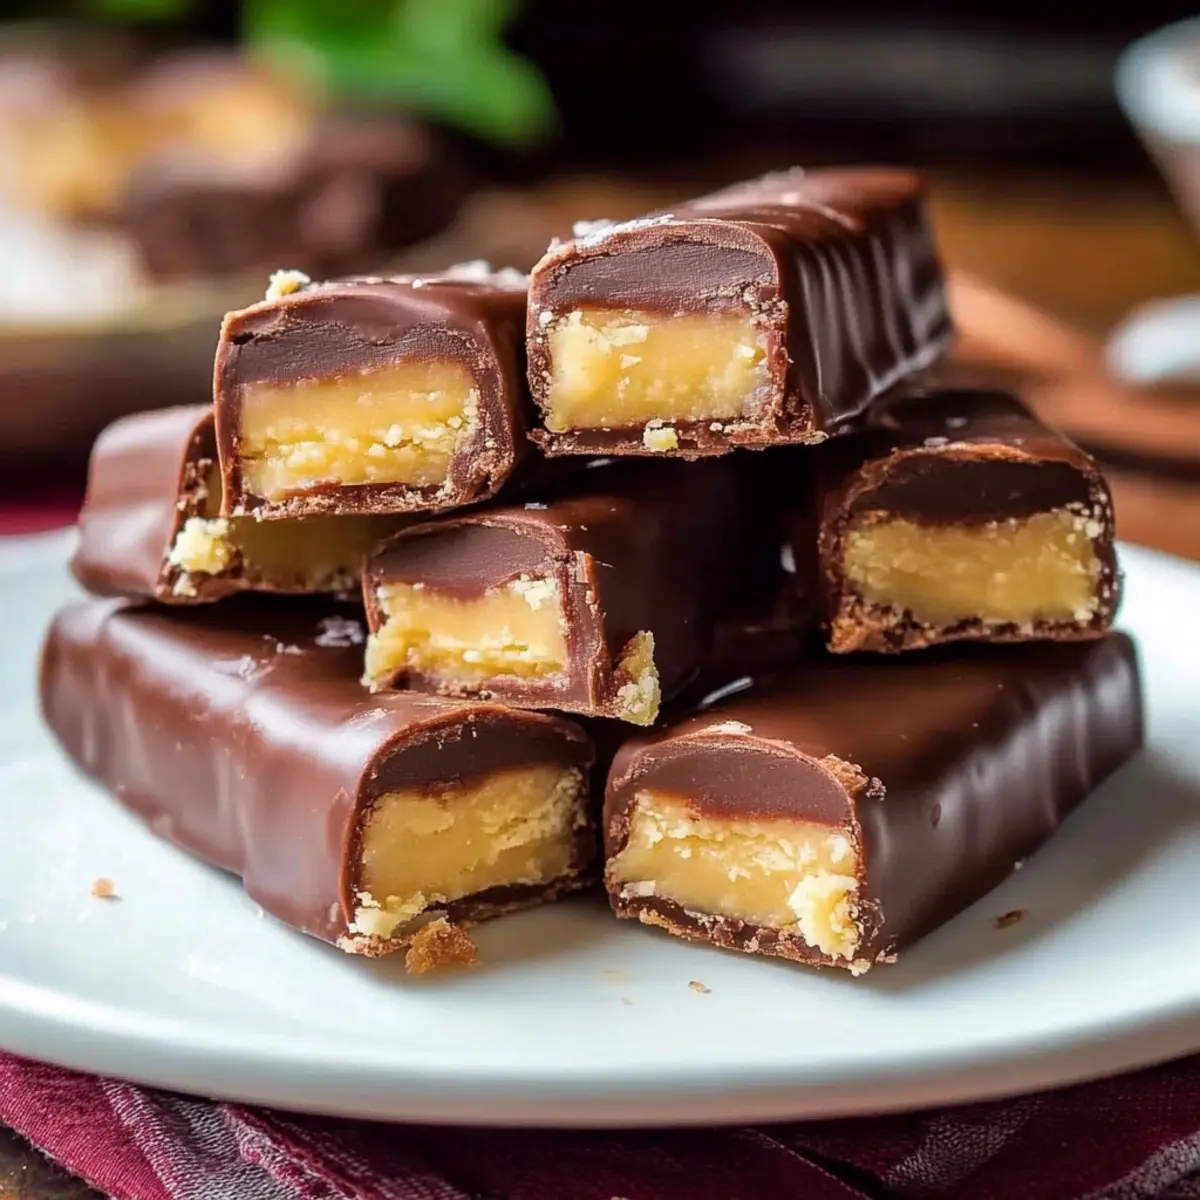
With just a handful of pantry staples, this homemade Twix bar recipe transforms simple ingredients into an indulgent treat that satisfies any sweet tooth. Picture layers of buttery shortbread, luscious caramel, and a thick coating of rich chocolate—all made from scratch. Whether you're looking to impress guests at a gathering or simply craving a delectable snack, these bars are versatile and crowd-pleasing.
So, let’s dive right into this easy-to-follow recipe and create your own batch of homemade joy!
Why You'll Love This Homemade Twix Bar Recipe
- This homemade Twix bar recipe is incredibly easy to make, allowing you to whip up a delicious treat in no time.
- The combination of buttery shortbread, creamy caramel, and rich chocolate creates a flavor explosion that will leave your taste buds dancing.
- It's versatile enough to be served at parties, given as gifts, or enjoyed as an afternoon snack, making it perfect for any occasion.
- Visually, these bars are a feast for the eyes, with their stunning layers and glossy chocolate topping that will impress anyone who sees them.
Homemade Twix Bar Ingredients
• You won't believe how simple these are!
For the Shortbread Base
- 1 cup unsalted butter – this adds a rich flavor to your shortbread, making it melt-in-your-mouth delightful.
- ½ cup powdered sugar – ensures the sweetness is perfectly balanced, creating that tender texture.
- ¼ teaspoon salt – a pinch enhances the sweetness and rounds out the flavors beautifully.
- 1 teaspoon vanilla extract (optional) – adds a lovely aromatic warmth to the shortbread.
- 2 cups all-purpose flour – the foundation of your bars, providing the necessary structure.
For the Caramel Layer
- 11 ounces soft caramel candies – these are the stars of this homemade Twix bar recipe, giving that gooey, luscious texture.
- 2 tablespoons heavy cream – helps to melt the caramels and makes them creamy and smooth.
For the Chocolate Topping
- 1 ½ cups semi-sweet or milk chocolate chips – choose your favorite for a sweet, chocolatey finish perfect for any occasion!
How to Make a Homemade Twix Bar
-
Preheat your oven to 350°F (175°C) and prepare an 8×8-inch baking pan by lining it with parchment paper. This ensures easy removal later on and helps the bars bake evenly.
-
Cream together the softened unsalted butter and powdered sugar in a mixing bowl until fluffy. Mixing in the salt and optional vanilla extract, gradually add the all-purpose flour to create a soft and cohesive dough.
-
Press the dough evenly into the lined pan, making sure to spread it smoothly. Bake for 20–22 minutes, or until the edges are lightly golden, then set it aside to cool completely.
-
Melt the soft caramel candies with the heavy cream in a saucepan over low heat. Stir consistently until the mixture reaches a smooth consistency. Once melted, pour and spread this delicious caramel evenly over the cooled shortbread. Chill for about 30 minutes to set.
-
Microwave the chocolate chips in a microwave-safe bowl, heating in 30-second intervals. Stir until smooth and fully melted. Pour over the chilled caramel layer, spreading it gently to cover completely.
-
Chill the assembled bars in the refrigerator for an additional 30–60 minutes, or until the chocolate topping is set and firm to the touch.
-
Slice into bars using a warm, sharp knife. Store these delightful treats in the fridge to maintain their delectable texture.
Optional: Drizzle a bit of melted chocolate over the top for an extra touch of indulgence!
Exact quantities are listed in the recipe card below.
Make Ahead Options
These Homemade Twix Bars are perfect for meal prep enthusiasts! You can prepare the shortbread base up to 3 days in advance; simply bake it and let it cool completely before wrapping it tightly in plastic wrap to maintain its freshness. The caramel layer can also be made ahead and stored in an airtight container in the refrigerator for up to 1 week. When you're ready to serve, simply melt the chocolate and pour it over the set caramel for that irresistible finish. This make-ahead strategy saves you precious time, ensuring your delicious dessert is just as delightful as when freshly made, and keeps you organized during busy days!
How to Store and Freeze Homemade Twix Bars
Fridge: Store your homemade Twix bars in an airtight container in the fridge for up to 1 week. This keeps them fresh and maintains the delightful texture.
Freezer: For longer storage, freeze them by wrapping individual bars in plastic wrap, then place them in a freezer-safe bag or container. They can last for up to 3 months!
Thawing: To enjoy, simply transfer the frozen bars to the fridge for several hours or overnight to thaw. This preserves the delicious layers of shortbread, caramel, and chocolate.
Reheating: If you prefer warm bars, heat them gently in the microwave for 10-15 seconds. Enjoy the indulgent flavors of this homemade Twix bar recipe!
Homemade Twix Bar Variations
Feel free to get creative and customize this delightful treat to suit your preferences and dietary needs!
-
Dairy-Free: Use coconut oil and dairy-free chocolate chips to remix this classic for a vegan-friendly version. The coconut adds a tropical twist!
-
Nutty Crunch: Add a layer of chopped nuts like almonds or peanuts between the caramel and chocolate layers for an added crunch. This will elevate the texture and flavor significantly.
-
Salted Caramel: Sprinkle a pinch of sea salt over the caramel layer before adding chocolate for that sweet-and-salty contrast that makes every bite irresistible.
-
Chocolate Drizzle: After the chocolate has set, drizzle white chocolate on top for a beautiful and festive look, perfect for special occasions.
-
Flavor Infusion: Mix in a teaspoon of peppermint extract into the chocolate for a holiday-inspired treat that refreshes and delights the palate.
-
Spicy Twist: Add a pinch of cayenne pepper to the chocolate for a surprising kick that contrasts beautifully with the sweetness of the bars. It's a flavor adventure for bold palates!
-
Cookie Crumble Topping: Crush some chocolate cookies and sprinkle them on top of the chocolate layer before it sets for an extra layer of flavor and crunch. It’s a delightful twist that transforms the whole bar!
-
Caramel Variations: Try different flavored caramels, like apple or mocha, for distinct taste experiences that change up your standard recipe. Each variation brings a unique twist to the classic!
What to Serve with Homemade Twix Bar?
Looking to create the perfect treat spread alongside your indulgent homemade Twix bars?
-
Rich Coffee: A cup of freshly brewed coffee enhances the sweet and buttery flavors, making for a delightful pairing. The bitterness of the coffee beautifully balances the sweetness of the bars.
-
Ice Cream Sundae: Serve them with vanilla ice cream drizzled with chocolate sauce. The melty ice cream contrasts the crunchy texture of the Twix, offering a comforting and satisfying experience.
-
Fresh Berries: Juicy strawberries or raspberries provide a refreshing burst of flavor that cuts through the richness. Their natural sweetness complements the bars, adding a vibrant touch to your dessert platter.
-
Milkshakes: A chocolate or caramel milkshake echoes the decadent layers of the bars, creating a delightful, indulgent vibe that’s perfect for celebrations.
-
Charcuterie Board: Create a sweetened charcuterie board with nuts, dried fruits, and other chocolates. This gives a mix of textures and flavors, inviting guests to explore and enjoy alongside your homemade Twix.
-
Sweet Tea: A chilled glass of sweet tea can provide a perfect refreshing contrast. Its subtle sweetness and floral notes enhance the rich chocolate and caramel flavors.
-
Coconut Macaroons: Light and chewy, these cookies add a unique texture and toasty flavor that pairs nicely with the smooth layers of your homemade Twix bars.
-
Dark Chocolate Fondue: For an interactive dessert experience, serve them with a side of dark chocolate fondue. Guests can dip and add their own twist for a fun, communal treat!
Chef's Helpful Tips
- When making Homemade Twix Bars, ensure your butter is at room temperature for easier creaming with the sugar, which creates a light and fluffy shortbread base.
- Avoid overbaking the shortbread; look for a lightly golden edge to give it the perfect texture without becoming dry.
- To achieve a smooth caramel layer, continuously stir the mixture over low heat, as this prevents it from burning while melting.
- When melting chocolate, use a microwave-safe bowl and heat it in short intervals to control the temperature and get a silky finish without seizing.
Homemade Twix Bar Recipe FAQs
How do I choose the right caramel candies?
Absolutely! Opt for soft caramel candies, as they melt smoothly and create that luscious layer we all love. Brands like Kraft work beautifully—just ensure they're fresh and not too hard. If you find them too firm, you might end up with a chewy caramel layer instead.
How should I store my homemade Twix bars?
Very good question! Keep your homemade Twix bars in an airtight container in the fridge for up to 1 week. This will help to maintain their delightful texture and flavor. If you notice them getting too soft or sticky, you can re-chill them briefly before serving.
Can I freeze homemade Twix bars?
Absolutely! For longer storage, wrap each individual bar tightly in plastic wrap and then place them in a freezer-safe bag. Your bars can last for up to 3 months in the freezer. When you're ready to enjoy them, simply transfer them to the fridge for several hours or overnight to thaw while keeping their amazing texture!
What if the caramel layer is too runny or hard?
No worries! If your caramel is too runny, it might not have been heated long enough, or instant melting was too intense. Try gently reheating it over low heat, stirring continuously, until it thickens slightly. Conversely, if your caramel is too hard, place it in a saucepan with a tablespoon of heavy cream and warm it gently until it softens up, achieving the perfect consistency.
Is there a way to make these bars allergen-friendly?
Of course! For a nut-free option, check your chocolate chips to ensure they’re made in a nut-free facility, and substitute with a dairy-free butter for those avoiding dairy. You can also use gluten-free flour instead of all-purpose flour to make these bars gluten-free. Just remember to keep the caramel candies safe in terms of allergens as well—many times, these can contain traces of various ingredients.
How do I know when my shortbread is baked perfectly?
To achieve that perfect golden shortbread base, look for edges that are just lightly golden after baking for about 20–22 minutes. If the top remains too pale, it may be underbaked, while if it’s darker, it could be overbaked—creating a dry texture. The ideal shortbread should feel firm to the touch but not overly hard.
Homemade Twix Bar Recipe
Ingredients
Equipment
Method
- Preheat your oven to 350°F (175°C) and prepare an 8×8-inch baking pan by lining it with parchment paper.
- Cream together the softened unsalted butter and powdered sugar until fluffy. Mix in the salt and optional vanilla extract, then gradually add all-purpose flour to create a soft dough.
- Press the dough evenly into the lined pan. Bake for 20–22 minutes, or until the edges are lightly golden. Cool completely.
- Melt soft caramel candies with heavy cream in a saucepan over low heat, stirring until smooth. Pour over the cooled shortbread and chill for 30 minutes.
- Microwave chocolate chips in a bowl, heating in 30-second intervals until smooth. Pour over the chilled caramel layer.
- Chill assembled bars in the refrigerator for 30–60 minutes until chocolate topping is set.
- Slice into bars using a warm, sharp knife. Store in the fridge.


Leave a Reply