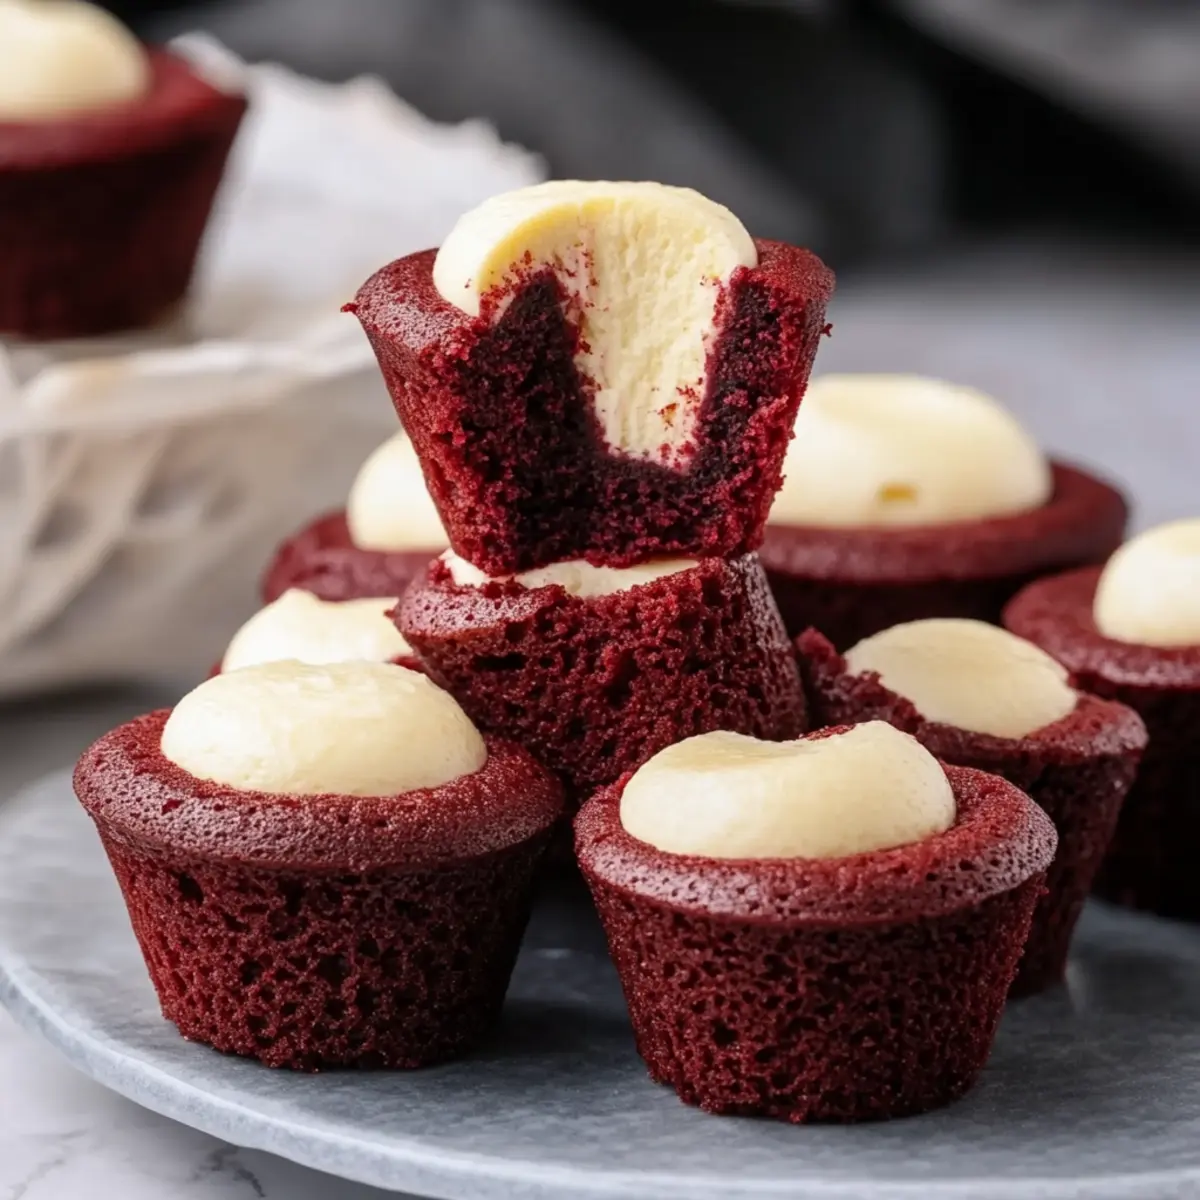
When a craving for something sweet hits, I find myself dreaming of desserts that are both indulgent and whimsical. Enter these Mini Red Velvet Cheesecakes! Imagine taking a classic dessert and transforming it into bite-sized pieces of pure joy. The rich, velvety cocoa flavor paired with creamy cheesecake filling creates a delightful contrast that is nothing short of heavenly.
One day, inspired by the vibrant red of a sunset, I decided to experiment with my favorite flavors, and the result was nothing short of magical. These miniature delights are perfect for entertaining guests or treating yourself during a cozy night in. Best of all, they are incredibly easy to whip up—no elaborate baking skills required!
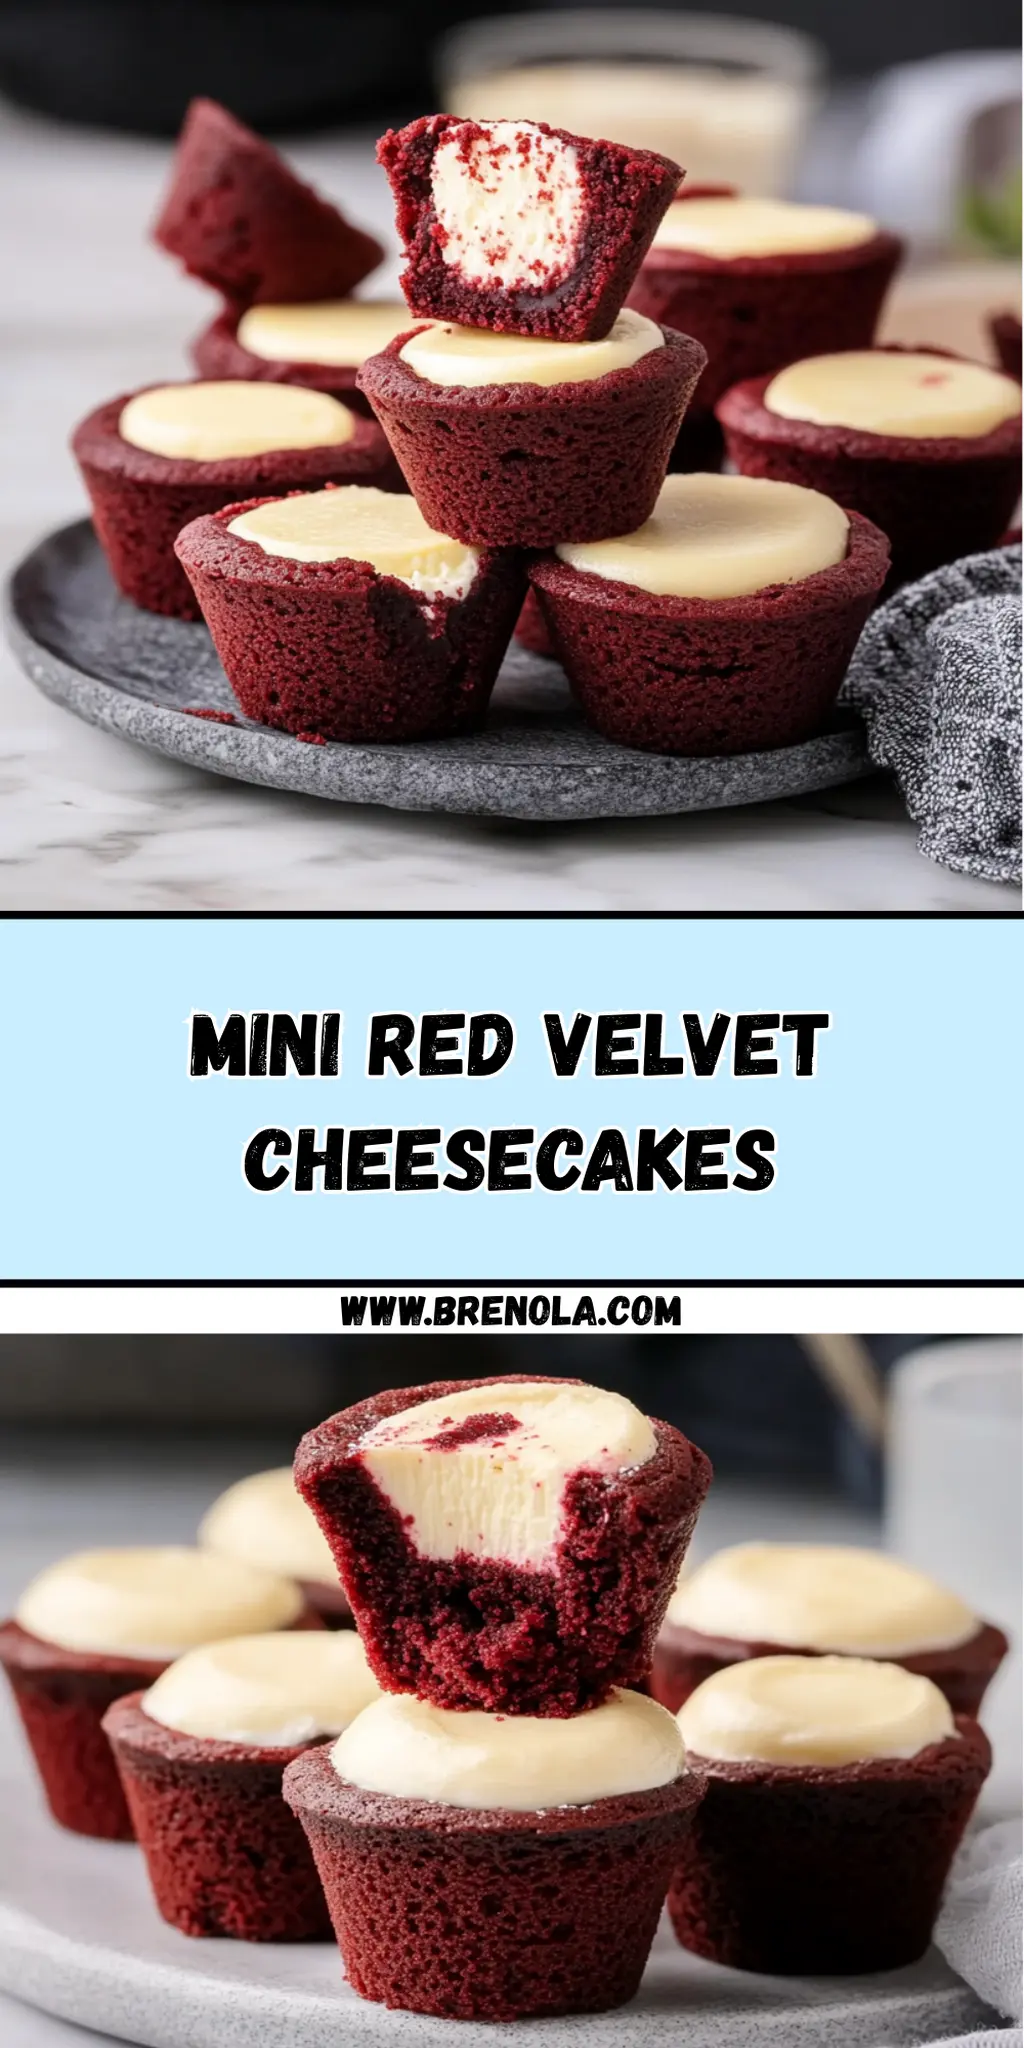
Whether you're a seasoned chef or someone looking to break free from the monotony of takeout, these Mini Red Velvet Cheesecakes bring a splash of color and a burst of flavor to your table. Are you ready to impress with these little gems? Let’s dive into the recipe!
Why You'll Love This Mini Red Velvet Cheesecakes
- These Mini Red Velvet Cheesecakes are a breeze to make, combining a simple process with stunning results.
- The rich, velvety flavor paired with the creamy cheesecake filling will leave your taste buds dancing with delight.
- Their vibrant red hue adds a festive and visually appealing touch that’s perfect for any occasion.
- With 42 servings in one batch, they're an ideal crowd-pleaser that will keep your guests coming back for more.
- Enjoy every bite of these delightful treats without the fuss of traditional baking.
Mini Red Velvet Cheesecakes Ingredients
• Get ready to create these delightful treats!
For the Cheesecake Base
- All-purpose flour – A must for structure, ensuring your cheesecakes hold their shape!
- Unsweetened cocoa powder – Adds the rich chocolate flavor that makes red velvet so unique.
- Salted sweet cream butter – Use melted for a moist base; the salt complements the sweetness beautifully.
- Granulated sugar – Sweetens the base to balance the cocoa's bitterness.
- Red gel food coloring – The star of the show! It gives those Mini Red Velvet Cheesecakes their iconic hue.
- Pure vanilla extract – Enhances the flavor, making each bite taste like a dream.
- Large eggs – Essential for binding and giving a rich texture to your batter.
For the Cheesecake Filling
- Cream cheese – Soften it to ensure a smooth, luscious filling.
- Granulated sugar (filling) – Sweetens the cheesecake mixture; adjust to taste if you prefer it less sweet.
- Pure vanilla extract (filling) – Just like in the base, this adds depth of flavor to the creamy center.
- Large egg yolk – Adds richness to the filling; don’t skip this for that silky texture!
Prepare your kitchen and get ready for a joyful baking experience with these Mini Red Velvet Cheesecakes!
How to Make Mini Red Velvet Cheesecakes
-
Preheat your oven to 350°F and lightly spray a mini muffin pan with nonstick spray to prevent sticking. This ensures each little cheesecake pops out perfectly.
-
Whisk together in one bowl the all-purpose flour and cocoa powder. This dry mixture will help create a soft and tender base for your cheesecakes.
-
Combine in another bowl the melted butter, granulated sugar, red gel food coloring, vanilla extract, and beaten eggs. Mix until everything is well blended, creating a vibrant, luscious batter.
-
Stir the dry mixture into the wet mixture until just combined. Take care not to overmix; we want a fluffy texture that will bake beautifully!
-
Beat the cream cheese in a separate bowl until smooth. Then, add in the granulated sugar and vanilla extract reserved for the filling, mixing until creamy and dreamy.
-
Incorporate the egg yolk into the cream cheese mixture, mixing until completely smooth and streak-free. This will create a rich filling that pairs wonderfully with the red velvet base.
-
Fill each mini muffin cup with one tablespoon of the red velvet batter. This lovely layer sets the stage for your delightful cheesecake filling!
-
Pipe about two teaspoons of the cheesecake filling right into the center of each filled batter. This will create a luscious surprise at the heart of each mini dessert.
-
Bake in the preheated oven for 8–9 minutes. The edges should look set, while the centers might jiggle slightly—this will firm up as they cool.
-
Cool in the pan for 20–30 minutes before transferring them to a wire rack. Allow them to cool fully, which enhances the flavor and texture of your treats.
Optional: Garnish with a sprinkle of cocoa powder for a chic finish!
Exact quantities are listed in the recipe card below.
Storage Tips for Mini Red Velvet Cheesecakes
Room Temperature: Store uneaten Mini Red Velvet Cheesecakes at room temperature for up to 2 hours; after that, refrigerate to maintain freshness.
Fridge: Keep your cheesecakes in an airtight container in the refrigerator for up to 3 days. This helps preserve their delightful flavor and texture.
Freezer: For longer storage, freeze the cheesecakes in a single layer on a baking sheet for 1-2 hours, then transfer them to a freezer-safe container. They can last up to 3 months.
Reheating: Thaw frozen cheesecakes overnight in the fridge before enjoying. For a warm treat, microwave them for about 10-15 seconds — they’ll be deliciously gooey!
What to Serve with Mini Red Velvet Cheesecakes?
When indulging in these little delights, think of the perfect pairings that elevate your dessert experience to new heights.
-
Fresh Berries: The tartness of strawberries or raspberries complements the sweetness, adding a vibrant contrast and a refreshing taste to your plate.
-
Whipped Cream: A dollop of airy whipped cream balances the richness of the cheesecake filling, creating a light and lovely texture in each bite.
-
Chocolate Sauce: Drizzling warm chocolate sauce not only intensifies the decadent flavor but adds a luxurious touch that makes these treats feel extra special.
-
Nutty Crust Crumbles: Sprinkling crushed nuts like pecans or walnuts enhances the texture, providing a delightful crunch that pairs beautifully with smooth cheesecake.
-
Iced Coffee: A chilled caramel iced coffee offers a delightful flavor contrast, enhancing the cocoa notes while refreshing your palate with each sip.
-
Chilled Sparkling Wine: The bubbles and acidity of sparkling wine cut through the rich cheesecake, making every mouthful a celebration and perfect for entertaining guests.
-
Cream Cheese Frosting: For those who simply can’t get enough, a thin layer of cream cheese frosting can enhance both flavor and visual appeal, making them even more irresistible.
-
Chocolate-Covered Strawberries: These not only tie in with the red velvet theme but also add a touch of romance and elegance to your dessert table.
With these pairings, you’re not just serving a dessert; you’re creating an unforgettable experience that brings joy and flavor to every occasion!
Make Ahead Options
These Mini Red Velvet Cheesecakes are perfect for busy home cooks looking to save time without sacrificing flavor! You can prepare the red velvet batter and the cheesecake filling up to 24 hours in advance. Simply whisk together the dry ingredients and mix the wet ingredients in separate bowls, then refrigerate both mixtures in airtight containers. When you’re ready to bake, just combine the two mixtures, fill the muffin cups, and pipe in the cheesecake filling. This way, you'll have a delightful dessert ready with minimal effort, ensuring that your cheesecakes stay just as delicious and vibrant! Enjoy having these sweet treats on hand for any occasion!
Mini Red Velvet Cheesecake Variations
Feel free to get creative and customize these delightful treats with these charming twists!
-
Gluten-Free: Replace the all-purpose flour with a gluten-free blend to cater to dietary needs while keeping the same tasty texture.
-
Dairy-Free: Substitute cream cheese with a non-dairy cream cheese alternative and use coconut or almond milk for the filling. You'll still enjoy a creamy bite!
-
Nutty Delight: Add ¼ cup of finely chopped walnuts or pecans into the red velvet batter for a delightful crunch that contrasts beautifully with the creamy filling.
-
Minty Fresh: Mix in ½ teaspoon of peppermint extract into the cheesecake filling for a refreshing twist. A splash of mint makes these mini treats perfectly festive!
-
Choco-Lover's Dream: Fold in mini chocolate chips into the cheesecake filling for an extra layer of indulgence that will delight any chocoholic. It adds wonderful bursts of flavor.
-
Spice it Up: Sprinkle a pinch of cinnamon or nutmeg into the batter for a warm, comforting spice flavor that complements the cocoa beautifully.
-
Citrus Zing: Add the zest of one orange or a lemon to the cream cheese filling for a zesty kick that brightens up the rich flavors.
-
Mini Red Velvet Layer Cake: Use the batter to make a mini layer cake instead by baking it in a small round cake pan. Layer it with the cheesecake filling for a fun twist on the classic!
Chef's Helpful Tips
- When making Mini Red Velvet Cheesecakes, ensure your butter is fully melted and cooled to avoid curdling the eggs in the batter.
- A common mistake is overmixing the batter; remember to combine wet and dry ingredients just until incorporated for the best texture.
- Always use room temperature cream cheese for your filling as it blends more easily and prevents lumps.
- Bake your cheesecakes at 350°F for exactly 8–9 minutes to achieve the perfect balance between firmness and a slight jiggle in the center.
Mini Red Velvet Cheesecakes Recipe FAQs
How do I select the right ingredients for my Mini Red Velvet Cheesecakes?
Absolutely! When choosing your ingredients, look for high-quality cocoa powder without any additives to ensure a rich flavor. Make sure your butter is unsalted and sweet cream, as it perfectly balances the sweetness in the batter. For the red gel food coloring, opt for gel over liquid to achieve that vibrant hue without altering the batter’s consistency.
What is the best way to store Mini Red Velvet Cheesecakes?
Very simple! Place any uneaten cheesecakes in an airtight container in your refrigerator, where they will stay fresh for up to 3 days. If you're storing them at room temperature, they can only last for about 2 hours before needing to be refrigerated. To maintain their delightful taste and texture, avoid leaving them out for too long.
Can I freeze Mini Red Velvet Cheesecakes?
Yes, you can! To freeze your cheesecakes, first, place them on a baking sheet and allow them to freeze in a single layer for about 1-2 hours. After they are firm, transfer them to a freezer-safe container, separating layers with parchment paper if needed. They can be stored this way for up to 3 months. When you're ready to enjoy them, thaw overnight in the fridge before serving.
What should I do if my cheesecakes sink or crack after baking?
If your Mini Red Velvet Cheesecakes sink or crack, it could be due to overmixing the batter or adding too much air when incorporating the eggs. To avoid this, mix just until combined—aim for a smooth batter without overbeating. Ensure you bake them for the correct time of 8-9 minutes; they should be set on the edges with a slight jiggle in the center, which will firm up as they cool.
Are Mini Red Velvet Cheesecakes suitable for individuals with allergies?
It depends! These cheesecakes contain common allergenic ingredients like eggs, dairy (cream cheese), and gluten (from the flour). If you’re making them for someone with allergies, consider using gluten-free flour and a dairy-free cream cheese alternative. Always label your treats to inform guests of possible allergens, and feel free to customize the filling and base to suit dietary restrictions!
Mini Red Velvet Cheesecakes
Ingredients
Equipment
Method
- Preheat your oven to 350°F and lightly spray a mini muffin pan with nonstick spray.
- Whisk together in one bowl the all-purpose flour and cocoa powder.
- Combine melted butter, granulated sugar, red gel food coloring, vanilla extract, and beaten eggs in another bowl.
- Stir the dry mixture into the wet mixture until just combined.
- Beat the cream cheese in a separate bowl until smooth, then mix in the granulated sugar and vanilla extract reserved for the filling.
- Incorporate the egg yolk into the cream cheese mixture until smooth.
- Fill each mini muffin cup with one tablespoon of the red velvet batter.
- Pipe about two teaspoons of the cheesecake filling into the center of each filled batter.
- Bake in the preheated oven for 8–9 minutes.
- Cool in the pan for 20–30 minutes before transferring to a wire rack.


Leave a Reply