When the rich crimson hue of a Red Velvet Buttermilk Cake fills my kitchen, an unmistakable joy washes over me. I can almost hear the faint whispers of cake-cutting camaraderie from family gatherings and celebrations, each slice bringing warmth and smiles to all around. This luscious cake is more than just striking; it’s incredibly easy to make, making it the perfect dessert for both novice and seasoned bakers alike.
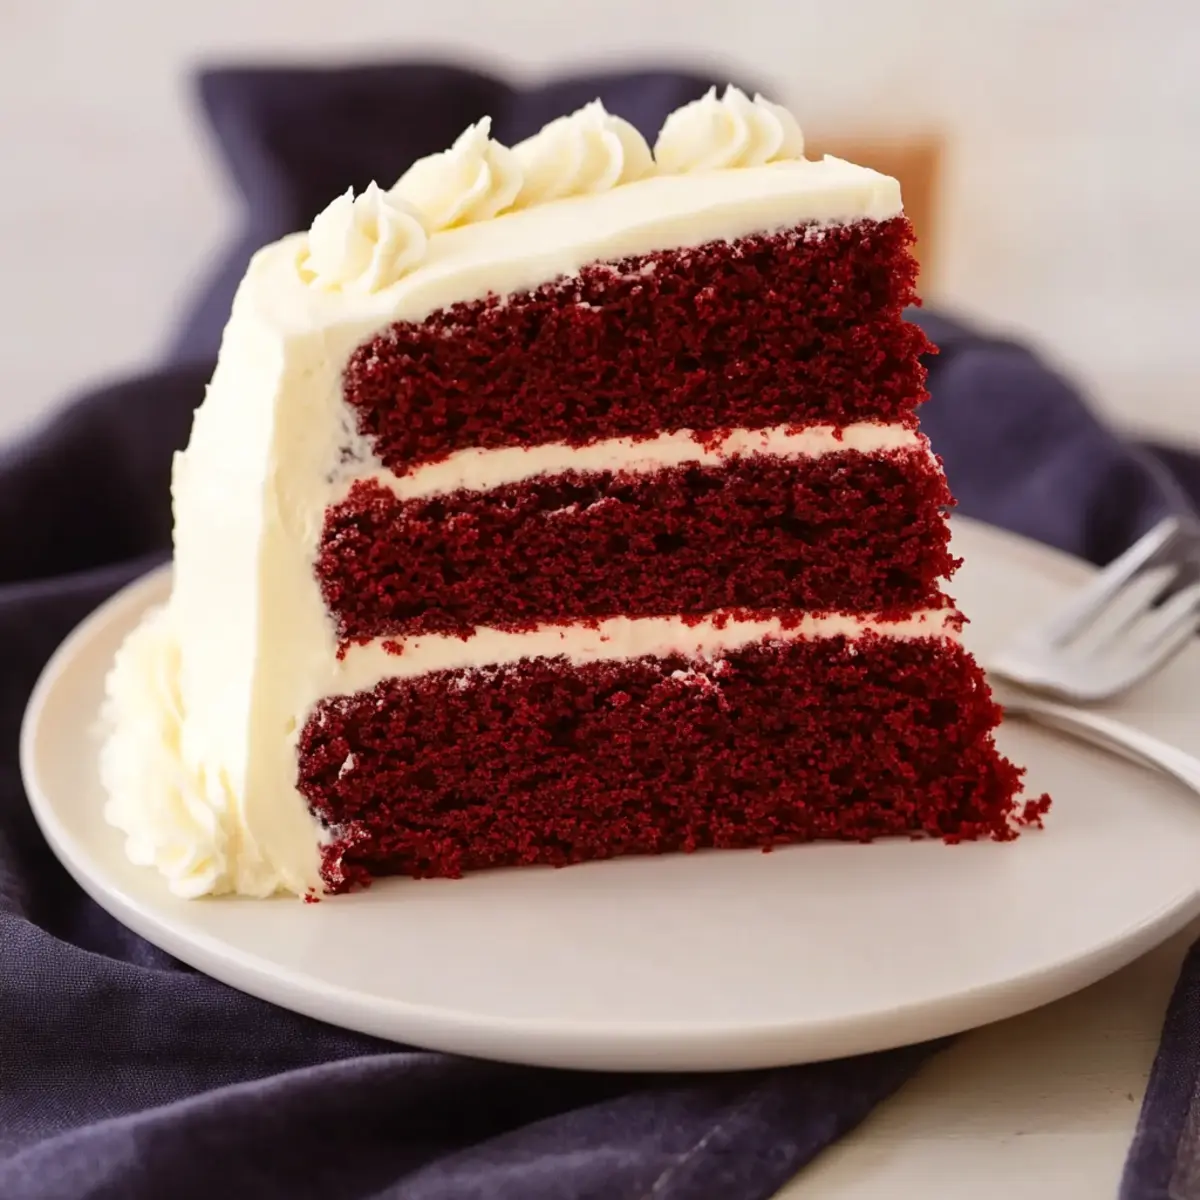
It's often surprising to find a cake that looks so fancy can be made with simple pantry staples, right? With layers of buttery, moist buttermilk goodness frosted with creamy, tangy cream cheese icing, this cake offers a delightful contrast of flavors that will impress your guests time and time again. Whether you’re planning a special occasion or just want to turn an ordinary day into something sweet, this Red Velvet Buttermilk Cake is the answer. So, let’s roll up our sleeves and bring a bit of joy to the table with this showstopper!
Why You'll Love This Red Velvet Buttermilk Cake
- This Red Velvet Buttermilk Cake is incredibly easy to make, making it a great choice for both beginner and experienced bakers.
- The rich, buttery flavor combined with creamy cream cheese frosting creates a taste sensation that is simply irresistible.
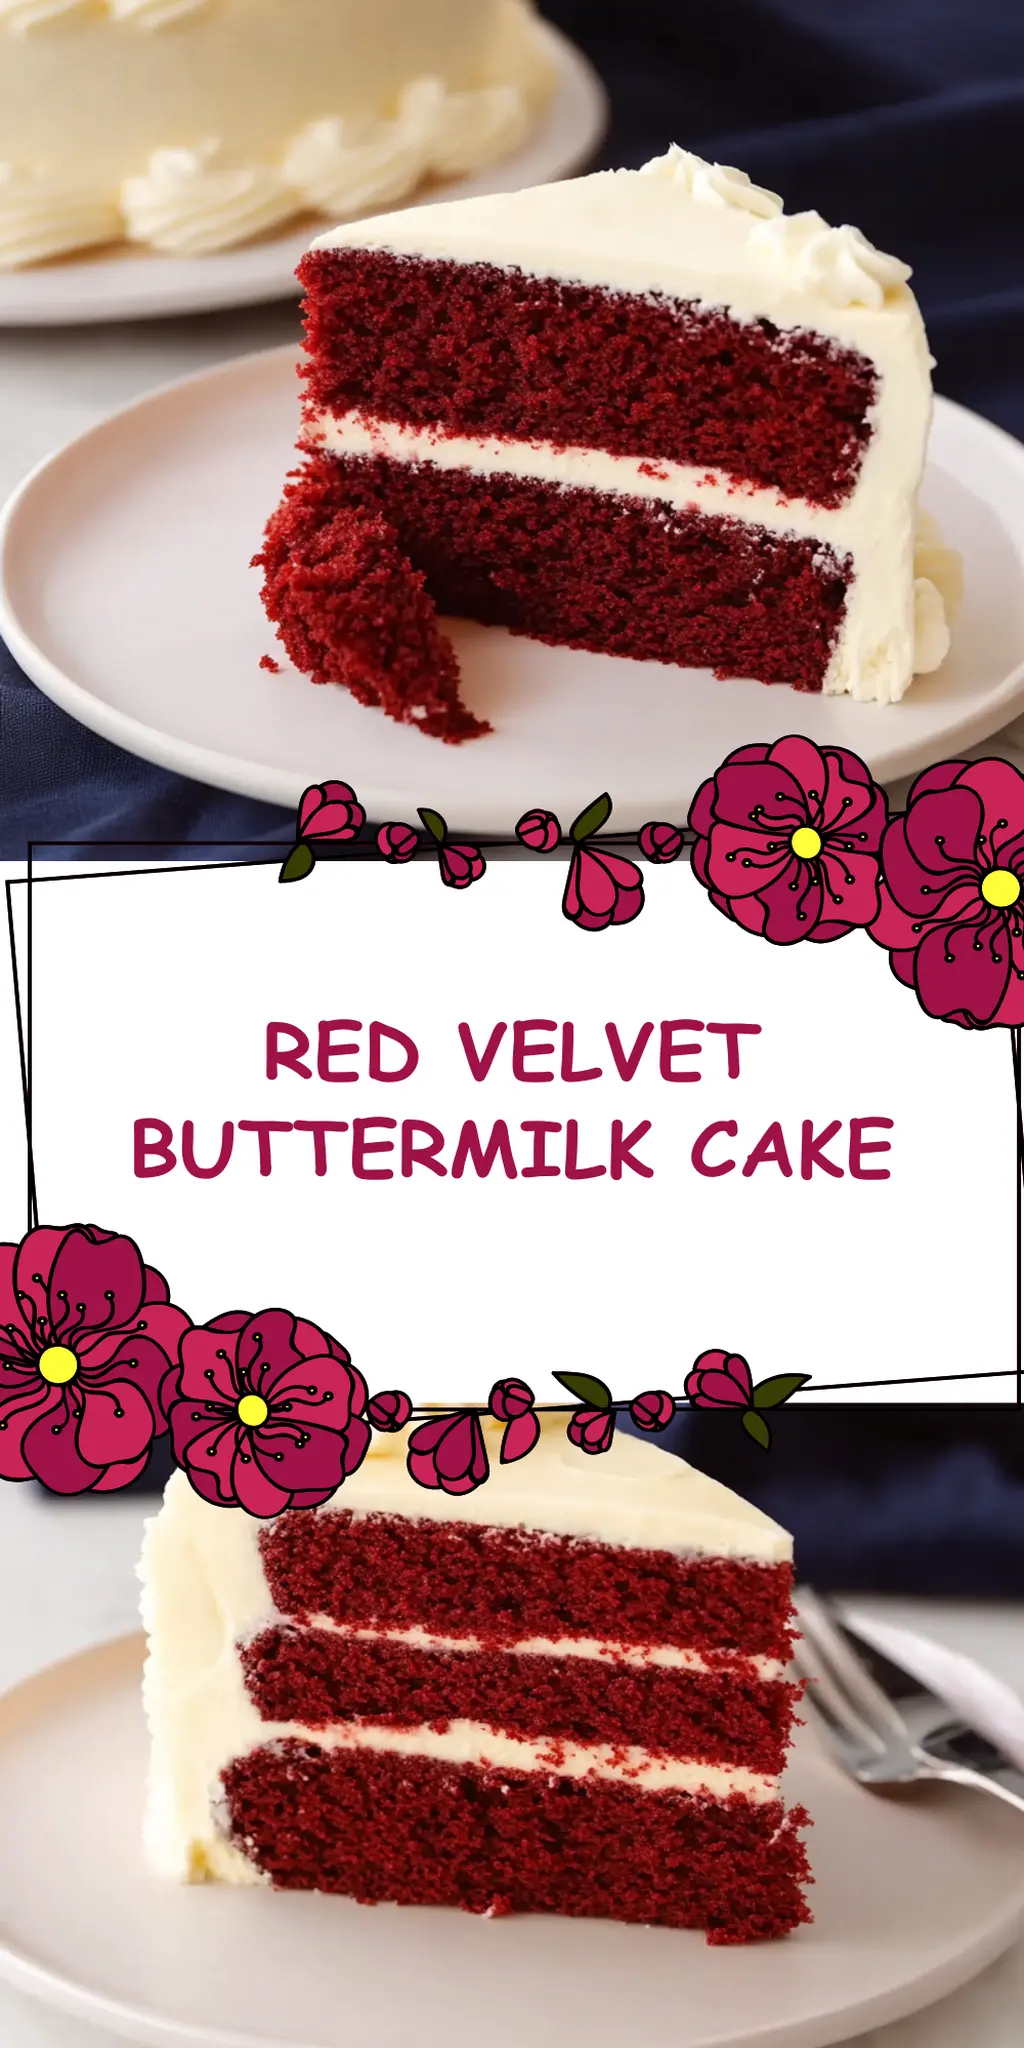
- Its stunning red hue and elegant presentation make it a visual delight that will wow your guests at any gathering.
- You can enjoy this cake for various occasions, whether it's a birthday, holiday, or just because, making it a versatile addition to your baking repertoire.
Red Velvet Buttermilk Cake Ingredients
For the Cake
- All-purpose flour – sifting ensures a light and fluffy texture for your cake.
- Corn starch – adds tenderness by weakening gluten in the flour.
- Unsweetened cocoa powder – enhances flavor while giving a subtle chocolate undertone.
- Baking soda – provides the necessary lift for a light cake structure.
- Salt – balances the sweetness and enhances overall flavor.
- Canola oil – keeps the cake moist and adds richness without overpowering flavors.
- Unsalted butter – melting it adds depth; make sure it's cooled to avoid cooking eggs.
- Caster or superfine sugar – dissolves easily, ensuring a smooth batter.
- Large eggs – help bind ingredients and contribute moisture.
- White vinegar – reacts with baking soda to promote rising and tenderness.
- Buttermilk – adds moisture and a subtle tang, making the cake delightfully rich.
- Vanilla extract – enhances the overall flavor with warm, sweet notes.
- Red food coloring – gives the cake its signature vibrant hue.
For the Frosting
- Unsalted butter – using room temperature butter creates a smooth and creamy frosting.
- Cream cheese – contributes a tangy flavor, complementing the sweetness of the cake.
- Powdered sugar – provides a sweet, airy texture for the frosting.
- Lemon juice – adds brightness to balance the richness of the cream cheese.
- Vanilla extract – adds a warm and delicious undertone that enhances the frosting's flavor.
With these ingredients, your Red Velvet Buttermilk Cake will be a delightful centerpiece for any gathering!
How to Make Red Velvet Buttermilk Cake
-
Preheat the oven to 160°C fan-forced (180°C conventional). Prepare your two 20 cm (8-inch) round pans by greasing them well and lining with parchment paper to ensure easy cake removal later.
-
Sift together the all-purpose flour, corn starch, cocoa powder, baking soda, and salt into a large mixing bowl. This step is crucial for a light and fluffy cake texture that everyone will love.
-
Whisk together the canola oil, melted butter, caster sugar, eggs, white vinegar, buttermilk, vanilla extract, and red food coloring in another bowl. Ensure everything is well combined and smooth for the best flavor outcome.
-
Combine the wet and dry ingredients gently, stirring until just smooth. Avoid overmixing to keep the cake light and airy. You'll want a silky batter without any lumps—this is your ticket to cake perfection!
-
Divide the batter evenly between your prepared pans. Bake in the preheated oven for 35–40 minutes, or until a skewer inserted comes out clean. They'll rise beautifully, turning a vibrant red.
-
Cool the cakes in their pans for about 10 minutes. After that, move them to a wire rack to cool completely. This prevents a soggy bottom and ensures the perfect texture.
-
Prepare the frosting by beating the room temperature unsalted butter and cream cheese together until fluffy. Gradually add the powdered sugar, lemon juice, and vanilla extract, mixing until pale and creamy for that lovely contrast with your cake.
-
Level the tops of the cooled cakes if they have domed. Spread frosting generously between the layers, then envelop the entire cake and sides with a smooth finish. Every bite deserves that creamy goodness!
-
Chill the frosted cake in the refrigerator for 1–2 hours before serving. This helps to set the frosting and enhances the flavors, creating the perfect slice ready for enjoyment.
Optional: Add a sprinkle of cocoa powder or chocolate shavings on top for an extra touch of elegance!
Exact quantities are listed in the recipe card below.
How to Store and Freeze Red Velvet Buttermilk Cake
Room Temperature: Keep the cake in an airtight container for up to 2 days if you plan to enjoy it soon. This helps retain its delicious moisture and flavor.
Fridge: Store any leftover slices in the refrigerator, covered tightly, for up to 5 days. This will keep the Red Velvet Buttermilk Cake fresh, but it's best enjoyed at room temperature.
Freezer: For longer storage, wrap the cake layers tightly in plastic wrap and aluminum foil, then freeze for up to 3 months. Thaw in the fridge before serving, so the flavors can reawaken.
Reheating: If you prefer warm cake, gently warm individual slices in the microwave for about 10-15 seconds. Just enough to bring back that cozy, come-hither texture without drying it out.
Make Ahead Options
These Red Velvet Buttermilk Cakes are perfect for busy home cooks looking to save time! You can prepare the cake layers up to 24 hours in advance by baking and cooling them completely, then wrapping them tightly in plastic wrap before refrigerating. Alternatively, the frosting can be made up to 3 days ahead; just store it in an airtight container in the fridge to keep it fresh and fluffy. When you're ready to serve, simply frost the cakes and let them chill for 1–2 hours before enjoying. With these make-ahead options, you’ll have a stunning dessert ready to impress with minimal last-minute effort!
Red Velvet Buttermilk Cake Variations
Let your creativity shine by personalizing this delightful cake to fit your tastes and dietary needs.
- Gluten-Free: Substitute all-purpose flour with a 1:1 gluten-free blend for a cake everyone can enjoy.
- Dairy-Free: Use almond or coconut milk in place of buttermilk and a dairy-free cream cheese for the frosting.
- Chocolate Twist: Add ½ cup of chocolate chips to the batter for a rich, decadent surprise in every slice.
- Nutty Flavor: Incorporate 1 cup of finely chopped walnuts or pecans into the batter for added crunch and warmth.
- Citrus Zest: Brighten the frosting with a tablespoon of orange or lemon zest for a refreshing, zesty kick.
- Spicy Kick: Add 1 teaspoon of cayenne pepper to the frosting for an unexpected yet delightful heat that contrasts wonderfully.
- Layered Delight: Create a layered cake by baking the batter in 4 layers instead of 2, adding fruit preserves between layers for extra sweetness.
- Different Colors: Swap red food coloring for blue or green to celebrate themed occasions or simply to surprise your guests with a rainbow twist.
Feel free to mix, match, and adapt; your personal touch will make this cake even more special!
What to Serve with Red Velvet Buttermilk Cake?
Elevate your dessert experience with delightful accompaniments that beautifully enhance the flavors of your decadent cake.
-
Fresh Berries: The tartness of raspberries or strawberries balances the sweet, rich flavors of the cake.
-
Vanilla Ice Cream: A scoop of creamy vanilla ice cream provides a delightful temperature contrast against the rich frosting.
-
Chocolate Sauce: Drizzle warm chocolate sauce over each slice for an indulgent touch that chocolate lovers will adore.
-
Espresso or Coffee: A well-brewed cup of coffee brings out the cake's flavors, perfect for an afternoon treat or dessert pairing.
-
Whipped Cream: Light and airy whipped cream adds a fluffy texture that complements the cake's richness without overwhelming it.
-
Mint Leaves: Fresh mint leaves as a garnish can offer a refreshing herbal note that enhances the overall presentation and flavor profile.
-
Almond Milk: For a non-dairy option, serve with chilled almond milk for a light, nutty companion that won't overshadow the cake.
Chef's Helpful Tips
- When making the Red Velvet Buttermilk Cake, remember to sift your dry ingredients to create a lighter texture; this step is often overlooked but essential.
- Make sure your melted butter is cooled before adding it to avoid scrambling the eggs in your wet mixture.
- When combining wet and dry ingredients, mix gently to prevent overmixing, which can result in a dense cake.
- Finally, ensure your oven is fully preheated before baking to achieve even cooking and that signature rise.
Red Velvet Buttermilk Cake Recipe FAQs
What’s the best way to select ripe ingredients for the cake?
Absolutely! For the best results, choose fresh eggs, ideally at room temperature, to help ingredients meld beautifully. When selecting buttermilk, check the expiration date; it should be fresh and have no off odors. The butter should be soft but not melted for optimal mixing, allowing for that luxurious creamy texture in the frosting.
How long can I store leftovers of my Red Velvet Buttermilk Cake?
Very! You can keep the cake in an airtight container at room temperature for up to 2 days. If you place the leftover slices in the fridge, they will stay fresh for about 5 days. To enjoy that delicious moistness, bring refrigerated slices back to room temperature before indulging.
Can I freeze Red Velvet Buttermilk Cake? If so, how?
Of course! To freeze your cake, wrap each cooled cake layer tightly in plastic wrap, followed by aluminum foil to prevent freezer burn. You can freeze it for up to 3 months. When you’re ready to serve, simply thaw the wrapped cakes in the fridge overnight. This gentle thaw helps the texture and flavor deepen before you frost it or enjoy it plain!
What should I do if my cake doesn’t rise properly?
If your Red Velvet Buttermilk Cake doesn’t rise as expected, it might be due to expired baking soda or the oven temperature being inaccurate. First, check the freshness of your baking soda—old baking agents lose potency. Additionally, ensuring your oven is preheated correctly can make a significant difference. Use an oven thermometer for accuracy! If you find your cakes are dense after baking, it could also be due to overmixing the batter; gentle mixing is key!
Are there any dietary considerations I need to be aware of?
Absolutely! If you're serving guests with allergies, be aware that this recipe contains gluten (from flour), dairy (from butter and cream cheese), and eggs. To make a gluten-free version, substitute with a 1:1 gluten-free baking blend and ensure your food coloring and other ingredients are certified gluten-free. For a vegan option, you can swap eggs with flax eggs, use vegan butter, and opt for dairy-free cream cheese. Just keep in mind that it might alter the texture and flavor slightly.
Can I use different types of food coloring if I don’t have red food coloring?
Definitely! While red is traditional and brings out the cake’s signature hue, you can experiment with other colors. Gel food colors work best to achieve vibrant results without altering the batter's consistency much. Just remember that the taste will remain neutral as food coloring is generally tasteless. If you are avoiding artificial coloring, consider using beet juice for a natural red hue—though it may affect the cake's flavor slightly!
Red Velvet Buttermilk Cake
Ingredients
Equipment
Method
- Preheat the oven to 160°C fan-forced (180°C conventional). Prepare your two 20 cm (8-inch) round pans by greasing them well and lining with parchment paper.
- Sift together the all-purpose flour, corn starch, cocoa powder, baking soda, and salt into a large mixing bowl.
- Whisk together the canola oil, melted butter, caster sugar, eggs, white vinegar, buttermilk, vanilla extract, and red food coloring in another bowl.
- Combine the wet and dry ingredients gently, stirring until just smooth. Avoid overmixing.
- Divide the batter evenly between your prepared pans. Bake for 35–40 minutes, or until a skewer inserted comes out clean.
- Cool the cakes in their pans for about 10 minutes, then move them to a wire rack to cool completely.
- Prepare the frosting by beating the room temperature unsalted butter and cream cheese together until fluffy. Gradually add the powdered sugar, lemon juice, and vanilla extract, mixing until pale and creamy.
- Level the tops of the cooled cakes if they have domed. Spread frosting generously between the layers and envelop the entire cake.
- Chill the frosted cake in the refrigerator for 1–2 hours before serving.
- Optional: Add a sprinkle of cocoa powder or chocolate shavings on top for an extra touch of elegance!


Leave a Reply