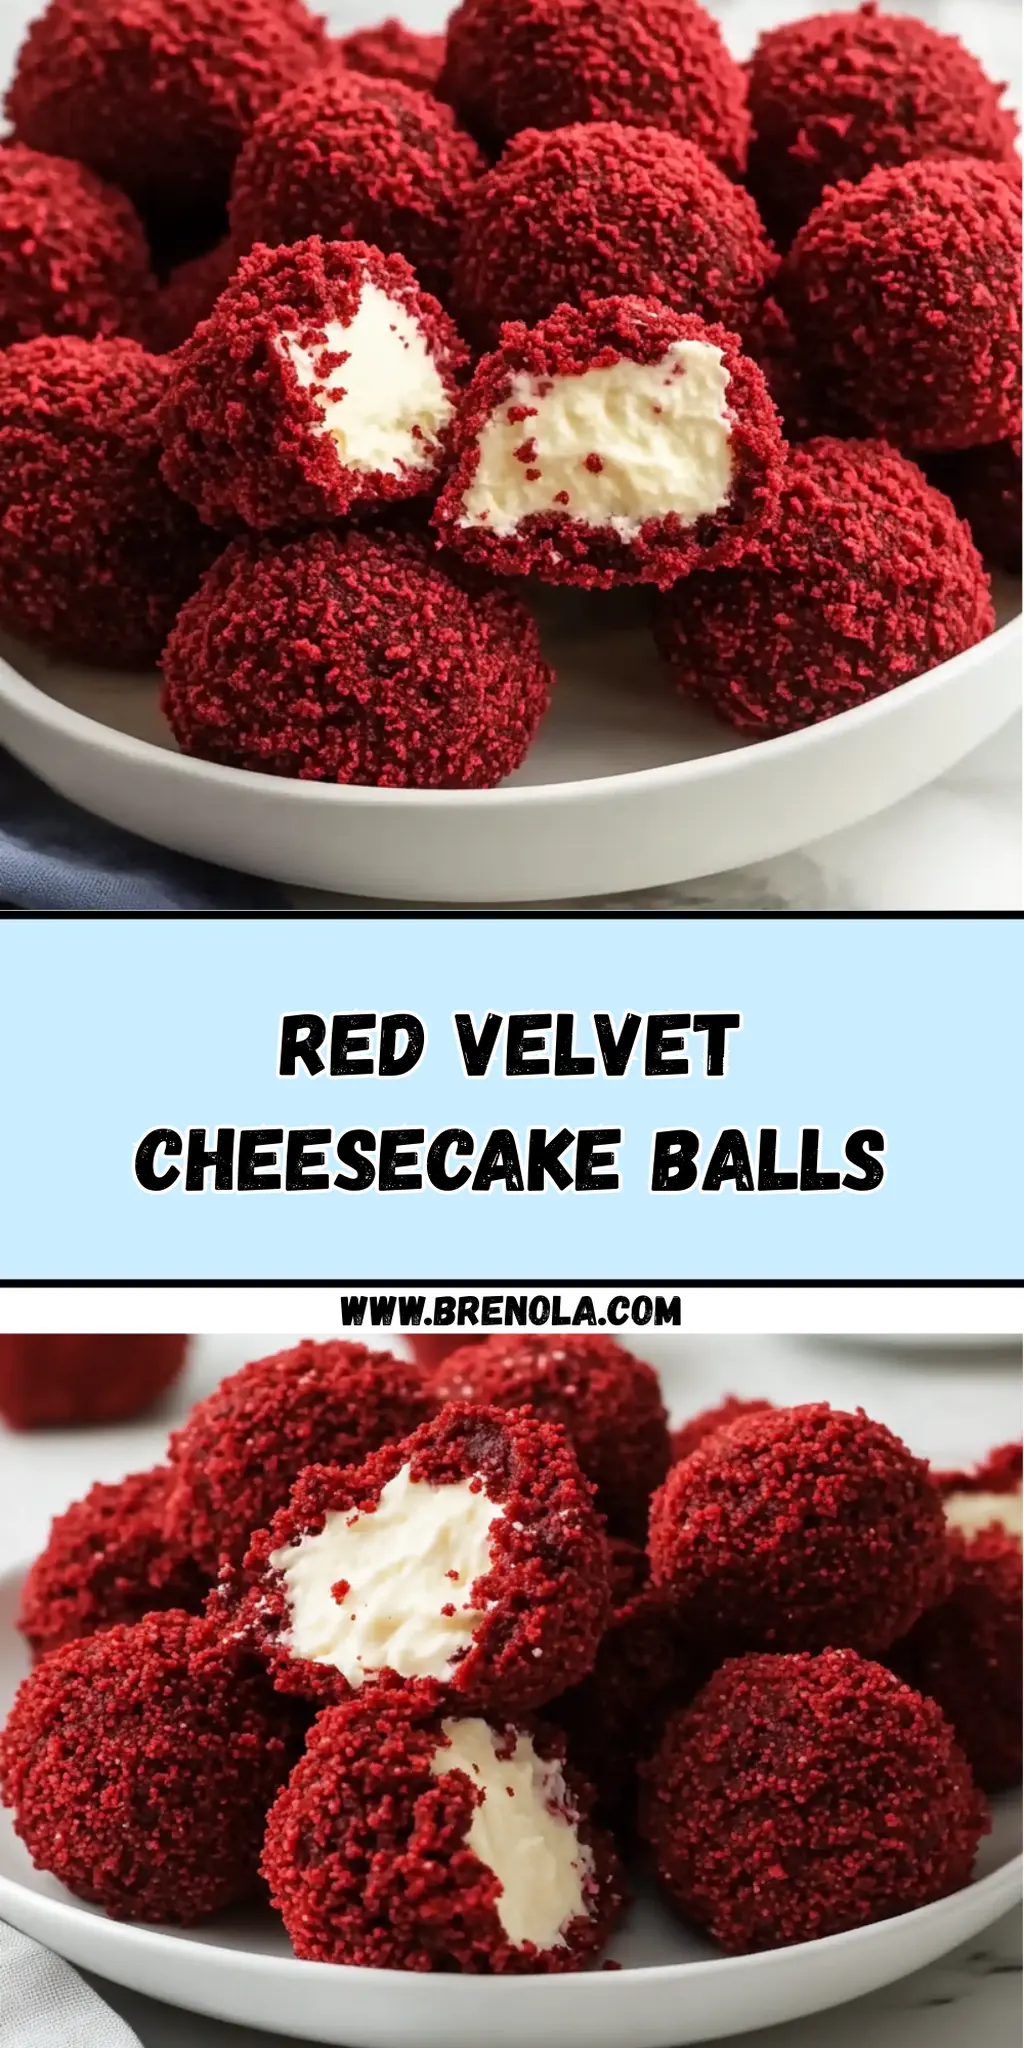
The moment I took my first bite of these Red Velvet Cheesecake Balls, I knew I had stumbled upon a little piece of heaven. Imagine sinking your teeth into a luscious ball that perfectly balances the rich flavors of red velvet cake and creamy cheesecake. Your taste buds deserve this delightful treat, and here's the best part: it’s incredibly easy to make!
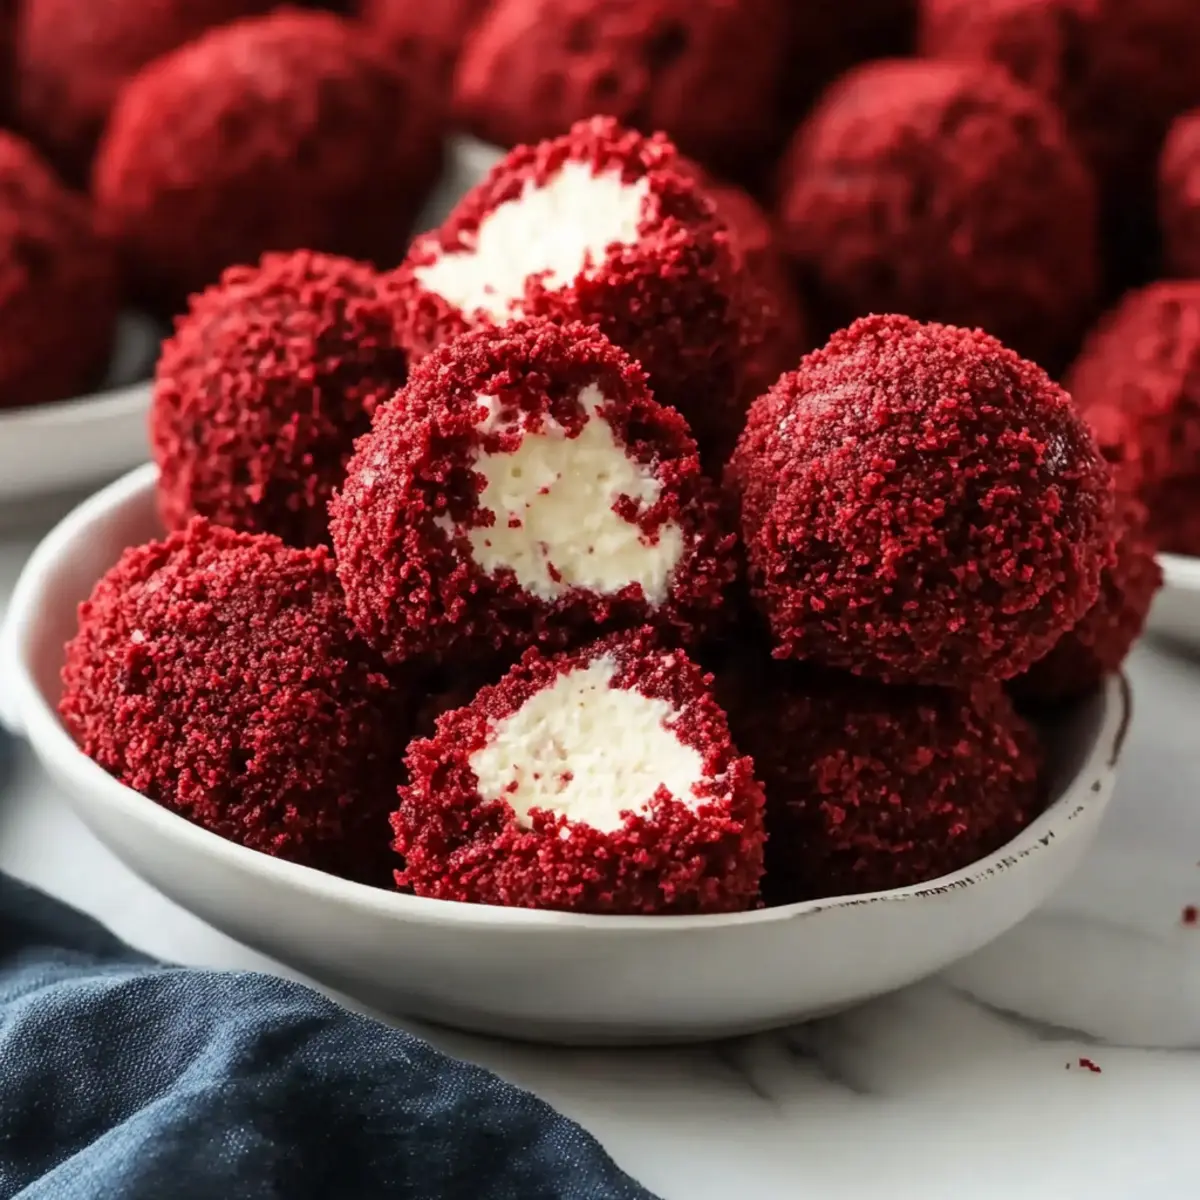
Whether you’re looking to impress guests at your next gathering or simply craving something sweet without the hassle, these delightful bites are your go-to solution. The combination of soft, crumbled red velvet enveloping a velvety cheesecake center is not only visually stunning but also a crowd-pleaser every time. Plus, they can be made in advance, making them a stress-free addition to any occasion!
Join me in this sweet adventure and turn your kitchen into a bakery filled with laughter, joy, and delightful aromas. Let’s get started on creating these irresistible Red Velvet Cheesecake Balls!
Why You'll Love This Red Velvet Cheesecake Balls
- These Red Velvet Cheesecake Balls are incredibly easy to make, allowing you to whip up a delicious dessert in no time.
- The rich and creamy flavors combine to create an irresistible treat that everyone will adore.
- Not only are they visually stunning, but their vibrant red color makes them the perfect centerpiece for any gathering.
- You can make them ahead of time, ensuring you have a stress-free sweet option ready for your next event.
Red Velvet Cheesecake Balls Ingredients
Delight in a sweet creation with these essential components!
For the Cake
• Red velvet cake mix – a convenient base that brings the beautiful hue and flavor.
• Water – helps the cake mix come together for a perfect moist texture.
• Vegetable oil – adds richness and moisture for a tender cake.
• Eggs – bind the ingredients and provide structure to the cake.
For the Cheesecake Filling
• Cream cheese – brings a luscious, creamy richness that contrasts beautifully with the cake.
• Confectioner’s sugar – sweetens the cheesecake filling and helps create that velvety texture.
• Heavy cream – increases creaminess and helps achieve stiff peaks for the filling.
• Vanilla extract – adds depth and a touch of warmth to the cheesecake flavor.
These simple yet essential ingredients make for an unforgettable treat: Red Velvet Cheesecake Balls!
How to Make Red Velvet Cheesecake Balls
-
Bake the Cake: Preheat your oven and bake the red velvet cake as per the box instructions, mixing together the water, vegetable oil, and eggs. Let it cool completely so it’s easier to crumble.
-
Crumble the Cake: Once cooled, take the cake and crumble it into fine pieces using your hands or a fork. You want a nice, even texture for rolling!
-
Mix the Cheesecake Filling: In another bowl, beat the softened cream cheese with the confectioner’s sugar until it’s smooth and creamy. This will be the delicious center of your cheesecake balls.
-
Whip It Good: Add heavy cream and vanilla extract to the cream cheese mixture. Whip until stiff peaks form, creating a rich filling that’s irresistible!
-
Prepare the Sheet: Line a baking sheet with parchment or wax paper. This will help prevent sticking when the cheesecake balls are placed on it.
-
Scoop and Shape: Use a cookie scoop to portion out the cheesecake mixture. Roll each portion into small balls and place them on the lined baking sheet.
-
Chill the Balls: Freeze the cheesecake balls for about 1 hour or until they are firm. This makes them easier to handle when rolling in the cake crumbs.
-
Coat with Crumbs: Once chilled, roll each ball in the crumbled red velvet cake until they are fully coated. This adds a lovely texture to each bite!
-
Store and Serve: Keep the coated cheesecake balls in the refrigerator until you’re ready to serve. They taste best chilled and are sure to impress!
Optional: Sprinkle with extra confectioner’s sugar for a gorgeous finish.
Exact quantities are listed in the recipe card below.
Make Ahead Options
These Red Velvet Cheesecake Balls are perfect for meal prep! You can make the cheesecake filling and shape the balls up to 24 hours in advance. Simply follow the first seven steps of the recipe, then freeze the shaped cheesecake balls. Once frozen, transfer them to an airtight container and keep them in the freezer. When you’re ready to serve, roll them in the crumbled red velvet cake crumbs (which can also be prepared in advance and stored in a separate container). This way, they remain just as delicious and fresh, saving you time on busy days and ensuring an impressive dessert is always on hand!
Red Velvet Cheesecake Balls Variations
Feel free to explore these enticing twists to make the recipe uniquely yours!
-
Gluten-Free: Substitute the red velvet cake mix with a gluten-free blend. Everyone can enjoy these tasty bites regardless of dietary needs.
-
Nutty Crunch: Add finely chopped walnuts or pecans to the cheesecake mixture for a delightful crunch that contrasts beautifully with the creamy center.
-
Chocolate Drizzle: Melt some dark chocolate and drizzle over the coated balls for a decadent finish. This adds an extra layer of indulgence that chocolate lovers will adore.
-
Spicy Kick: Sprinkle a pinch of cinnamon or cayenne into the cheesecake filling for a surprising, warming spice that elevates the flavor profile.
-
Cream Cheese Swap: For a tangier version, replace cream cheese with mascarpone cheese. This will give a lighter texture and a less pronounced cream cheese flavor.
-
Fruit Infusion: Incorporate crushed raspberries or strawberries into the cheesecake filling for a fruity burst that complements the red velvet beautifully.
-
Lemon Zest: Grate some fresh lemon zest into the cheesecake mixture for a refreshing citrus twist that brightens the rich flavors of the dessert.
-
Vegan Version: Use a plant-based cake mix and substitute the cream cheese with vegan cream cheese to create a delightful vegan version everyone can savor.
Making these substitutions and variations will sure keep the magic alive in your kitchen! Enjoy the creativity!
What to Serve with Red Velvet Cheesecake Balls?
Looking to create a memorable meal around these delightful treats? Here are some pairings that will elevate your gathering.
-
Velvety Cream Cheese Frosting: This luscious frosting is a perfect dip, enhancing the creamy cheesecake flavor for an extra indulgent experience.
-
Fresh Berries: Strawberries, raspberries, or blueberries add a refreshing burst of flavor and a pop of color, balancing the sweetness of the cheesecake balls.
-
Chocolate-Covered Strawberries: Elevate the dessert table with these sweet delights that pair beautifully with the rich flavors of the red velvet.
-
Whipped Cream: Light and airy, a dollop of freshly made whipped cream offers a delightful contrast in texture and richness with each bite.
-
Sparkling Wine or Champagne: A bubbly drink enhances the indulgence of the cheesecake balls and adds a festive touch to your gathering.
-
Hot Cocoa or Coffee: Rich beverages like hot cocoa or a warm cup of coffee can magnify the passion of the red velvet flavor, creating a cozy experience.
Impress your guests by serving a combination of these delicious pairings with your Red Velvet Cheesecake Balls!
How to Store and Freeze Red Velvet Cheesecake Balls
Fridge: Store the cheesecake balls in an airtight container in the refrigerator for up to 5 days. This keeps them fresh and perfect for snacking!
Freezer: For longer storage, place the cheesecake balls in a single layer on a baking sheet, freeze until firm, and then transfer to a freezer-safe container for up to 3 months.
Reheating: If served directly from the freezer, allow the cheesecake balls to thaw in the fridge for a couple of hours before enjoying. They taste best chilled!
Wrapping: To prevent freezer burn, wrap each ball individually in plastic wrap before placing them in the container. This will maintain their delicious flavor and texture.
Chef's Helpful Tips
- When making Red Velvet Cheesecake Balls, ensure your cake is completely cool before crumbling to avoid a sticky mess.
- Consider sifting the confectioner’s sugar to eliminate any lumps for a smoother filling.
- To achieve the perfect consistency in your whipped cheesecake, start with very soft cream cheese, as this will ensure seamless mixing.
- Freeze the cheesecake balls for at least one hour before rolling them in cake crumbs to maintain their shape and make coating easier.
Red Velvet Cheesecake Balls Recipe FAQs
How do I choose the right box of red velvet cake mix?
Absolutely! When selecting a box of red velvet cake mix, look for options with fewer artificial ingredients and a vibrant color. You might want to choose a mix that contains cocoa powder, as it enhances the chocolate flavor without overpowering the iconic red hue.
What is the best way to store Red Velvet Cheesecake Balls?
I recommend storing your cheesecake balls in an airtight container in the refrigerator where they can stay fresh for up to 5 days. Make sure there’s enough space between them, as they can get sticky if stacked.
Can I freeze Red Velvet Cheesecake Balls?
Very! To freeze, first place the cheesecake balls in a single layer on a baking sheet and freeze until firm. Then, transfer them to a freezer-safe container and ensure they're separated by parchment paper if stacking. They can be frozen for up to 3 months! Always remember to thaw them in the fridge for a couple of hours before serving for the best taste and texture.
What should I do if my cheesecake filling isn't firm enough?
If your cheesecake filling isn't achieving stiff peaks, it could be due to the cream cheese being too cold or not soft enough. Allow it to warm up slightly at room temperature before whipping. You can also try adding a bit more heavy cream. Whip again until you see those lovely peaks form! Patience is key – it can take some time to perfect the texture.
Are there any dietary considerations I should keep in mind?
Certainly! If you're serving these Red Velvet Cheesecake Balls to guests, consider allergens like dairy in the cream cheese and heavy cream, which can affect those with lactose intolerance. For a gluten-free version, look for gluten-free cake mix options. Always check ingredient labels for any additional allergies, especially for pets, as chocolate can be harmful to them.
Can I use homemade red velvet cake instead of a mix?
Absolutely! If you want to create a more personalized touch, you can bake a homemade red velvet cake. Just ensure it cools completely before crumbling it into fine pieces. The key is to maintain the same proportions to achieve that delicious flavor and eye-catching color, so follow a good homemade recipe closely!
Red Velvet Cheesecake Balls
Ingredients
Equipment
Method
- Preheat your oven and bake the red velvet cake as per the box instructions, mixing together the water, vegetable oil, and eggs. Let it cool completely so it’s easier to crumble.
- Once cooled, take the cake and crumble it into fine pieces using your hands or a fork. You want a nice, even texture for rolling!
- In another bowl, beat the softened cream cheese with the confectioner’s sugar until it’s smooth and creamy. This will be the delicious center of your cheesecake balls.
- Add heavy cream and vanilla extract to the cream cheese mixture. Whip until stiff peaks form, creating a rich filling that’s irresistible!
- Line a baking sheet with parchment or wax paper. This will help prevent sticking when the cheesecake balls are placed on it.
- Use a cookie scoop to portion out the cheesecake mixture. Roll each portion into small balls and place them on the lined baking sheet.
- Freeze the cheesecake balls for about 1 hour or until they are firm. This makes them easier to handle when rolling in the cake crumbs.
- Once chilled, roll each ball in the crumbled red velvet cake until they are fully coated. This adds a lovely texture to each bite!
- Keep the coated cheesecake balls in the refrigerator until you’re ready to serve. They taste best chilled and are sure to impress!


Leave a Reply