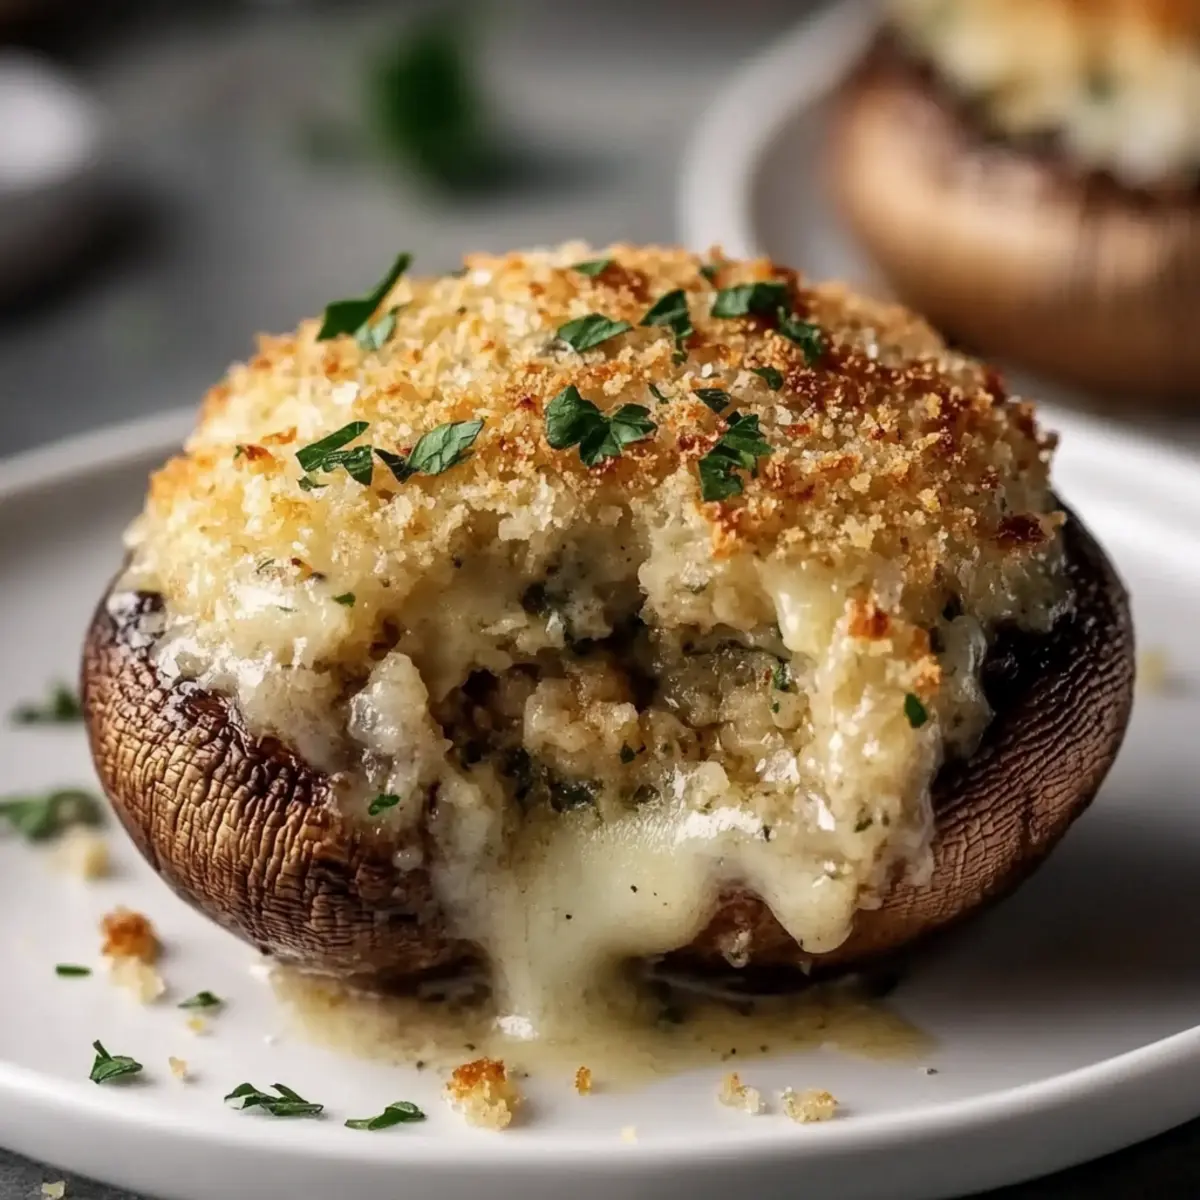
The moment I opened my oven and inhaled the buttery aroma of these Olive Garden Stuffed Mushrooms, it was as if I was transported to a cozy Italian trattoria. There's just something undeniably comforting about stuffing fresh mushrooms with flavors that dance together—savory clams, fresh garlic, and a hint of oregano. It’s a dish that can easily elevate a casual weeknight dinner or impress guests at a gathering without the stress of complicated cooking techniques.
I was hunting for something different to please the crowd at my last dinner party. After a whirlwind of fast food fatigue, I craved a homemade dish that was simple but packed with flavor. Enter these stuffed mushrooms: effortless to prepare, delightful to savor, and incredibly versatile. They can serve as a fantastic appetizer or a side dish that steals the show. Let me guide you through each step of this easy recipe that promises to impress both your taste buds and your dinner guests!
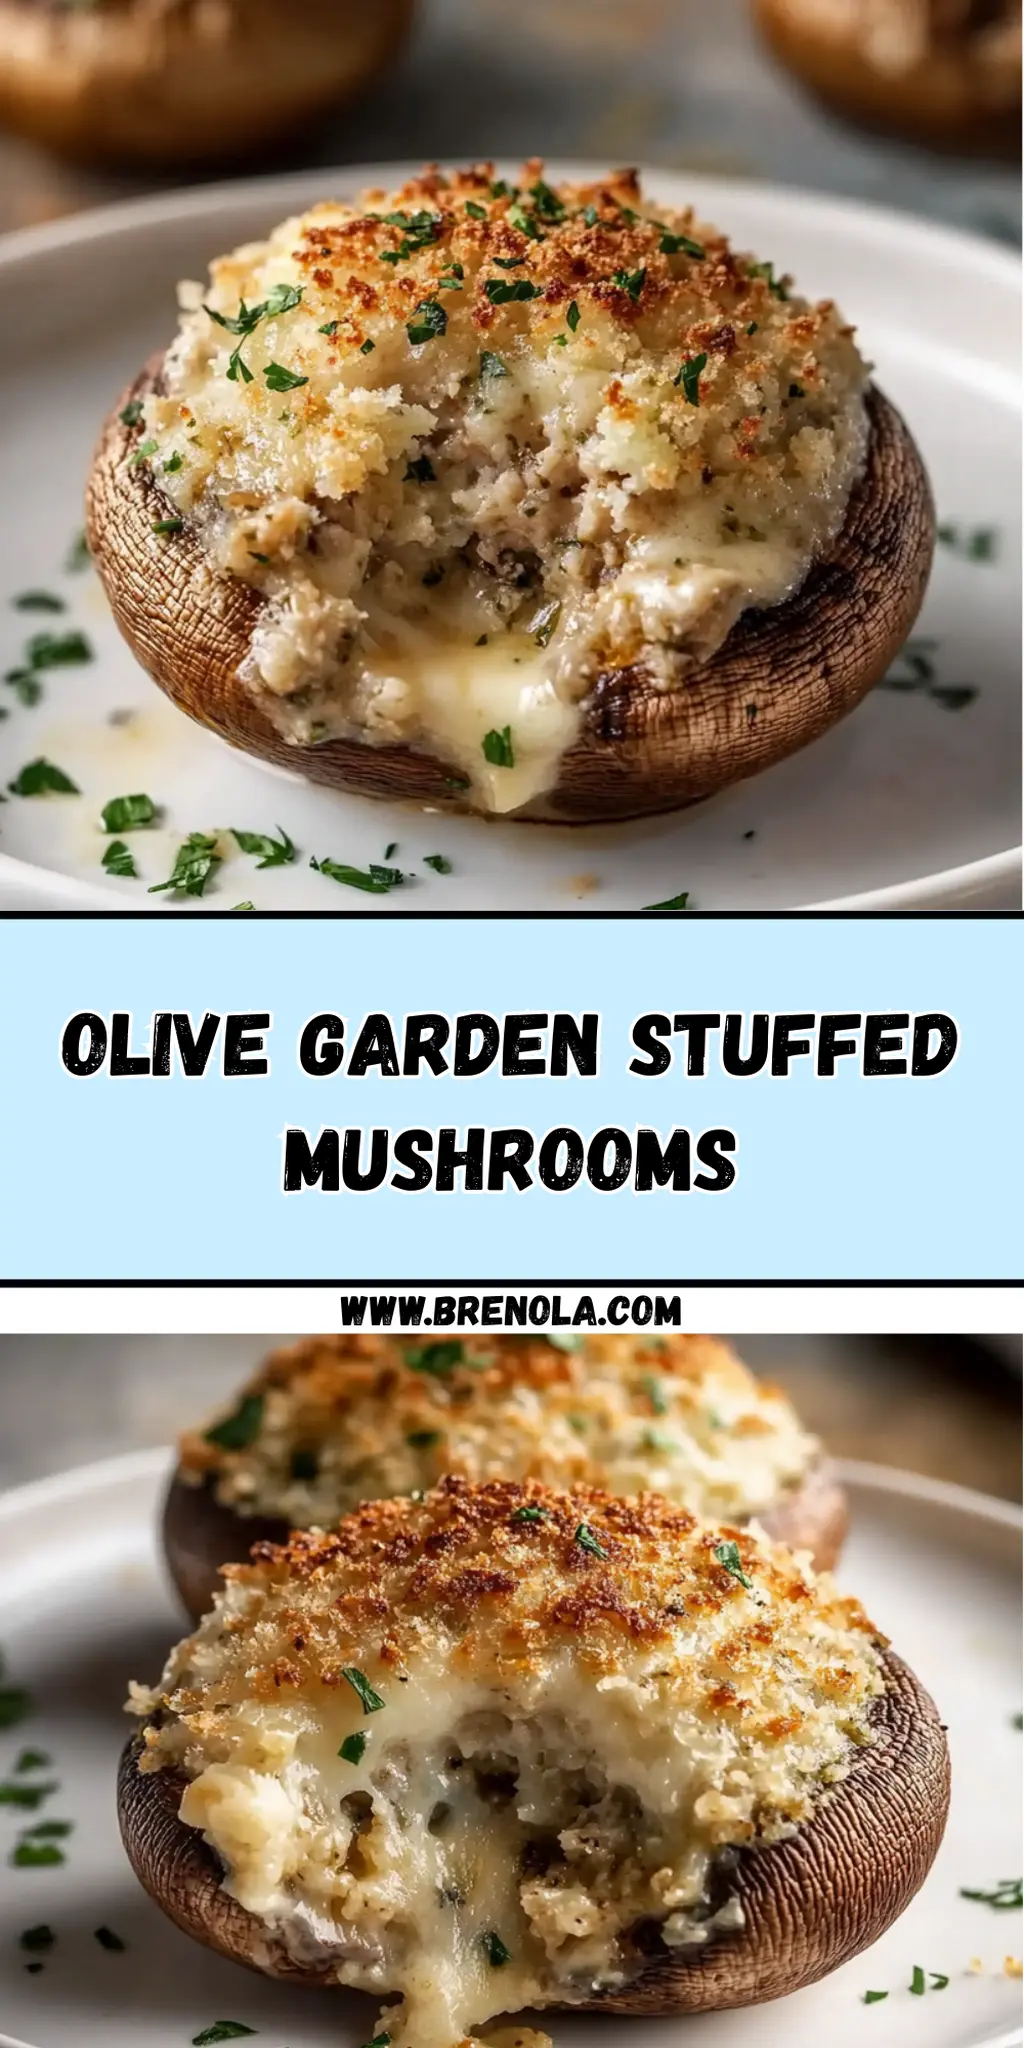
Why You'll Love This Olive Garden Stuffed Mushrooms
- These Olive Garden Stuffed Mushrooms are incredibly easy to prepare, making them perfect for both novice cooks and seasoned chefs alike.
- The flavor combination of clams, garlic, and a sprinkle of cheese creates a mouthwatering experience that will have everyone coming back for more.
- Their versatility means they shine as an appetizer at parties or as a delightful side dish for family meals.
- With minimal prep time and just a few simple steps, you'll be able to whip up this crowd-pleaser in no time.
- The appealing presentation of these stuffed mushrooms also adds a touch of elegance to your table, making every occasion feel special.
Olive Garden Stuffed Mushrooms Ingredients
For the Filling
• Large fresh mushrooms – 12 caps will hold the delicious stuffing beautifully.
• Italian bread crumbs – ½ cup adds a delightful crunch and texture.
• Large egg – 1, lightly beaten, helps bind the filling together.
• Melted butter – 1 tablespoon enhances the savory flavor of the filling.
• Minced clams – 1 can (6 oz), drained, brings a briny depth that’s delightful.
• Freshly minced garlic – 2 teaspoon infuses the mushrooms with aromatic goodness.
• Dried oregano – 1 teaspoon adds a classic Italian herb flavor.
• Green onion – 1, finely chopped (white and light green parts), for a fresh crunch.
• Mozzarella cheese – ¼ cup, finely shredded, melts beautifully over the mushrooms.
For Topping
• Melted butter – 3 tbsp, drizzled on top, keeps the mushrooms juicy.
• Grated Parmesan cheese – 3 tablespoon adds a rich, salty finish to each stuffed mushroom.
These Olive Garden Stuffed Mushrooms are not just a dish; they’re an occasion waiting to happen!
How to Make Olive Garden Stuffed Mushrooms
-
Preheat your oven to 350°F. Lightly coat a baking dish with non-stick spray to prevent sticking. This step ensures a golden, tender finish on your mushrooms.
-
Clean the mushroom caps by gently wiping them with a damp paper towel. Remove the stems and set them aside for later use in the filling.
-
Combine breadcrumbs, egg, melted butter, minced clams, garlic, oregano, and green onion in a bowl. Mix until the ingredients are evenly blended, creating a delicious filling.
-
Fill each mushroom cap generously with 1 to 2 spoonfuls of the mixture. Press lightly to pack them in, ensuring each cap is brimming with flavors.
-
Arrange the stuffed mushrooms in the baking dish with their filling sides facing up. This presentation will make them visually appealing as they bake.
-
Drizzle the remaining 3 tablespoons of melted butter over the tops of the mushrooms. Then, cover the dish with foil, sealing in moisture and flavor.
-
Bake for 20 to 30 minutes until the mushrooms are tender and juicy. You'll notice a delightful aroma filling your kitchen—it's a good sign!
-
Uncover the dish and sprinkle mozzarella cheese over each mushroom. Return them to the oven and bake for an additional 2 to 3 minutes, just until the cheese is perfectly melted.
-
Cool slightly before serving. This gentle cooling allows the flavors to settle and makes it easier to handle.
Optional: Garnish with fresh parsley for a pop of color and freshness.
Exact quantities are listed in the recipe card below.
What to Serve with Olive Garden Stuffed Mushrooms?
Delight in a meal that feels like a warm hug while pairings elevate your creations beautifully.
-
Garlic Bread: This classic side offers a crunchy texture that complements the soft, savory mushrooms, creating a duet of flavor.
-
Caesar Salad: Crisp romaine, creamy dressing, and crunchy croutons provide a refreshing contrast that balances the richness of the stuffed mushrooms.
-
Roasted Vegetables: A medley of colorful vegetables, caramelized to perfection, adds both depth and delightful earthiness to your meal.
-
Italian Pasta: A light pasta with olive oil and herbs pairs wonderfully, giving a comforting touch alongside the stuffed mushrooms' savory notes.
-
White Wine: A chilled Sauvignon Blanc or light Pinot Grigio enhances the flavors of the dish while making every bite feel special.
-
Homemade Tiramisu: Finish on a sweet note with this creamy Italian dessert that echoes the flavors of your savory course, ensuring a memorable meal.
-
Zucchini Noodles: For a healthful touch, spiralized zucchini tossed in olive oil and lemon brightens the plate and adds an appealing textural contrast.
-
Herbed Quinoa: This nutty, fluffy grain serves as a wonderful base, soaking up the flavors from the mushrooms while introducing a touch of protein.
Make Ahead Options
These Olive Garden Stuffed Mushrooms are absolutely perfect for meal prep enthusiasts looking to save time before a busy week! You can prepare the filling up to 24 hours in advance. Just mix the breadcrumbs, egg, clams, garlic, oregano, and green onion, then store it in an airtight container in the refrigerator. Additionally, you can clean and stuff the mushroom caps, and refrigerate them for up to 3 days before baking. To maintain their quality, cover the dish with foil to prevent drying out. When you're ready to serve, simply bake as directed, adding the mozzarella and cooking until melted for restaurant-quality results with minimal effort!
How to Store and Freeze Olive Garden Stuffed Mushrooms
Fridge: Store leftover Olive Garden Stuffed Mushrooms in an airtight container for up to 3 days. This ensures they stay fresh and flavorful for your next craving.
Freezer: If you want to freeze them, place the cooled stuffed mushrooms in a single layer on a baking sheet. Once frozen solid, transfer them to a freezer bag for up to 3 months.
Reheating: To reheat, bake from frozen at 350°F for about 20-25 minutes or until heated through. You can also thaw them overnight in the fridge before reheating for a quicker option.
Airtight Guidance: Always make sure the container is properly sealed to keep moisture at bay, preserving the delightful texture and taste of the mushrooms.
Olive Garden Stuffed Mushrooms Variations
Feel free to add your own twist to these delightful stuffed mushrooms and create a dish that's uniquely yours!
-
Vegetarian: Replace clams with finely chopped spinach or artichokes for a fresh and vibrant filling. Spinach adds a pop of color and nutrients, making it a fantastic choice for those who prefer plant-based options.
-
Gluten-Free: Swap Italian breadcrumbs for gluten-free panko or ground almonds, ensuring every bite remains delicious without the gluten.
-
Spicy Kick: Add diced jalapeños or a dash of crushed red pepper to the filling for a zesty heat that will awaken your taste buds.
-
Cheesier: Boost the cheese game by mixing in cream cheese or ricotta with your filling—this gives a richer, creamier texture everyone will love.
-
Herb Infusion: Mix in fresh herbs like basil or parsley to the filling for a brightness that adds freshness and a pop of flavor in every bite.
-
Seafood Twist: Incorporate diced shrimp or crab instead of clams for an even more decadent seafood experience.
-
Savory Bacon: Crumbled cooked bacon in the filling elevates the dish, adding a smoky richness that pairs beautifully with earthy mushrooms.
-
Nutty Addition: Sprinkle chopped toasted walnuts or pecans into the filling for a delightful crunch and added depth of flavor.
With these variations, your Olive Garden Stuffed Mushrooms can transform into an endless array of delightful appetizers, ensuring every gathering is filled with excitement and flavor!
Chef's Helpful Tips
- When preparing Olive Garden Stuffed Mushrooms, make sure to clean the mushrooms gently with a damp paper towel to avoid water saturation that can make them soggy.
- A common mistake is overstuffing the mushrooms, so aim for 1 to 2 spoonfuls of the filling to ensure even cooking and flavorful bites.
- To enhance the filling's flavor, let the clams and garlic marinate in the melted butter for a few minutes before mixing it all together.
- Bake the mushrooms covered for most of the cooking time and only uncover them in the last few minutes to get a perfectly melted cheese topping without drying them out.
Olive Garden Stuffed Mushrooms Recipe FAQs
What kind of mushrooms should I use for stuffing?
Absolutely! For this recipe, you'll want to use large fresh mushrooms, like portobellos or button mushrooms. They provide a sturdy cap that holds up well under the filling. Look for mushrooms that are firm and plump, avoiding any with dark spots or mushy textures, which indicate overripeness.
How should I store leftover Olive Garden Stuffed Mushrooms?
To enjoy your leftovers, place the stuffed mushrooms in an airtight container in the fridge. They will stay fresh for up to 3 days. Just make sure to let them cool to room temperature first to prevent condensation, which can make them soggy.
Can I freeze Olive Garden Stuffed Mushrooms?
Very! To freeze, first allow the cooked stuffed mushrooms to cool completely. Arrange them in a single layer on a baking sheet and freeze until solid, about 1-2 hours. Then, transfer them to a freezer bag or airtight container, where they can be stored for up to 3 months. When you’re ready to enjoy them, bake directly from frozen at 350°F for about 20-25 minutes, or thaw overnight in the fridge for quicker reheating.
What if my stuffed mushrooms are too soggy after baking?
A common challenge! If your stuffed mushrooms turn out soggy, it might be due to excess moisture in the mushrooms themselves. Make sure to gently clean them with a damp paper towel rather than rinsing them. Also, avoid another common mistake: overstuffing. Aim for 1-2 spoonfuls of filling per mushroom cap to ensure even cooking and avoid sogginess.
Are Olive Garden Stuffed Mushrooms safe for people with seafood allergies?
Not at all! This recipe contains minced clams, which can trigger seafood allergies. If you or your guests have these allergies, consider using a different filling such as sautéed spinach and cheese or a mix of vegetables that everyone can enjoy. Always be mindful of guests' dietary restrictions when preparing dishes.
Can I reheat leftover stuffed mushrooms?
Definitely! To reheat, simply place the mushrooms back in an oven preheated to 350°F. Bake for about 10-15 minutes until heated through, and feel free to add a sprinkle of extra cheese on top for a deliciously melty finish. Enjoy the comfort of homemade food any day of the week!
Olive Garden Stuffed Mushrooms
Ingredients
Equipment
Method
- Preheat your oven to 350°F. Lightly coat a baking dish with non-stick spray.
- Clean the mushroom caps by gently wiping them with a damp paper towel and removing the stems.
- Combine breadcrumbs, egg, melted butter, minced clams, garlic, oregano, and green onion in a bowl and mix until evenly blended.
- Fill each mushroom cap generously with 1 to 2 spoonfuls of the mixture, pressing lightly to pack it in.
- Arrange the stuffed mushrooms in the baking dish with their filling sides facing up.
- Drizzle the remaining melted butter over the tops of the mushrooms, then cover the dish with foil.
- Bake for 20 to 30 minutes until the mushrooms are tender and juicy.
- Uncover the dish and sprinkle mozzarella cheese over each mushroom, then return to the oven for an additional 2 to 3 minutes until the cheese melts.
- Cool slightly before serving. Optional: Garnish with fresh parsley.


Leave a Reply