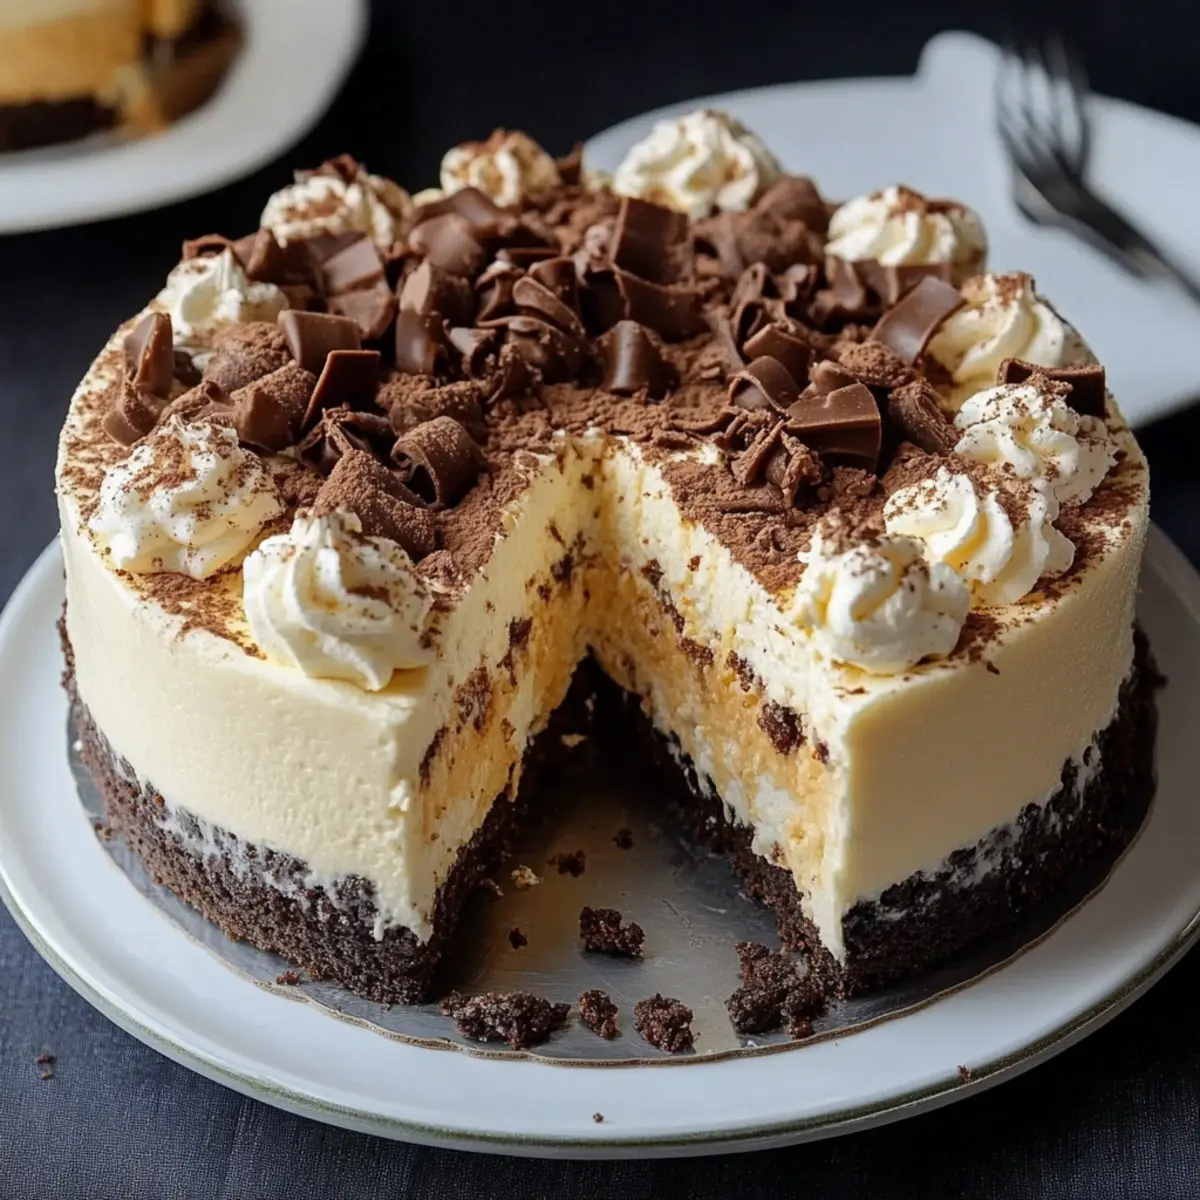
The first bite of my Cannoli Cheesecake takes me back to that quaint Italian café where the walls were adorned with colorful murals and the air was filled with the sweet scent of chocolate and creamy ricotta. I created this dessert to capture those memories—a perfect blend of rich flavors and silky textures that transforms any gathering into a special occasion.
When life feels hectic, and fast food no longer cuts it, this luscious cheesecake becomes my delicious solution. You’d be surprised at how effortlessly this luxurious dessert comes together. It requires just a handful of simple ingredients and a little bit of love, yet the end result is nothing short of impressive.
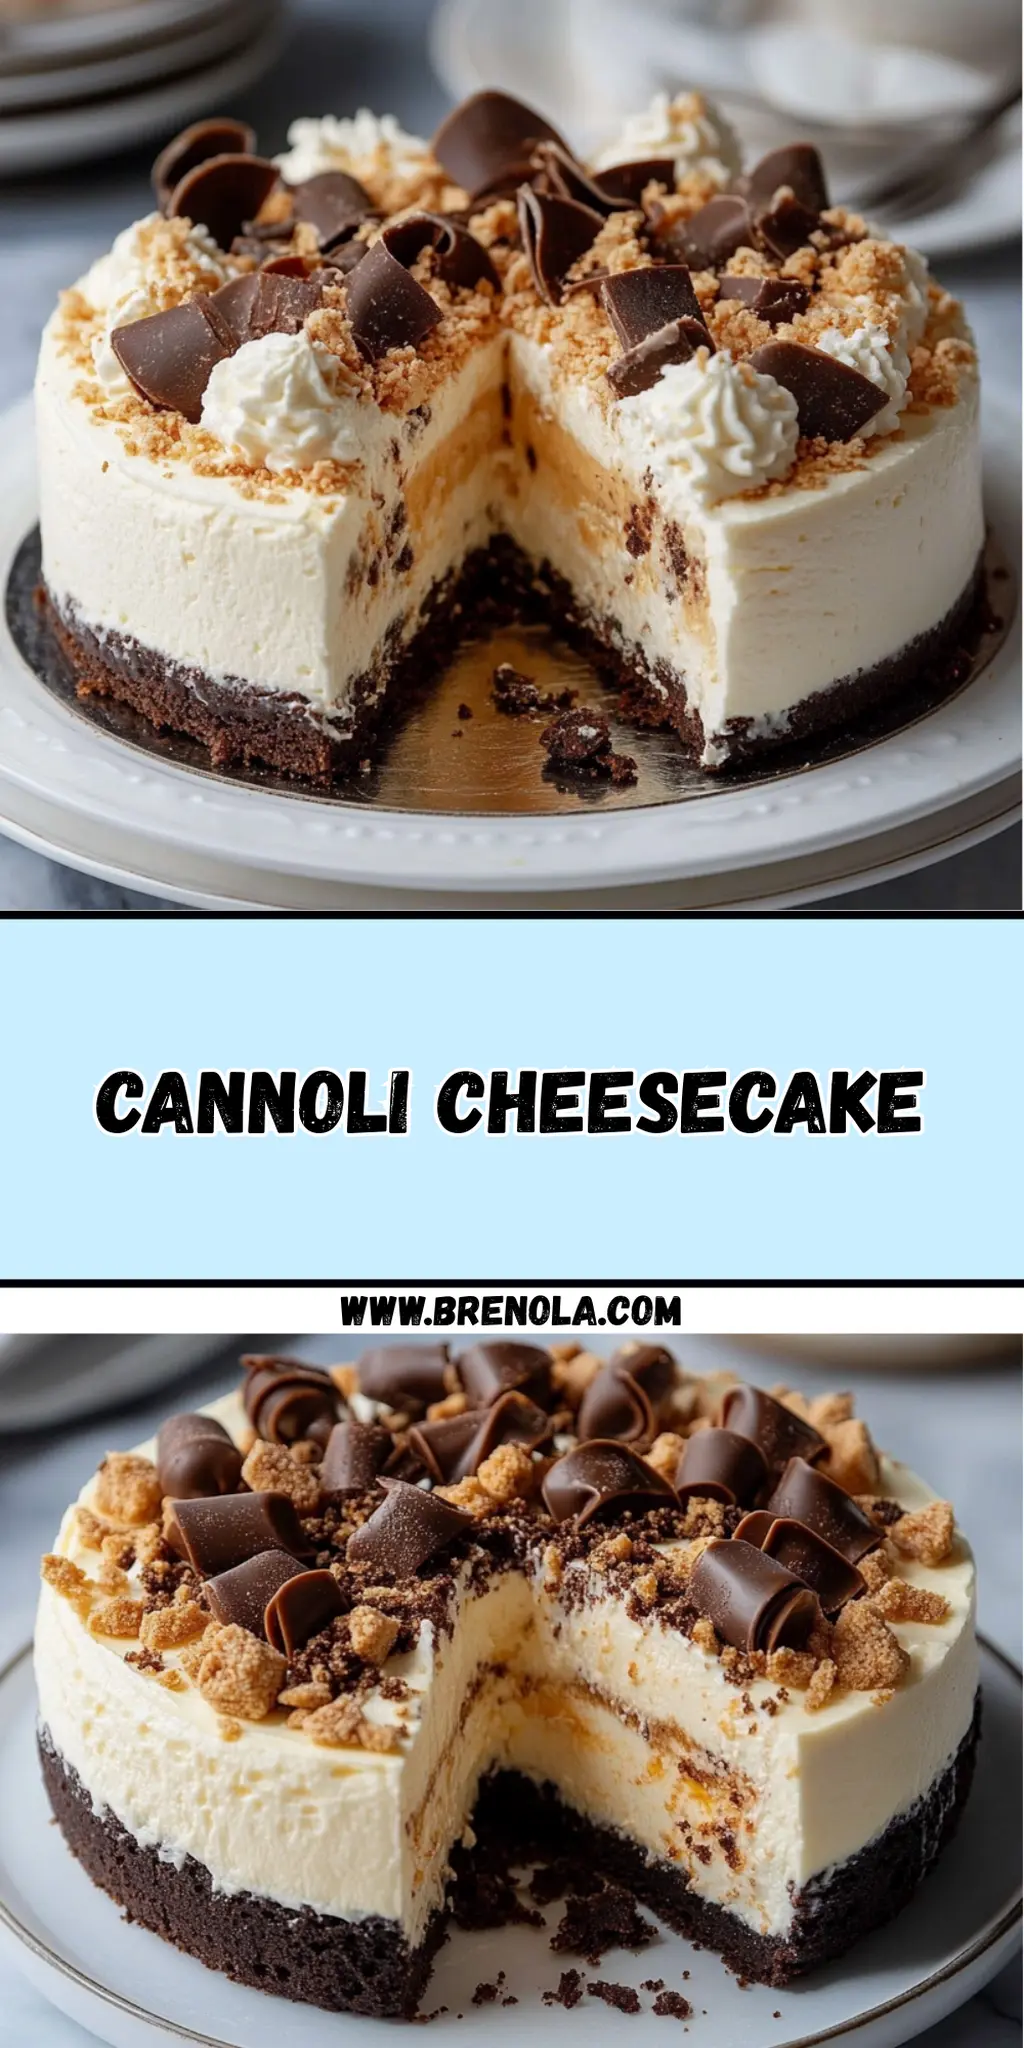
Whether you're entertaining friends or indulging in a cozy night in, this Cannoli Cheesecake is a crowd-pleaser that will leave everyone begging for seconds. Join me in creating a moment of dessert magic that beats the mundane, and let's get started on this decadent treat that combines the best of both worlds: traditional cannoli flavors and the creamy delight of cheesecake!
Why You'll Love This Cannoli Cheesecake
- This Cannoli Cheesecake is incredibly easy to make, yet it feels like a gourmet dessert you'll find in the finest of restaurants.
- The harmonious blend of ricotta, mascarpone, and cream cheese creates a decadent flavor profile that's truly unforgettable.
- Its versatility allows you to customize it with various toppings, making it perfect for any occasion or gathering.
- Visually stunning and rich in flavor, this cheesecake will impress your guests and leave them craving more.
- Whether for a celebration or a cozy night in, this dessert is sure to be a hit with everyone.
Cannoli Cheesecake Ingredients
Discover the essential ingredients that make this Cannoli Cheesecake a show-stopping dessert!
For the Crust
• Chocolate cookie crumbs – Adds a rich, chocolaty base that perfectly complements the creamy filling.
• Unsalted butter – Used to bind cookie crumbs together; don't substitute with salted to keep flavors balanced.
For the Filling
• Whole milk ricotta cheese – The star of the cheesecake, adding that authentic cannoli flavor; make sure it's well-drained for the best texture.
• Mascarpone cheese – Provides a velvety richness that elevates the cheesecake.
• Cream cheese – Softened for easier mixing, it contributes to the creamy consistency of the filling.
• Granulated sugar – Sweetens the mixture; adjust according to your sweetness preference!
• Large eggs – Binder for the filling; one at a time helps achieve a smooth blend.
• Vanilla extract – Enhances the flavor; use pure vanilla for the best aroma and taste.
• Mini chocolate chips – Sprinkle these in for delightful bursts of chocolate goodness throughout the cheesecake.
For Topping (Optional)
• Whipped cream – Adds an airy touch on top; use heavy cream for a stable whip.
• Extra mini chocolate chips – For garnish, giving an extra chocolatey kick.
• Crushed cookies or chocolate pieces – Use these to create a delightful visual and textural contrast on your dessert!
How to Make Cannoli Cheesecake
-
Combine the chocolate cookie crumbs and melted butter in a bowl until the texture resembles damp sand. Press this mixture firmly into the bottom and slightly up the sides of a greased springform pan. Freeze it while you prepare the filling.
-
Beat together the ricotta, mascarpone, and cream cheese in a large bowl until smooth and creamy, about 2–3 minutes on medium speed. This is the key to a luscious filling!
-
Add the sugar and vanilla extract to the cheese mixture. Beat until fully incorporated and fluffy—this will give your cheesecake that rich, sweet flavor.
-
Incorporate the eggs one at a time, mixing on low after each addition to ensure a silky texture. Be careful not to overmix; just enough to blend well.
-
Fold in the mini chocolate chips gently with a spatula. This adds delightful bursts of chocolate throughout your cheesecake.
-
Pour the filling into the chilled crust and smooth the top with a spatula. Bake at 325°F (163°C) for 60–70 minutes, or until the edges are set while the center retains a slight jiggle.
-
Cool the cheesecake by turning off the oven, cracking the door open, and allowing it to sit in there for 1 hour. This prevents cracking and ensures a creamy texture.
-
Chill it by letting it cool to room temperature, then covering and refrigerating for at least 4 hours or overnight. This patience is key to achieving the best flavors!
-
Decorate before serving with whipped cream, extra mini chocolate chips, or any preferred toppings to give it a finishing touch that's as tempting as it is beautiful.
Optional: For an extra touch, drizzle some chocolate sauce over the whipped cream.
Exact quantities are listed in the recipe card below.
What to Serve with Cannoli Cheesecake?
Indulge in the perfect meal experience by pairing this enchanting dessert with delightful accompaniments that sincerely elevate your dining occasion.
-
Espresso Coffee: The rich and bitter notes of espresso perfectly balance the sweetness of the cheesecake, delivering a comforting end to your meal.
-
Fresh Berries: A burst of tartness from raspberries or strawberries complements the creamy filling and adds a refreshing contrast to each bite.
-
Vanilla Ice Cream: The smooth, cold indulgence of vanilla ice cream creates a heavenly contrast. Drizzling it with chocolate sauce makes every spoonful decadent.
-
Pistachio Crumble: The nutty crunch of crushed pistachios sprinkled over the cheesecake adds a delightful texture. Their subtle saltiness enhances the dessert's sweetness.
-
Chocolate Port Wine: Pairing this cheesecake with a glass of rich chocolate port wine elevates its luxurious feel, creating an irresistible combination of chocolatey delight.
-
Mint Leaves: Fresh mint not only looks beautiful on the plate but also adds a light, refreshing note that cuts through the creaminess, making the dessert even more enjoyable.
By gracefully considering these pairings, your Cannoli Cheesecake journey transforms from delightful dessert to a beautiful feast for all the senses.
Make Ahead Options
These Cannoli Cheesecake preparations are a lifesaver for busy weeknights or entertaining! You can prepare the crust and the filling up to 24 hours in advance. Start by mixing the chocolate cookie crumbs and melted butter, then press it into the springform pan; refrigerate this crust. Make the cheesecake filling by beating the cheeses and sugar, then refrigerate it in a separate bowl. When you're ready to enjoy, simply pour the filling into the chilled crust, bake, and cool as directed. Covering both components properly helps maintain their quality and flavor, ensuring your decadent Cannoli Cheesecake remains just as delicious!
Cannoli Cheesecake Variations
Feel free to get creative and make this Cannoli Cheesecake your own with these delicious twists!
-
Gluten-Free: Use gluten-free chocolate cookie crumbs. This swap ensures everyone can enjoy this scrumptious dessert without worry.
-
Vegan: Substitute the cheeses with plant-based alternatives and flaxseed eggs. You'll achieve a creamy, compassionate option that’s still delectable!
-
Extra Chocolate: Add cocoa powder to the crust or increase the mini chocolate chips in the filling for a chocolate lover’s dream.
-
Nutty Flavor: Mix in finely chopped pistachios or almonds into the filling. This adds a delightful crunch and enhances the cannoli essence.
-
Fruity Burst: Incorporate finely chopped candied orange peel for a twist reminiscent of traditional cannoli. The citrus note brightens the flavors beautifully.
-
Spicy Kick: A pinch of cinnamon or nutmeg can elevate the flavor profile, bringing warm undertones that make every bite uniquely delightful.
-
Swirl it Up: Create a ricotta or mascarpone swirl in the filling for a marble effect. This adds visual charm and richness to each slice.
-
Limoncello Essence: Add a splash of Limoncello to the filling for a citrusy twist that perfectly balances the richness of the cheesecake. Enjoy every zesty bite!
How to Store and Freeze Cannoli Cheesecake
Fridge: Keep your Cannoli Cheesecake covered in plastic wrap or an airtight container in the fridge for up to 5 days. This helps maintain its creamy texture.
Freezer: For longer storage, slice the cheesecake and wrap each piece in plastic wrap, then place in a freezer-safe container. It can last up to 3 months and still taste delightful!
Thawing: When ready to enjoy, thaw the cheesecake in the refrigerator overnight. This keeps it from becoming too soft and ensures a perfectly luscious texture when served.
Reheating: There's no need to reheat your Cannoli Cheesecake, as it's best enjoyed chilled. Just dress it with whipped cream or toppings right before serving!
Chef's Helpful Tips
- For the Cannoli Cheesecake, ensure your ricotta cheese is well-drained to avoid a watery filling that can affect the texture.
- When mixing the cream cheeses, take your time and beat them until smooth for a creamy consistency that enhances the cheesecake.
- Remember to incorporate the eggs gently and mix on low speed to prevent overmixing, which can lead to cracks during baking.
- Allow the cheesecake to cool gradually in the oven after baking by cracking the door open to help maintain its moisture and texture.
Cannoli Cheesecake Recipe FAQs
What should I look for when selecting ricotta cheese?
Absolutely! When choosing whole milk ricotta cheese, look for a product that is creamy with a smooth texture and a mild flavor. Avoid ricotta with excess liquid or one that shows signs of age, like dark spots, which can indicate spoilage. Also, if possible, opt for a brand that is made with whole milk for richer flavor.
How should I store my Cannoli Cheesecake?
For the best taste and texture, cover your Cannoli Cheesecake with plastic wrap or place it in an airtight container before storing it in the fridge. It will stay fresh for 3 to 5 days. This method keeps the cheesecake creamy and delicious, ensuring you can enjoy the leftovers without compromising flavor!
Can I freeze Cannoli Cheesecake? If so, how?
Yes, you can freeze your Cannoli Cheesecake! To do so, slice the cheesecake into individual pieces. Wrap each slice tightly in plastic wrap and then place them in a freezer-safe container. This way, your cheesecake will remain safe in the freezer for up to 3 months. When you're ready to enjoy a slice, simply transfer it to the refrigerator to thaw overnight. This gentle thawing method helps maintain its luscious consistency.
What should I do if my cheesecake cracks while baking?
The more the merrier, and not every baking experience is perfect! If your Cannoli Cheesecake cracks, don’t worry too much; it can still taste amazing! To prevent cracking in the future, make sure not to overmix your filling, especially after adding the eggs. Cooling the cheesecake slowly in the oven, as instructed, is also key. If cracking occurs, you can always top the cheesecake with whipped cream and crushed cookies to cover any imperfections.
Are there any dietary considerations I should keep in mind?
Definitely! If you're serving the Cannoli Cheesecake to guests with dietary restrictions, it's essential to note that this recipe contains dairy and eggs, making it unsuitable for vegans or those with lactose intolerance. For those with gluten allergies, you can substitute the chocolate cookie crust with a gluten-free cookie option to make it safe for everyone. Enjoying a delicious dessert should be an inclusive experience!
Cannoli Cheesecake
Ingredients
Equipment
Method
- Combine the chocolate cookie crumbs and melted butter in a bowl until resembling damp sand. Press into the bottom and up the sides of a greased springform pan. Freeze while preparing the filling.
- Beat together the ricotta, mascarpone, and cream cheese in a large bowl until smooth and creamy, about 2–3 minutes on medium speed.
- Add the sugar and vanilla extract to the cheese mixture. Beat until fluffy.
- Incorporate the eggs one at a time, mixing on low after each addition.
- Fold in the mini chocolate chips gently with a spatula.
- Pour the filling into the chilled crust and smooth the top. Bake at 325°F (163°C) for 60–70 minutes.
- Cool by turning off the oven, cracking the door open, and allowing it to sit inside for 1 hour.
- Chill to room temperature, then cover and refrigerate for at least 4 hours or overnight.
- Decorate with whipped cream, extra mini chocolate chips, or preferred toppings.


Leave a Reply