As the holiday season approaches, my kitchen transforms into a cozy haven filled with festive aromas and cherished memories. There's a certain joy that comes with baking, especially when it involves sweet treats that can warm hearts and homes alike. It was during a delightful afternoon spent decorating the tree that I stumbled upon my grandmother's old recipe for Christmas Cherry Bars. The sweet, tangy cherry filling layered within golden, buttery goodness never fails to bring smiles to the table.
These Christmas Cherry Bars are not just incredibly easy to whip up but are also a delightful ode to festive flavors, making them a perfect addition to any holiday spread. Imagine slicing into a warm bar, the glaze glistening under twinkling lights, and feeling the comforting embrace of sweet cherries mingling with a hint of almond. Whether you're looking for a show-stopping dessert for family gatherings or simply a sweet pick-me-up after a busy day, these bars are sure to please. Grab your apron and let’s get started on this holiday favorite that will leave everyone asking for seconds!
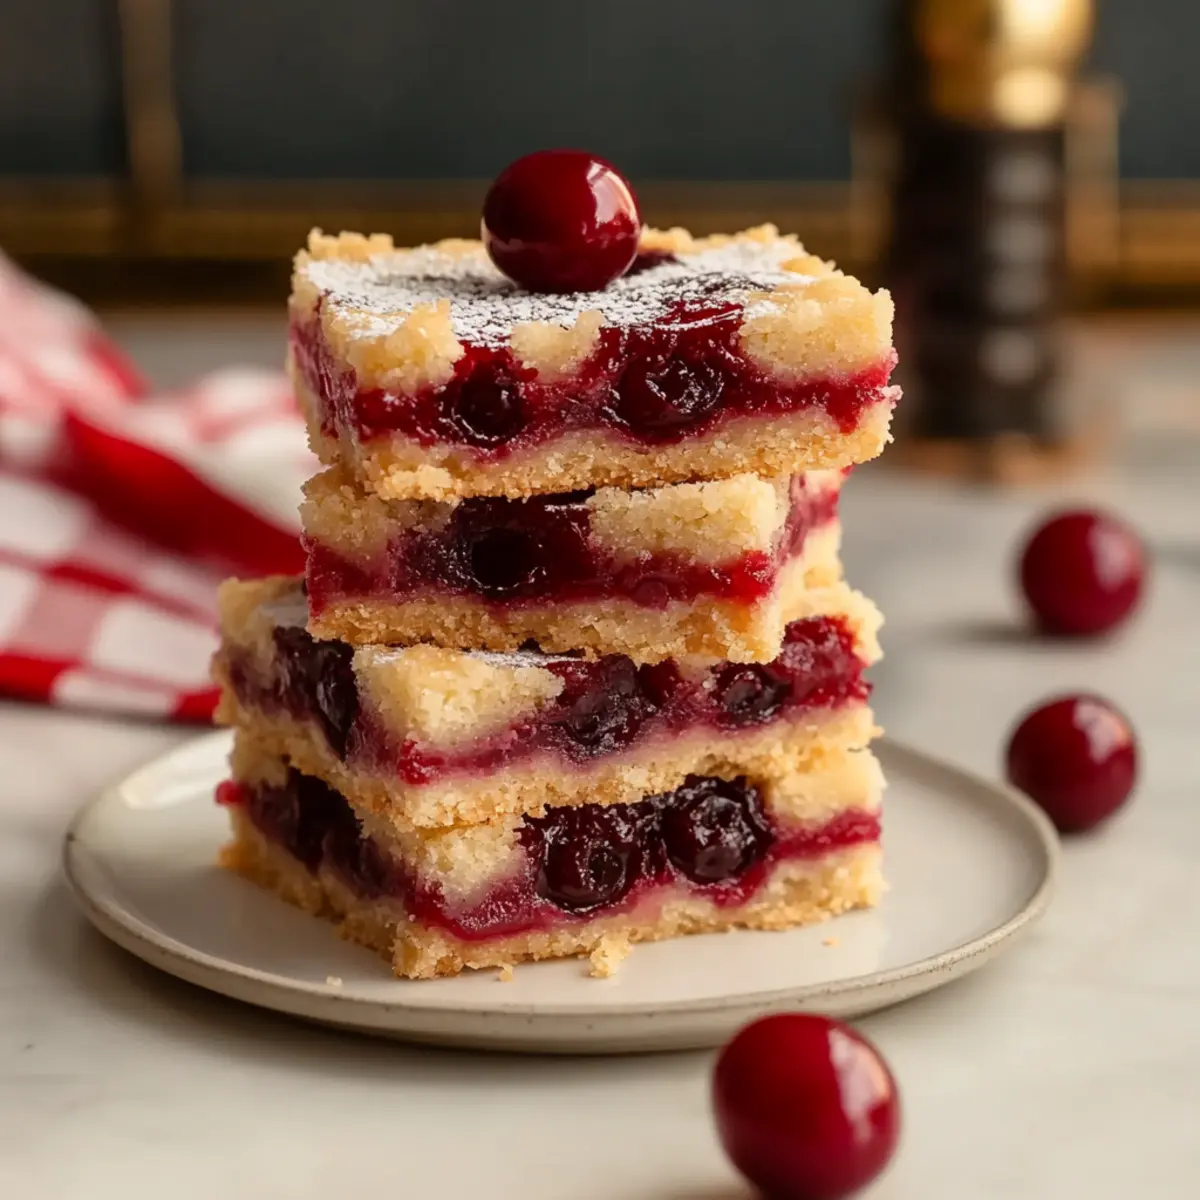
Why You'll Love This Christmas Cherry Bars
- These Christmas Cherry Bars are incredibly easy to make, allowing you to enjoy festive baking without a lot of hassle.
- The combination of sweet cherries and rich buttery dough creates a mouthwatering flavor that everyone will adore.
- Their vibrant appearance, topped with a shiny glaze, makes them a stunning centerpiece for any holiday gathering.
- Perfect for serving a crowd, these bars are guaranteed to delight both friends and family, ensuring they're a hit at every celebration.
Christmas Cherry Bars Ingredients
These delightful bars come together with simple yet essential ingredients!
For the Batter
- Unsalted butter – a key player for that rich flavor, softened for easy creaming.
- Sugar – adds sweetness and moisture to the bars.
- Salt – just a pinch enhances the overall flavor profile.
- Large eggs – binds the ingredients while adding lightness.
- Vanilla extract – infuses a warm, comforting flavor that's especially festive.
- Almond extract – offers a unique, nutty twist that complements the cherries beautifully.
- All-purpose flour – the backbone of your bars, giving them structure.
For the Cherry Layer
- Cherry pie filling – brings that sweet and tart essence, the star of our Christmas Cherry Bars!
For the Glaze
- Powdered sugar – sweetens and adds a lovely, glossy finish.
- Vanilla extract – a hint of vanilla in the glaze ties the flavors together.
- Almond extract – adds a delightful aroma that echoes throughout the bars.
- Milk – adjusts the consistency of the glaze to your liking.

How to Make Christmas Cherry Bars
-
Preheat your oven to 350°F and prepare a 15x10x1-inch jelly roll pan by greasing it. This step ensures your delicious bars won’t stick and are easy to slice later.
-
Cream the softened unsalted butter, sugar, and salt together in a large bowl until the mixture becomes light and fluffy. Take your time with this; it creates a lovely texture!
-
Incorporate the eggs, adding them one at a time, and beat well after each addition. This extra blending helps create that airy structure in your bars.
-
Mix in the vanilla and almond extracts, allowing their delightful aromas to fill your kitchen. This festive touch adds depth to the flavor!
-
Gradually add the all-purpose flour while mixing to form a soft dough. You want a dough that’s slightly sticky but will hold together nicely.
-
Spread about 3 cups of the dough evenly in your prepared pan, holding back some for topping. Use a spatula for a smooth finish!
-
Layer the cherry pie filling evenly over the dough, covering it completely. The vibrant color and sweet aroma are sure to lift your spirits!
-
Drop spoonfuls of the remaining dough on top of the cherry layer. This doesn’t need to be perfect; a rustic look adds to the charm.
-
Bake for 30–35 minutes until the top is golden brown and a toothpick comes out clean. Your kitchen will smell heavenly!
-
Cool the bars completely in the pan before glazing. Patience is key here; glazing warm bars can lead to a messy finish.
-
For the glaze: whisk together the powdered sugar, vanilla, almond extract, and milk until smooth. This will create a luscious topping!
-
Drizzle the glaze over the cooled bars, slice them into squares, and serve. Watch those smiles light up as they take a bite!
Optional: Garnish with a sprinkle of chopped almonds for an extra festive touch!
Exact quantities are listed in the recipe card below.
What to Serve with Christmas Cherry Bars?
As you gather around the table, these treats provide the perfect sweet finale to your festive meal.
-
Vanilla Ice Cream: A scoop of creamy vanilla pairs beautifully, adding richness that contrasts the cherry's tartness.
-
Whipped Cream: Light and airy, this classic topping enhances the dessert's sweetness while balancing the cherries' bold flavor.
-
Earl Grey Tea: The subtle floral notes and bergamot in this tea offer an elegant touch to the sweetness of the bars.
-
Chocolate Drizzle: For a decadent twist, drizzling melted chocolate over the top complements the cherries with a luscious richness.
-
Fresh Mint Leaves: Garnish each slice with a sprig for a refreshing burst of color and flavor that brightens the dessert.
-
Nutty Biscotti: The crunchy texture and flavors of almond or hazelnut biscotti provide a delightful contrast to the soft bars.
-
Sparkling Cider: This festive drink adds bubbles and a crisp taste that goes hand-in-hand with the holiday spirit.
-
Cheese Platter: A platter of soft brie or aged cheddar can balance the sweetness and make for a stunning appetizer duo.
-
Chocolate Chip Cookies: For an extra sweet treat, serve these alongside, providing a contrast of textures and flavors that guests will love.
Christmas Cherry Bars Variations
Feel free to personalize these Christmas Cherry Bars to suit your taste and dietary needs—every twist brings its own charm!
-
Gluten-Free: Substitute all-purpose flour with a 1:1 gluten-free baking blend for a delicious adaptation that everyone can enjoy. The texture remains wonderfully soft and inviting!
-
Nut-Free: Omit the almond extract and replace it with additional vanilla for a nut-free version that still maintains delightful flavor. Everyone can gather around to enjoy these festive bars safely.
-
Fruit Twist: Replace cherry pie filling with blueberry or mixed berry filling for a fresh fruit alternative. Each bite will burst with a unique, fruity flavor!
-
Chocolate Drizzle: After glazing, add a drizzle of melted chocolate over the bars for an indulgent touch. This makes each bite decadently chocolatey!
-
Coconut Flakes: Sprinkling shredded coconut on top before baking adds a tropical twist that compliments the cherries beautifully. The coconut's sweetness mingles perfectly with the fruits!
-
Almond Joy: Mix in chopped almonds or your favorite nuts into the dough for added crunch and flavor. Texture adds an enjoyable contrast to the soft bars.
-
Spiced Option: Add a teaspoon of cinnamon or a pinch of nutmeg to the batter for warm, cozy spices that elevate the festive flavor profile. These bars become even more comforting!
-
Cheesecake Layer: Spread a layer of cream cheese on top of the dough before adding the cherry filling for a cheesecake-inspired delight. This twist is sure to impress!
Make Ahead Options
These Christmas Cherry Bars are perfect for busy home cooks looking to simplify their festive baking! You can prepare the dough and layer it with cherry pie filling up to 24 hours in advance. To do this, simply follow steps 1-8 and then cover the assembled bars tightly with plastic wrap before refrigerating. This will keep the bars fresh and ready for baking when you are! When you're ready to bake, just pop the pan in a preheated oven at 350°F for about 30-35 minutes. They’ll come out just as delicious and comforting, freeing up your day for other holiday preparations. Enjoy the satisfaction of serving homemade treats with minimal hassle!
How to Store and Freeze Christmas Cherry Bars
Room Temperature: Store leftover Christmas Cherry Bars in an airtight container at room temperature for up to 3 days for optimal freshness.
Fridge: If you prefer a chilled treat, keep the bars in the fridge, where they will stay fresh for up to a week. Just make sure they're well-covered!
Freezer: For longer storage, wrap individual bars tightly in plastic wrap, then place them in a freezer-safe bag. They can last up to 3 months in the freezer.
Reheating: To enjoy them warm, reheat frozen bars in the oven at 350°F for about 10-15 minutes or microwave them individually for about 15-20 seconds.
Chef's Helpful Tips
- When making Christmas Cherry Bars, ensure your butter is at room temperature for easy creaming, as this can significantly affect the texture of your batter.
- Avoid overmixing after adding the eggs, as this can cause the bars to become dense instead of light and fluffy.
- For a beautiful glaze consistency, start with 2 tablespoons of milk and adjust as needed to achieve your desired texture.
- Keep a close eye on the baking time, as ovens can vary; check for a golden-brown top and a toothpick that comes out clean to ensure perfect bars every time.
Christmas Cherry Bars Recipe FAQs
What type of cherries should I use for the filling?
Absolutely! You can use canned cherry pie filling for convenience, but if you’re feeling adventurous, fresh or frozen cherries can work beautifully. If using fresh cherries, make sure to pit and halve them, and toss them with a bit of sugar to enhance their natural sweetness!
How do I store leftover Christmas Cherry Bars?
Very simply! You can store leftover Christmas Cherry Bars in an airtight container at room temperature for up to 3 days to maintain their freshness. Alternatively, if you prefer a chilled treat, placing them in the fridge will keep them fresh for up to a week. Just ensure they're well-covered to prevent drying out.
Can I freeze Christmas Cherry Bars?
Yes, indeed! To freeze, wrap individual bars tightly in plastic wrap, then place them in a freezer-safe bag or container. This method helps to preserve their flavor and texture. They can last up to 3 months in the freezer. When you're ready to enjoy them, reheat frozen bars in the oven at 350°F for about 10-15 minutes or microwave them individually for 15-20 seconds.
What if my bars turn out too dry?
A common issue! If you find that your Christmas Cherry Bars are dry, it’s likely due to overbaking. Next time, start checking for doneness around the 30-minute mark. If the tops are golden brown and a toothpick comes out clean, they’re ready! You can also try reducing the flour slightly for a softer texture.
Do Christmas Cherry Bars contain common allergens?
Absolutely! This recipe contains several common allergens including eggs, gluten (from the flour), and tree nuts (if you choose to add almonds for garnish). For those with nut allergies, simply omit the almond extract and decorations. Always double-check ingredient labels if you’re baking for someone with food sensitivities!
How long do these bars last once baked?
Christmas Cherry Bars will last for up to 3 days at room temperature and up to a week in the fridge, as long as they are stored in an airtight container. For extended enjoyment, freeze any leftovers for up to 3 months. When stored properly, you can have a sweet holiday treat waiting anytime!
Christmas Cherry Bars
Ingredients
Equipment
Method
- Preheat your oven to 350°F and prepare a 15x10x1-inch jelly roll pan by greasing it.
- Cream the softened unsalted butter, sugar, and salt together in a large bowl until light and fluffy.
- Incorporate the eggs, adding them one at a time, and beat well after each addition.
- Mix in the vanilla and almond extracts.
- Gradually add the all-purpose flour while mixing to form a soft dough.
- Spread about 3 cups of the dough evenly in your prepared pan, holding back some for topping.
- Layer the cherry pie filling evenly over the dough.
- Drop spoonfuls of the remaining dough on top of the cherry layer.
- Bake for 30–35 minutes until the top is golden brown and a toothpick comes out clean.
- Cool the bars completely in the pan before glazing.
- Whisk together the powdered sugar, vanilla, almond extract, and milk until smooth for the glaze.
- Drizzle the glaze over the cooled bars, slice them into squares, and serve.


Leave a Reply