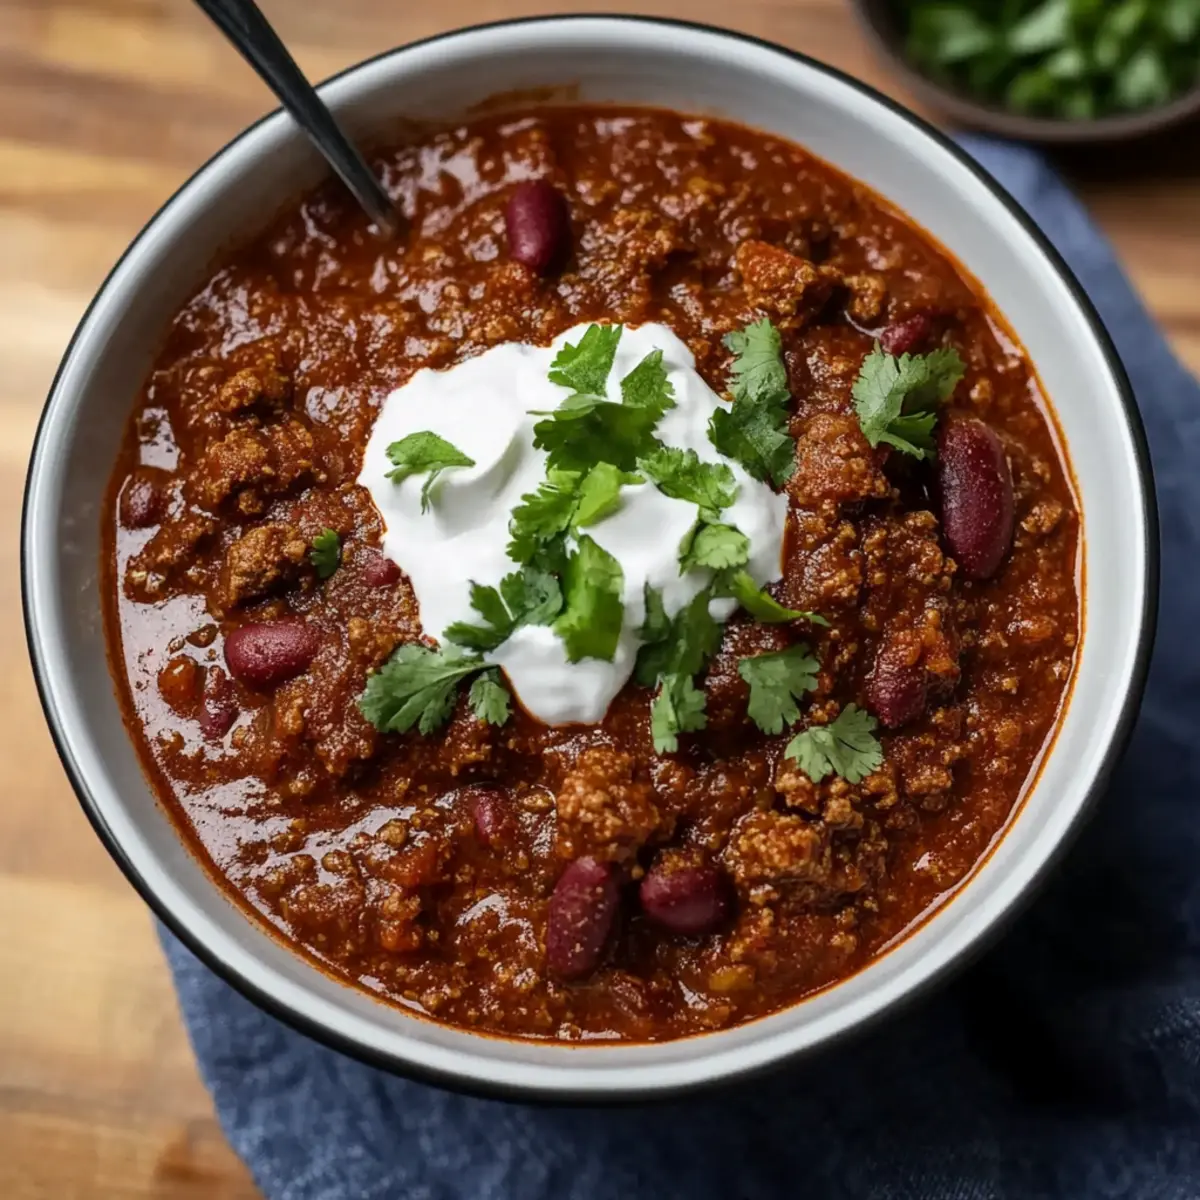
As the sun sets and a chill begins to ripple through the air, there's nothing quite like the hearty warmth of a pot of Texas Chili simmering on the stovetop. The scent of spices dancing with sautéed onions and garlic fills the kitchen, bringing an irresistible allure that can turn any average evening into a special occasion. This is more than just a meal; it’s comfort, celebration, and tradition all rolled into one delicious bowl.
I found this recipe while on a quest to elevate my weeknight dinners beyond the usual fast-food fare. The bold flavors and tender beef create a symphony of taste with the perfect amount of heat to keep your taste buds excited. The best part? It’s a crowd-pleaser that feeds a hungry family and warms the heart. So, whether you're hosting a game night, warming up after a brisk walk, or simply craving something satisfying, dive into this Texas Chili recipe that’s sure to bring everyone together around the table. Let’s get cooking!
Why You'll Love This Texas Chili
- This Texas Chili is incredibly easy to prepare, allowing you to enjoy a homemade meal without the hassle.
- The rich, bold flavors will tantalize your taste buds and make every bite an unforgettable experience.
- Its versatility means you can serve it as a main dish or use it as a topping for nachos or baked potatoes, making it perfect for any occasion.
- Plus, the stunning aroma and vibrant color make it visually appealing and inviting, guaranteed to impress your guests.
Texas Chili Ingredients
• Get ready for a flavor explosion!
For the Spice Mix
- Chili powder – A foundational spice that adds warmth and depth.
- Ancho chili powder – Offers a rich, slightly sweet flavor important for authentic Texas Chili.
- Paprika – Adds a smoky dimension and vibrant color.
- Cayenne pepper – Adjust the heat level according to your preference; this spice brings the kick!
- Ground cumin – Gives earthy undertones that balance the bold spices.
- Dried oregano (preferably Mexican) – Adds a herbal note that brightens the flavors.
For the Chili Base
- Tomato paste – Thickens the chili, providing a rich and hearty texture.
- Onions (8 medium, diced) – Sweeten and enrich the chili with their aromatic flavor.
- Garlic cloves (10, minced) – Infuses the dish with a delightful savory essence.
- Beef chuck (7.5 lb, cut into ¾-inch cubes) – This cut becomes meltingly tender and flavorsome during cooking.
For Cooking
- Ghee or rendered beef fat (½ cup) – Adds richness and a deep, buttery flavor to the dish.
- Hot sauce (2 tbsp) – Infuses extra heat; feel free to choose your favorite variety!
- Kosher salt and black pepper – Essential for seasoning; adjust to your taste.
- Water (5 cups) – The base for the delicious simmering chili that brings all the flavors together!

How to Make Texas Chili
-
Prepare the Beef: Cut the beef into ¾-inch cubes and set aside. Dice the onions and mince the garlic to create a flavor-packed base for your chili.
-
Mix Spices: In a small bowl, combine all the dried spices. For an extra boost of flavor, you can optionally toast them in a dry pan for just a few minutes.
-
Brown the Beef: In a large pot over medium-high heat, heat ¼ cup of ghee. Brown the beef in batches for about 3-4 minutes per batch, ensuring a lovely golden color develops.
-
Sauté Onions: Once the beef is browned, set it aside. In the same pot, add the remaining ghee and sauté the onions until they become soft and golden, making the kitchen smell heavenly.
-
Add Garlic: Add the minced garlic to the pot and cook for 1-2 minutes, stirring until fragrant. This builds the flavors that will make your chili irresistible!
-
Incorporate Tomato Paste: Stir in 24 oz of tomato paste and cook for 10-12 minutes until it darkens and caramelizes—this step adds rich depth to your chili.
-
Toast the Spice Mix: Once the tomato paste is ready, sprinkle in your spice mix and toast for about 1 minute, stirring to ensure the spices release their aromatic oils.
-
Combine Ingredients: Stir in the hot sauce, then return the browned beef to the pot along with 5 cups of water. This will create a deliciously thick and savory chili.
-
Simmer: Bring the mixture to a gentle simmer, season lightly with salt and pepper, then reduce the heat to low. Let it cook for 2.5 to 3 hours, stirring occasionally, until the beef is tender and the sauce has thickened beautifully.
-
Adjust and Rest: Before serving, taste and adjust the seasoning as needed. Allow the chili to rest for 10 minutes to let the flavors meld perfectly.
Optional: Top with fresh cilantro or shredded cheese for an extra burst of flavor.
Exact quantities are listed in the recipe card below.
How to Store and Freeze Texas Chili
Fridge: Store leftover Texas Chili in an airtight container in the refrigerator for up to 3 days. Reheat thoroughly on the stovetop or in the microwave before serving.
Freezer: To freeze, portion the cooled chili into freezer-safe bags or containers. It can be stored for up to 3 months, making it a great meal prep option!
Reheating: When ready to enjoy, gently thaw the chili overnight in the fridge, then reheat on the stovetop or microwave until hot. Adjust seasonings if needed.
Room Temperature: Avoid leaving Texas Chili out at room temperature for more than 2 hours to prevent spoilage.
What to Serve with Texas Chili?
As the rich and hearty Texas Chili simmers away, it’s time to think about the perfect accompaniments that will elevate your meal.
-
Cornbread: This classic side is slightly sweet with a buttery finish, balancing the spices of the chili beautifully. Freshly baked cornbread just waiting to soak up that flavorful sauce is a match made in heaven!
-
Chilled Coleslaw: A crunchy and zesty slaw adds refreshing contrast, cutting through the richness of the chili. The crisp vegetables pop with flavor, making every bite exciting and satisfying.
-
Tortilla Chips: Perfect for dipping, these salty, crunchy chips add a delightful texture. Serve alongside with some guacamole or salsa for a fun appetizer that pairs well with the spicy chili.
-
Rice: Fluffy white or Mexican-style rice offers a neutral base that soaks up the chili's intense flavors. This is a comforting addition that can stretch the meal further, perfect for hearty appetites!
-
Pickled Jalapeños: For those who crave extra heat, these spicy and tangy slices are a fantastic garnish. They not only enhance the flavor profile but also add a vibrant pop of color.
-
Beer or Cider: A cold beverage is essential! A crisp lager or a tangy cider complements the robust flavors of Texas Chili, refreshing your palate with every sip while keeping the vibe relaxed and enjoyable.
-
Brownies: For dessert, why not finish off with fudgy brownies? Their rich chocolate flavor contrasts wonderfully with the savory spice of chili, rounding off the meal on a sweet note that everyone will love.
Make Ahead Options
These Texas Chili preparations are perfect for busy weeknights! You can easily chop the onions and garlic and mix the spice blend up to 24 hours in advance. Simply store them in airtight containers in the refrigerator to preserve freshness. Additionally, you can brown the beef and prepare the tomato paste mixture up to 3 days ahead; just refrigerate it in a sealed container. When you’re ready to cook, combine the prepared ingredients and allow the chili to simmer as directed. This method not only saves you time but ensures that your Texas Chili is just as delicious when it’s time to serve!
Texas Chili Variations
Feel free to customize this Texas Chili to suit your tastes or dietary needs and enjoy the delightful journey of flavors!
-
Vegetarian: Swap beef for hearty lentils or beans. This twist keeps the chili filling while venturing into a plant-based delight.
-
Spicy Kick: Add extra cayenne or a diced jalapeño for more heat. Feel free to adjust until it elevates your taste buds to new heights!
-
Smoky Delight: Incorporate chipotle in adobo sauce for a rich, smoky flavor. This will deepen the overall taste, enhancing every bowl with warmth.
-
Creamy Texture: Stir in a splash of cream or dollop of sour cream before serving. This addition creates a luxurious mouthfeel that complements the spice beautifully.
-
Gluten-Free: Ensure all ingredients, especially your spices and hot sauce, are gluten-free. This way, everyone can relish in this comforting dish without worry!
-
Citrus Zest: A squeeze of lime or lemon juice just before serving brightens the flavors. This burst of acidity creates an exciting contrast to the dish's richness.
-
Sweet Touch: Mix in a tablespoon of brown sugar or honey to balance the heat. Just a hint of sweetness can elevate the flavor profile wonderfully.
-
Texture Twist: Toss in some corn or diced bell peppers for a delightful crunch. These additions bring freshness and a colorful flair to your chili experience.
Chef's Helpful Tips
- When making Texas Chili, ensure you cut the beef into uniform ¾-inch cubes for even cooking and tenderness.
- A common mistake is not browning the beef adequately; take your time to achieve a nice golden crust which enhances the flavor of the dish.
- Remember to toast your spice mix in a dry pan for a minute before adding it to the chili; this releases essential oils and intensifies the flavors.
- Lastly, simmer the chili on low heat for the full 2.5 to 3 hours to allow the beef to become tender and the sauce to thicken nicely.
Texas Chili Recipe FAQs
How do I choose the right beef for Texas Chili?
Absolutely! When selecting beef chuck for your Texas Chili, look for cuts with good marbling, as this will melt down during cooking, making the meat tender and flavorful. The lower the grade, such as choice or prime, the better for rich flavor. Avoid lean cuts as they can result in a dry chili.
What is the best way to store leftover Texas Chili?
Very! To store leftover Texas Chili, transfer it to an airtight container and place it in the refrigerator. It will stay fresh for up to 3 days. Reheating is simple; just warm it on the stovetop over medium heat, stirring occasionally, until heated through.
Can I freeze Texas Chili for later?
Certainly! To freeze, first allow the chili to cool completely. Then, portion it into freezer-safe bags or containers. Lay bags flat in the freezer for easier stacking. Texas Chili can be frozen for up to 3 months. When you’re ready to enjoy it again, thaw overnight in the fridge and reheat.
What should I do if my chili is too spicy?
If your Texas Chili turns out hotter than you hoped, there are a few methods to dial back the heat. You can stir in a spoonful of sour cream or a splash of cream to mellow the spiciness. Alternatively, adding more tomato paste or beans will help balance out the heat while enriching the texture. Don’t hesitate to adjust according to your palate!
Can my pets have any of these ingredients?
No, it’s important to be cautious! Many of the key ingredients in Texas Chili, such as onions and garlic, are toxic to pets. Keep this dish out of reach from your furry friends. If you want to treat them, consider making a pet-friendly stew without these harmful ingredients.
How long can Texas Chili sit out before it goes bad?
The more the merrier! However, be mindful to not leave Texas Chili out at room temperature for more than 2 hours. If you’re serving it at a gathering, keep it warm in a slow cooker to prevent spoilage and ensure everyone enjoys this delicious dish safely.
Texas Chili
Ingredients
Equipment
Method
- Prepare the Beef: Cut the beef into ¾-inch cubes and set aside. Dice the onions and mince the garlic.
- Mix Spices: In a small bowl, combine all the dried spices.
- Brown the Beef: In a large pot, heat ¼ cup of ghee and brown the beef in batches for 3-4 minutes per batch.
- Sauté Onions: Add the remaining ghee and sauté the onions until soft and golden.
- Add Garlic: Stir in the minced garlic and cook for 1-2 minutes until fragrant.
- Incorporate Tomato Paste: Stir in the tomato paste and cook for 10-12 minutes until it darkens.
- Toast the Spice Mix: Add the spice mix and toast for about 1 minute.
- Combine Ingredients: Stir in the hot sauce, return the browned beef, and add water.
- Simmer: Bring to a simmer, then reduce heat to low and cook for 2.5 to 3 hours.
- Adjust and Rest: Taste and adjust seasoning, allow to rest for 10 minutes before serving.


Leave a Reply