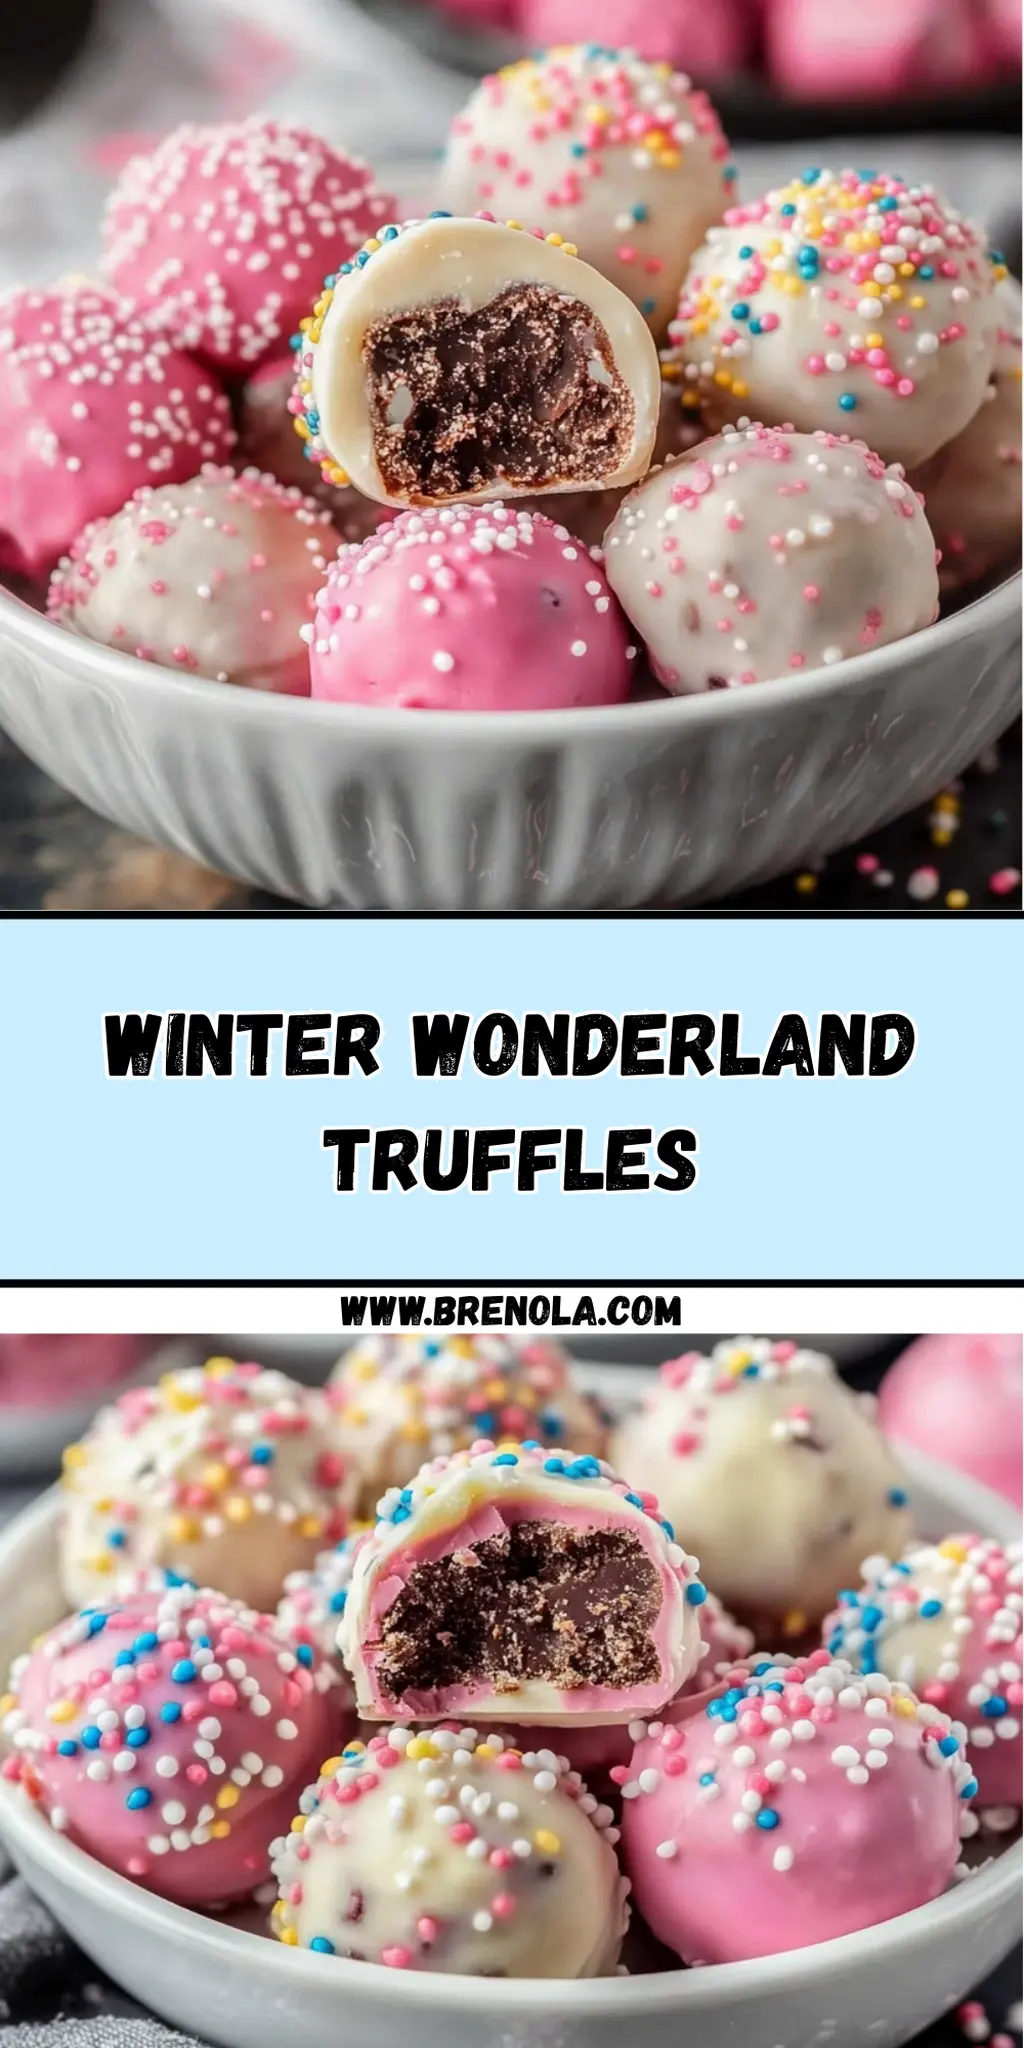
The holiday season is just around the corner, and there's something undeniably enchanting about homemade treats that fill the air with a sense of warmth and whimsy. That's exactly how I felt the moment I created my Winter Wonderland Truffles. This delightful recipe unexpectedly came to life while experimenting with leftover vanilla cake. What started as a kitchen adventure turned into a sweet gift that brought smiles to friends and family alike.
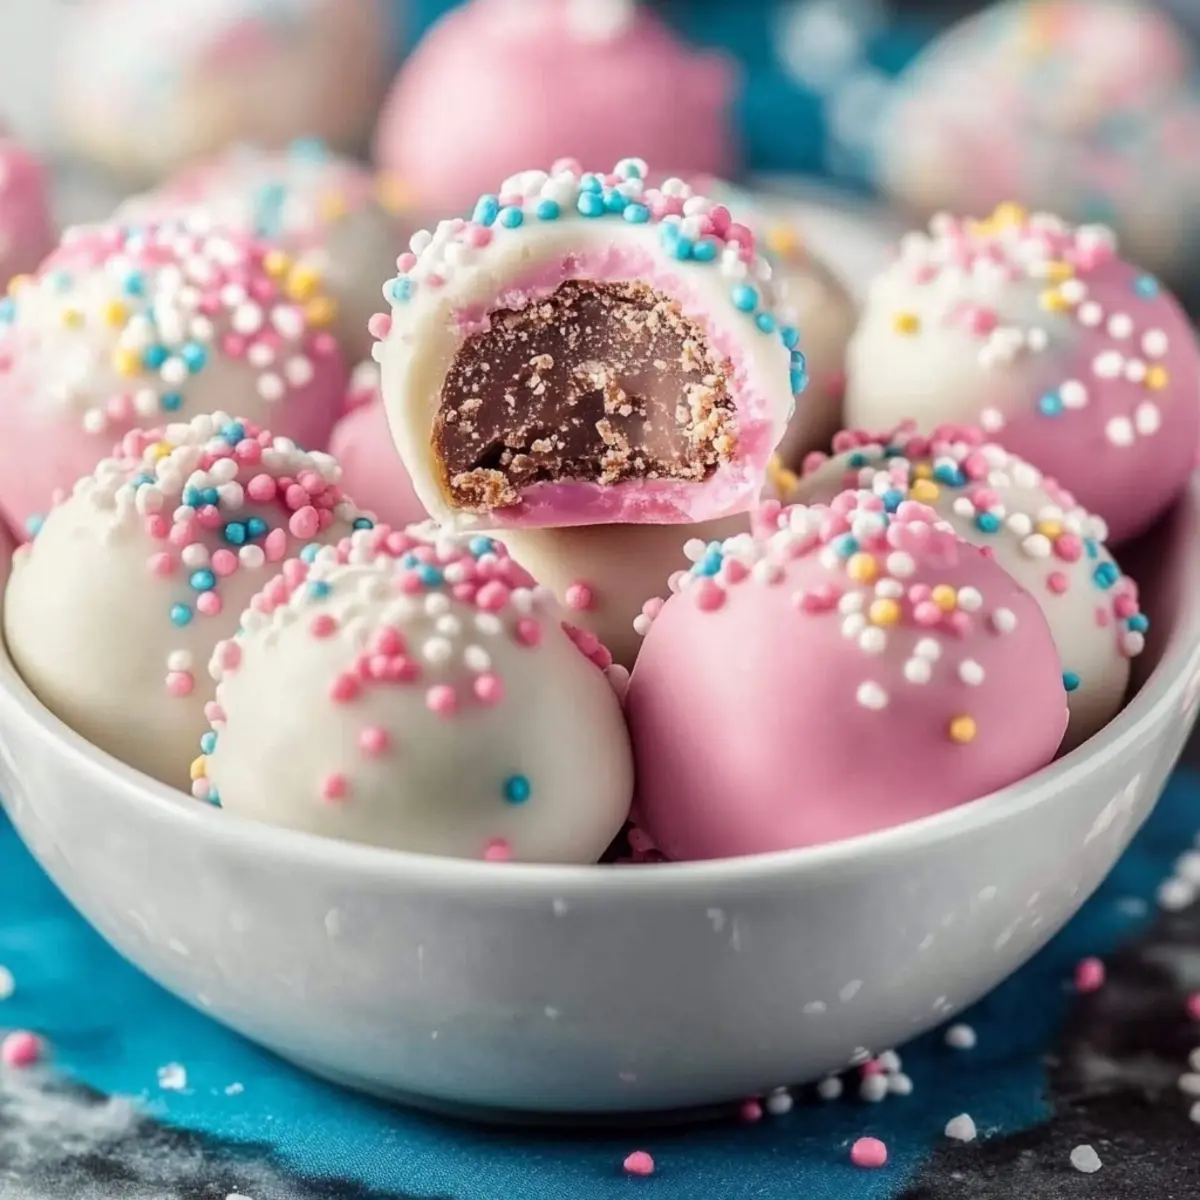
Each bite of these truffles combines creamy frosting and airy cake, cloaked in vibrant candy melts that evoke the joy of festive celebrations. The sprinkles add a touch of playful color, perfect for any holiday gathering or cozy evening in. Whether you're looking to impress guests at a potluck or simply desire some indulgent self-care, these truffles are your answer. With just a few ingredients and easy steps, you'll transform humble cake into an unforgettable treat that dances on your palate like fresh snowflakes. Grab your favorite playlist, and let's dive into the bliss of homemade joy with these delightful Winter Wonderland Truffles!
Why You'll Love This Winter Wonderland Truffles
- These Winter Wonderland Truffles are incredibly easy to make, requiring just a few simple ingredients and minimal cooking skills.
- Each truffle bursts with delightful flavors from the creamy frosting and white candy melts, making them a decadent treat that everyone will love.
- Their vibrant colors and festive sprinkles not only make them a visual delight but also add a playful touch to any dessert table.
- Perfect for gatherings or cozy nights at home, these truffles are a crowd-pleasing way to bring the joy of the season to life.
Winter Wonderland Truffles Ingredients
• Here’s everything you need to create these delightful treats!
For the Cake Mixture
- Crumble vanilla cake – this forms the base and adds a moist, sweet flavor.
- Cream cheese frosting – it binds the crumbs together while adding a rich, creamy touch.
For the Coating
- White candy melts – use these for a classic, snowy finish that complements the festive vibe.
- Pink candy melts – they add a fun burst of color that makes your truffles visually appealing.
For the Toppings
- Sprinkles – sprinkle these on right after coating for an extra festive look!
- Vanilla extract (optional) – adding this brings a subtle depth of flavor to your Winter Wonderland Truffles.
How to Make Winter Wonderland Truffles
-
Prepare the Cake: Start by making a vanilla cake using your favorite boxed mix or homemade recipe. Let it cool completely to ensure the truffles hold together well.
-
Crumble the Cake: Using clean hands or a food processor, crumble the cooled cake into fine crumbs. The texture should be like sand, ensuring an even mixture with the frosting.
-
Mix with Frosting: Now, add cream cheese frosting a spoonful at a time. Mix gently until the dough has a moist, moldable consistency that holds together without crumbling.
-
Shape the Truffles: Roll the mixture into 1-inch balls, placing them on a parchment-lined baking sheet. Chill in the fridge for 30 minutes to firm them up.
-
Melt the Candy Melts: In separate bowls, melt the white and pink candy melts according to the package directions. Stir until smooth and glossy for the perfect coating.
-
Dip the Truffles: Using a fork or dipping tool, dip each chilled ball into the melted candy. Let the excess drip off, ensuring an even coating.
-
Add Sprinkles: Immediately top with sprinkles before the coating sets. This adds a festive touch and makes them extra delightful!
-
Set the Truffles: Allow the truffles to set completely on the parchment paper. This may take about 30 minutes, ensuring they maintain their shape.
-
Serve and Store: These truffles can be served right away or stored in an airtight container in the refrigerator for up to 1 week.
Optional: Drizzle extra melted candy on top for added decoration!
Exact quantities are listed in the recipe card below.
Make Ahead Options
These Winter Wonderland Truffles are a great choice for busy home cooks looking to save time without sacrificing flavor! You can prepare the cake mixture—by crumbling the cooled vanilla cake and mixing it with cream cheese frosting—up to 24 hours in advance. Simply shape the mixture into balls and chill them in the fridge. To maintain their quality, ensure the truffles are covered or stored in an airtight container. When you're ready to serve, just dip the chilled truffles in melted candy melts and add sprinkles for that festive touch. This way, you can enjoy deliciously easy treats with minimal last-minute prep!
Storage Tips for Winter Wonderland Truffles
Room Temperature: Keep truffles in an airtight container at room temperature for up to 3 days. This keeps them soft and delightful while preventing drying.
Fridge: For longer freshness, store your Winter Wonderland Truffles in the refrigerator for up to 1 week. Ensure they’re in an airtight container to avoid absorbing odors.
Freezer: Freeze truffles in a single layer on a baking sheet. Once firm, transfer to a resealable freezer bag and store for up to 2 months. Thaw overnight in the fridge before serving.
Reheating: There’s no need to reheat these truffles; enjoy them chilled or at room temperature for the best experience!
What to Serve with Winter Wonderland Truffles?
Creating a festive spread is a delightful way to elevate your homemade treats and impress your guests.
-
Hot Cocoa Bar: Set out an assortment of toppings like marshmallows, whipped cream, and candy canes to complement the sweetness of the truffles. The warmth of hot cocoa pairs perfectly with their rich flavors.
-
Christmas Sugar Cookies: Add soft, buttery sugar cookies to your table for a contrasting texture. These cookies invite joyful bites, and their simplicity lets the truffles shine even more.
-
Fruit Platter: A vibrant platter of fresh berries and citrus provides a refreshingly tart contrast. This light, juicy addition brightens each bite, enhancing the overall experience of indulging in truffles.
-
Coffee or Espresso: Rich, brewed coffee offers a delightful counterbalance to the sweetness of the truffles. It awakens your senses and makes every bite feel like a cozy hug.
-
Holiday Cheeseboard: Serve a selection of cheeses paired with nuts, dried fruits, and honey. The creamy cheeses and crunchy nuts create a savory balance that elevates the dessert experience.
-
Gingerbread Bars: Chewy gingerbread brings warm spices to your dessert table. These bars add a delightful aromatic experience, making them the perfect pairing for the whimsical flavors of your truffles.
-
Sparkling Citrus Mocktail: A refreshing drink like a sparkling citrus mocktail can cleanse the palate. The bubbles and zest will create a festive atmosphere that ties beautifully with your Winter Wonderland theme.
Winter Wonderland Truffles Variations
Feel free to get creative and customize your Winter Wonderland Truffles with these delightful twists!
-
Chocolate-Coated: Swap the candy melts for dark or milk chocolate to give your truffles a richer flavor. This change will make every bite indulgently sweet and comforting.
-
Nutty Addition: Stir in ½ cup of finely chopped nuts like walnuts or almonds to add a delightful crunch and extra depth. The nutty flavor pairs well with the sweet cake, creating a pleasing contrast.
-
Flavor Boost: Infuse the cake mixture with 1-2 tablespoons of espresso powder or flavored extracts like almond or peppermint. This simple change adds an exciting layer of taste that elevates the truffles.
-
Dairy-Free: Use dairy-free frosting and chocolate melts to make these truffles suitable for a vegan audience. They’ll still taste heavenly without the dairy!
-
Fruit Burst: Mix in some dried fruits such as cranberries or chopped apricots for a chewy texture and a hint of tanginess. This variation offers a lovely burst of flavor that brightens each bite.
-
Spicy Kick: Incorporate a pinch of cayenne or chili powder into the cake mixture for a surprising heat element. The subtle spice will play beautifully against the sweetness of the truffles.
-
Coconut Delight: Roll the finished truffles in shredded coconut instead of sprinkles for a tropical twist. This addition brings a delightful chewiness and rich flavor that makes each truffle unique.
-
Cookie Crumble: For an extra crunch, mix crushed cookies like Oreos or graham crackers into the cake mixture. The added texture and flavor will give your truffles an exciting twist that everyone will love.
Chef's Helpful Tips
- When making Winter Wonderland Truffles, ensure your cake has cooled completely to prevent a dough that's too warm to shape.
- A common mistake is adding too much frosting at once, so add it gradually to achieve the right consistency.
- For a smooth coating, make sure your candy melts are stirred until completely melted and glossy before dipping.
- Finally, allow your truffles to chill for the full 30 minutes to help them hold their shape when coated with candy melts.
Winter Wonderland Truffles Recipe FAQs
How do I know if my vanilla cake is ripe for crumbling?
Absolutely! To ensure your vanilla cake is perfect for crumbling, make sure it has cooled completely after baking. Look for a cake that feels firm and is springy to the touch. If you notice any dark spots or signs of moisture on the surface, it's best to let it dry out a bit longer at room temperature.
What’s the best way to store Winter Wonderland Truffles?
Very! To keep your truffles fresh, store them in an airtight container. At room temperature, they can last for up to 3 days, but if you pop them in the fridge, they’ll stay delightful for up to 1 week. Just make sure the container is sealed tightly to prevent them from absorbing any lingering odors from the fridge.
Can I freeze Winter Wonderland Truffles, and if so, how?
Absolutely! Freezing these truffles is a fantastic way to extend their shelf life. Start by placing the truffles in a single layer on a baking sheet and freeze until firm, usually about 1 to 2 hours. Once they’re solid, transfer them to a resealable freezer bag, making sure to squeeze out as much air as possible. They’ll stay fresh for up to 2 months! When you're ready to indulge, thaw them overnight in the fridge for optimal texture.
What should I do if my truffles are too sticky to roll?
If the mixture is too sticky, add more crumbled cake gradually until it reaches a moldable consistency. You can also chill the mixture in the fridge for about 15 minutes before shaping, which often helps it firm up. Just be patient, and remember that it's all part of the creative process!
Are there any dietary considerations I should keep in mind with Winter Wonderland Truffles?
Indeed! These truffles contain cream cheese frosting, which is dairy-based, so be cautious if you're catering to anyone with lactose intolerance. For a dairy-free alternative, you could use a plant-based frosting. Additionally, pay attention to the ingredients in your candy melts, as some may contain allergens like soy or gluten. Always check labels to ensure your treats are safe for everyone enjoying them!
Can I change the coating or toppings on my Winter Wonderland Truffles?
Very! Feel free to get creative with your truffles. You can substitute the white and pink candy melts with dark or milk chocolate for a richer flavor. Also, experiment with different toppings like crushed nuts, coconut flakes, or colored sugar for added texture and flair. The more, the merrier when it comes to making these treats your own!
Winter Wonderland Truffles
Ingredients
Equipment
Method
- Start by making a vanilla cake using your favorite boxed mix or homemade recipe.
- Using clean hands or a food processor, crumble the cooled cake into fine crumbs.
- Add cream cheese frosting a spoonful at a time and mix gently until the dough holds together.
- Roll the mixture into 1-inch balls and place them on a parchment-lined baking sheet.
- Chill in the fridge for 30 minutes to firm them up.
- In separate bowls, melt the white and pink candy melts according to package directions.
- Dip each chilled ball into the melted candy and let the excess drip off.
- Immediately top with sprinkles before the coating sets.
- Allow the truffles to set completely on the parchment paper for about 30 minutes.
- Serve right away or store in an airtight container for up to 1 week.


Leave a Reply